Adding, Editing, or Deleting a LAG
- From the navigation pane, click Venues and select a venue.
- Select Networking Devices.
- Click the Switch tab and select a switch.
- Select Ports.
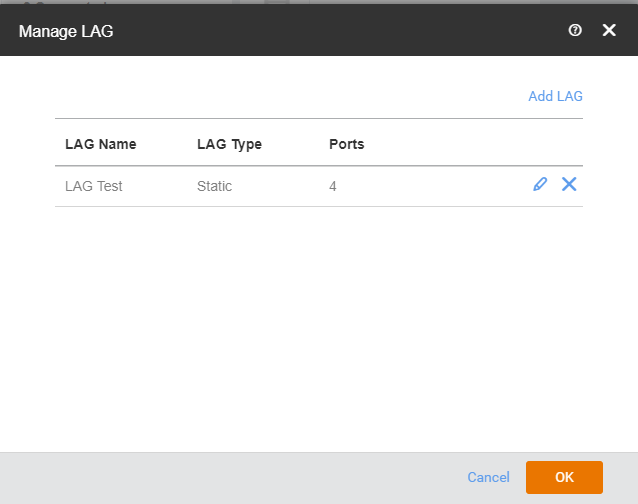
- Click Manage LAG in the upper-right corner.
-
Click Add
LAG.
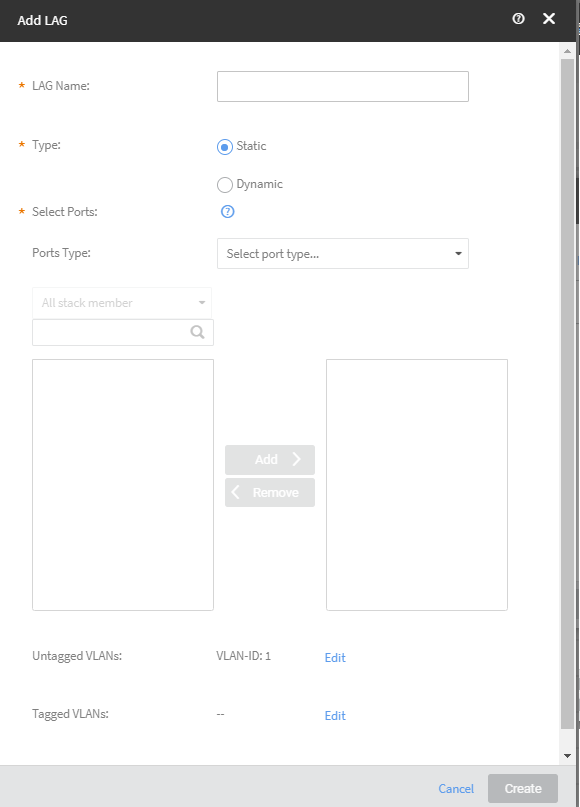
The Add LAG dialog box is displayed.
Adding a LAG  Note: After creation of LAG, the LAG member port is grayed out and not editable or configurable on port details. Any configuration on the interface can be done through LAG.
 - Enter the name of the LAG in the LAG Name field.
- Select the Type as Static or Dynamic.
- Select the ports to add to the LAG click Add > .
- (Optional) Click < Remove remove a port.
- Click Edit corresponding to Untagged VLANs to add untagged VLANs. Select the Untagged VLANs tab and then select a VLAN from the Select LAG VLANs dialog box.
- Click Edit corresponding to Tagged VLANs to add untagged VLANs. Select the Tagged VLANs tab and then select a VLAN from the Select LAG VLANs dialog box.
- Click Create to add the LAG.
- To edit or delete a LAG, repeat step 1 through step 4.
-
Click Manage LAG in the
upper-right corner.
Managing a LAG 
- Click the edit (pencil) icon to edit a LAG,.
- Click the delete (X) icon to delete a LAG.
- Click OK after editing or deleting the LAG.