Before you can provide Wi-Fi service in your venue, you must add at least one access point (AP) to your Ruckus Cloud account.
Before beginning this procedure, physically reset the AP that you want to connect to Ruckus Cloud Wi-Fi by pressing the reset button on the unit for at least 10 seconds. Refer to the
User Guide of the AP for more information.
Complete the following steps to add an AP to your Ruckus Cloud account.
Connect the AP that you want to add to Ruckus Cloud to a network that is connected to the Internet, and then plug it into a power source to power it on.
On the navigation page, click
Networking Devices and the select the click
WiFi tab.
By default, the
APs page is displayed.
Click
Add AP.
The
Add AP
dialog box appears.
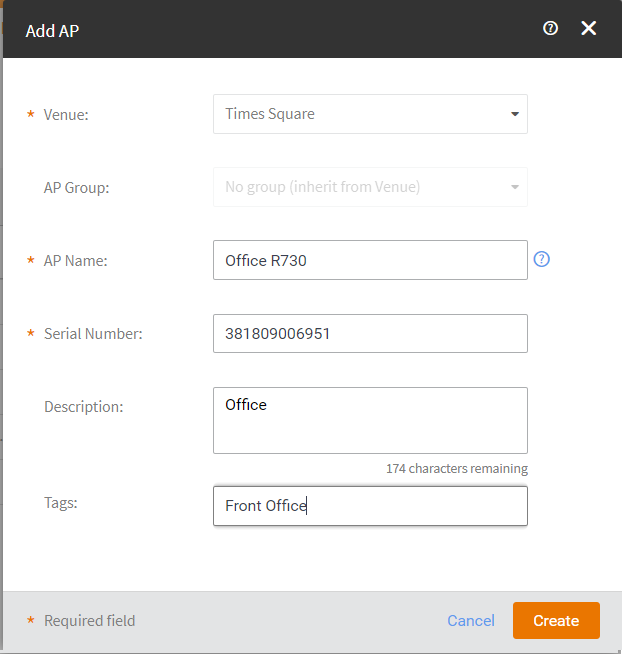
Adding an AP
Complete the following fields to add an AP:
Venue: Select the venue to which you want to deploy this AP.
AP Name: Enter a name for the AP. You could use the AP model number or another name that will help you identify this AP.
Description: Enter a brief description of the AP.
Serial Number: Enter the 12-digit serial number of the AP.
Tags: Enter a tag (keyword or term) that you want to assign to this AP. Using tags is another method to help describe this AP.
Click
Create.
When Ruckus Cloud completes adding the AP, the added AP is displayed in the
Access Points list. The
Status column displays
Never Contacted Cloud followed by
Initializing, which indicates that the AP has been added successfully and is being updated with the latest software from Ruckus Cloud. After the update is completed, the
Status column displays
Operational
The APs page refreshes and displays the newly added AP in the APs page.
(Optional) In the upper-right corner of the
APs page, toggle the
Auto update to
ON to automatically refresh the AP's list.