Adding a RUCKUS Edge through the Web User Interface
The RUCKUS Edge device must already
be successfully installed and deployed on the hypervisor. Refer to Installing and
Starting RUCKUS Virtual Edge on the Hypervisor in the RUCKUS Virtual Edge
Getting Started Guide for detailed instructions.
-
In the RUCKUS
Edge page, click Add and select
RUCKUS
Edge. This displays the Add RUCKUS Edge
page.
Add RUCKUS Edge 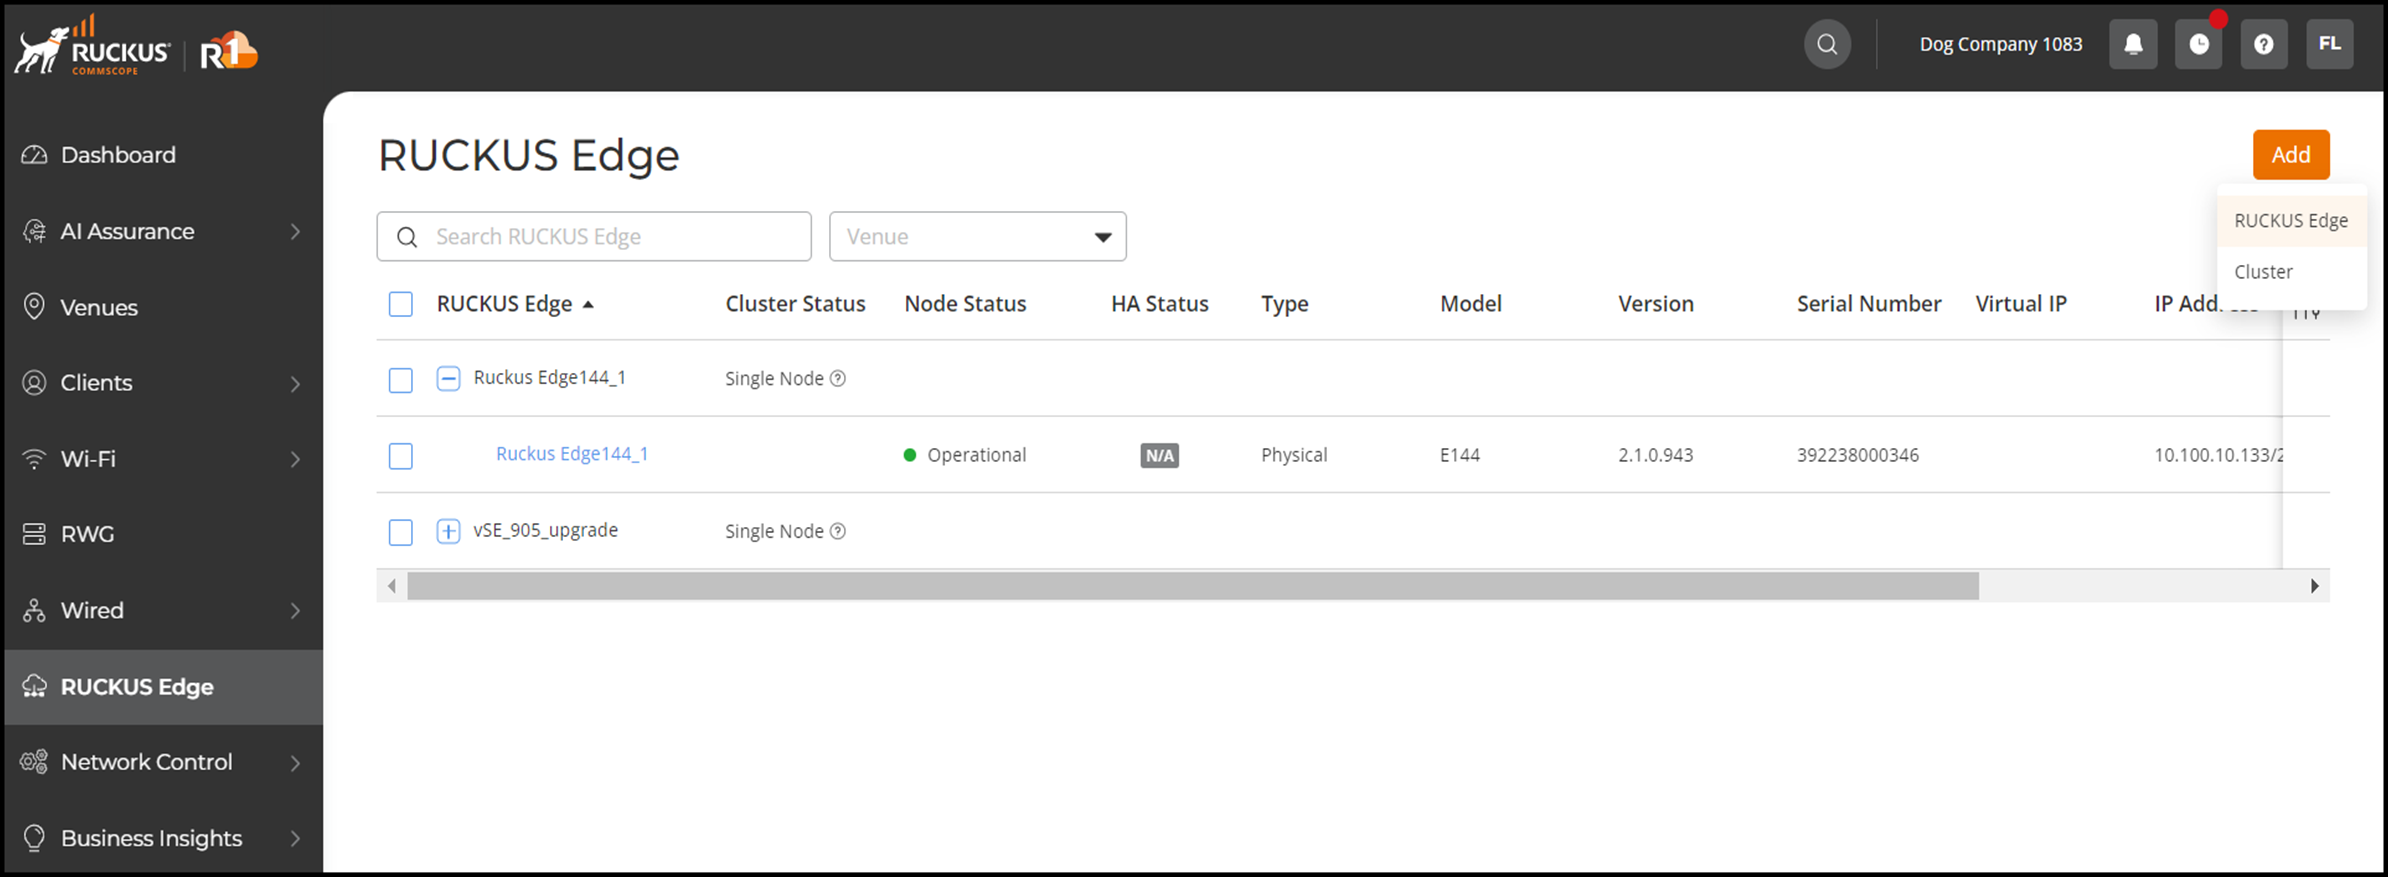
-
In the Add RUCKUS
Edge page, enter the following details:
- Venue: Click the drop-down arrow to select a site to associate with the RRUCKUS Edge device. A venue represents a physical space where networking devices are deployed.
- Cluster: (Optional) Click the drop-down arrow to select the cluster to associate with RUCKUS Edge device. Set this field only if you are adding multiple RUCKUS Edge devices for redundancy. A cluster is a group of nodes which act as a single system to provide high availability and load balancing.
- RUCKUS Edge Name: Enter a meaningful name for the RUCKUS Edge device.
- Serial Number: Enter the serial number of the RUCKUS Edge device. The serial number can be viewed either by entering the command show serial or scanning the QR code; refer to Obtaining the RUCKUS Virtual Edge Serial Number and Interface IP Addresses in the RUCKUS Virtual Edge Getting Started Guide for detailed instructions.
- Description (Optional): Enter a purposeful description for the RUCKUS Edge device.
Add RUCKUS Edge Device 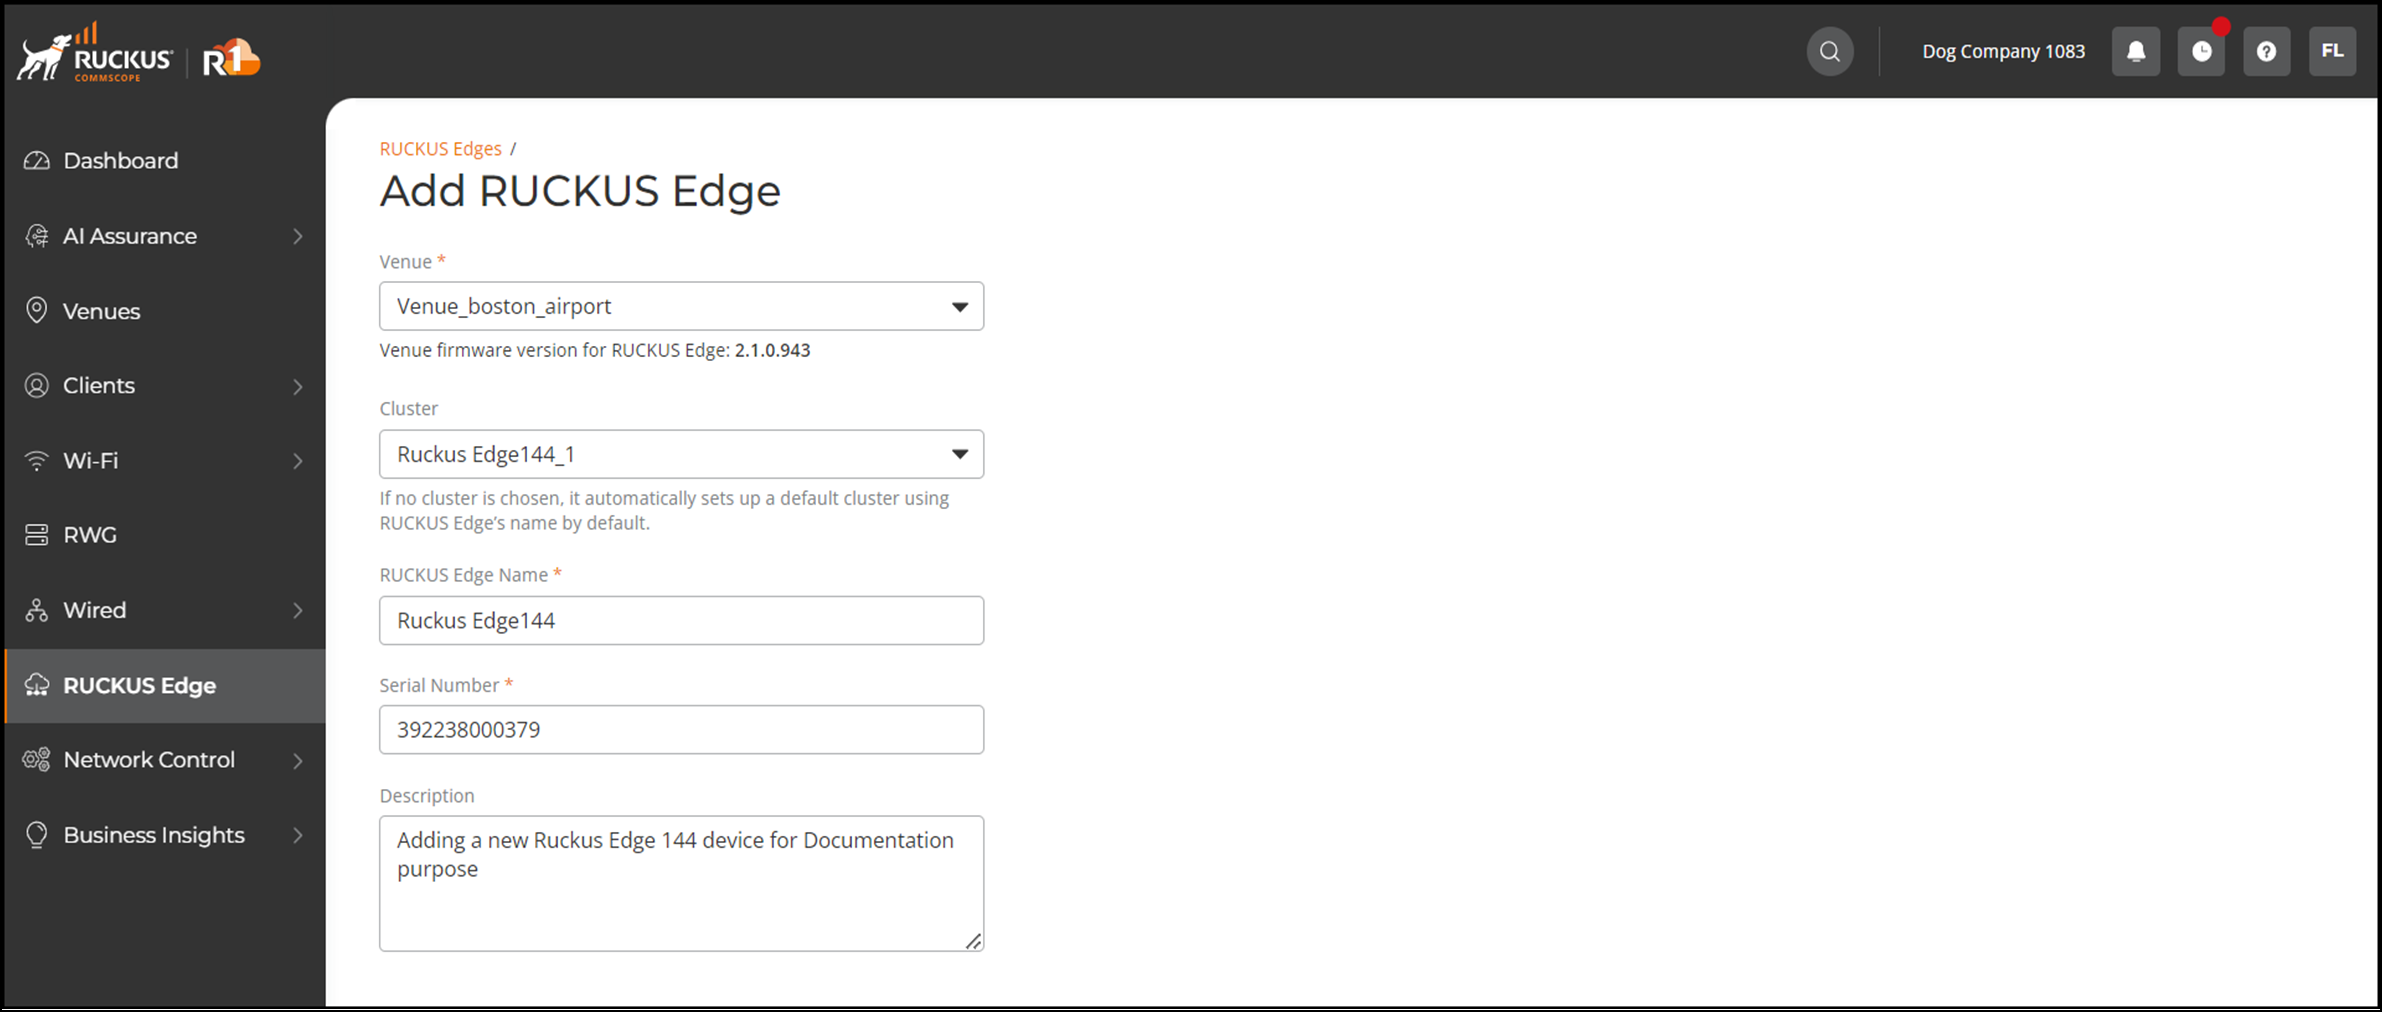
-
Click Add.
This displays the newly added RUCKUS Edge device on the RUCKUS Edge screen.
New RUCKUS Edge Device 
Note: Upon onboarding to RUCKUS One, the device will automatically upgrade to the latest firmware version associated with the venue.