You must add a venue before you can connect your APs to the
AP Management Service to provision the LTE service. By default, a sample venue named My Venue exists. If you want to assign your APs to a venue other than the default, you can add a new venue.
Follow these steps to add a venue.
-
On the Dashboard, click
Venues.
The
Venues page appears.
-
In the upper-right corner of the page, click
Add Venue.
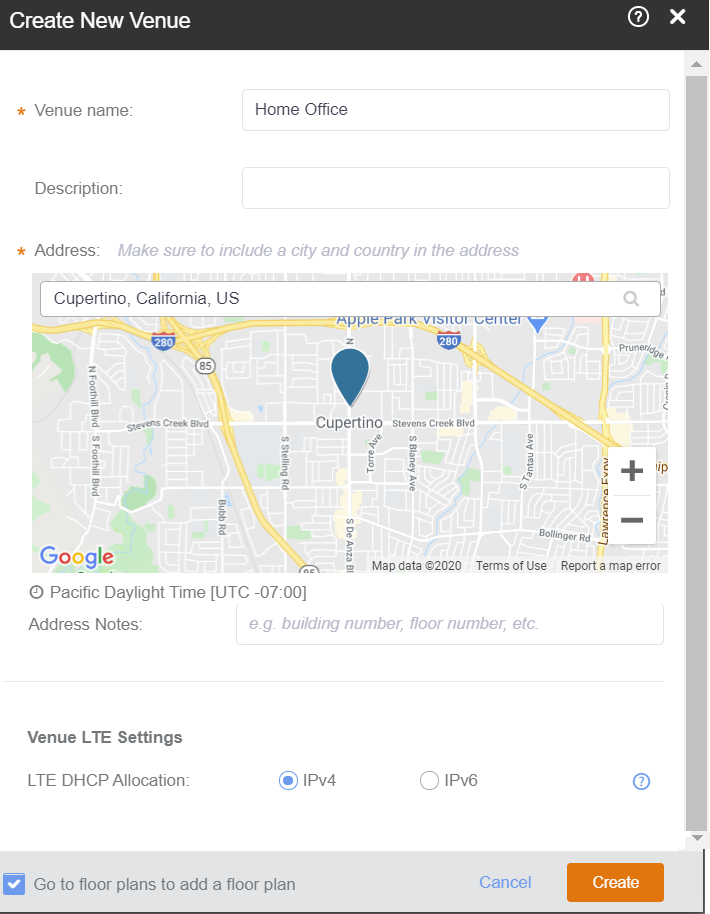
The
Create New
Venue dialog box appears.
-
In the
Venue name field (required), type a name for the venue that you are creating.
-
In the
Description field, type a brief description of the venue.
-
In the
Address field (required), type the address where the venue is located.
You can enter either a full or partial address. For example, if you type
350 W Java Dr, Google displays the location that matches the address. Select the correct address.
-
In
Address Notes, add notes or comments about this venue. For example, you can add the floor number or suite number.
-
Under the Venue LTE Settings section, select either
IPv4 or IPv6 for LTE DHCP Allocation .
A venue can work with either
with IPv4 or IPv6 DHCP allocation. After the venue is created, the DHCP
allocation cannot be changed.
-
(Optional) Select the
Go to floor plan to add a floor plan check box to create a floor plan.
-
Click
Create.
The message
Creating venue... appears as the
AP Management Service creates the venue in your account. The
Add New Floor Plan dialog box appears. Make sure that the
Go to floor plan to add a floor plan check box is selected.
-
Enter a name for the floor plan in the
Floor Plan Name text field.
-
Enter the floor number or click the Up or Down arrow and select the floor
floor number
text field. The "0" (zero) represents a ground floor.
-
Click the
Upload button to upload a floor plan image.
-
To calibrate the floor plan to a map, select the
Next, calibrate the floor plan to a map check box and click the
Add button. The system displays
Creating floor plan.. and then the
Uploading image.... Next, the
Floor Plan Calibration
dialog box prompts you to calibrate the floor plan image to a map.
Note: Calibrating the floor plan allows you to properly geo-position the APs which is mandatory for AP-SAS interaction. To perform calibration, click and position the two pins on corresponding features on the floor plan and on the map.
-
After the calibration, click the
Save button.
System displays
Updating floorplan.... The newly added venue appears in with the calibrated floor plan.
-
Verify that the name of the venue you have created appears on the venue list.
You have completed creating a venue.
Note: Click the pencil icon if you want to edit the venue. Click the globe icon to recalibrate the floor plan.