Header Panel
The Header panel provides information about the user, accounts, links to RUCKUS support, and documentation.
- Back to Classic View
- Search Icon
- Account name
- Help Icon
- User Icon
Back to Classic View
This option allows you to view the former RUCKUS Analytics web UI. In the former RUCKUS Analytics web UI, click Try RUCKUS AI to view the new RUCKUS AI web UI.
Search Field
This option allows you to explore the devices
and navigate to device or asset specific pages quickly. Click the  icon.
In the Search field, enter the search information and press the
 icon. The search results are displayed.
Account Name
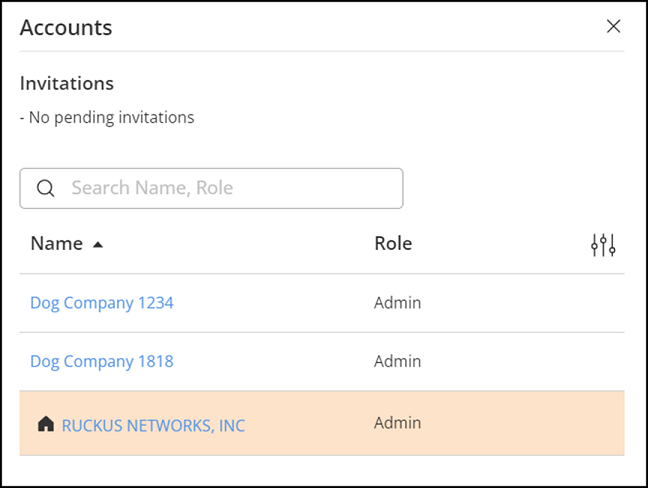
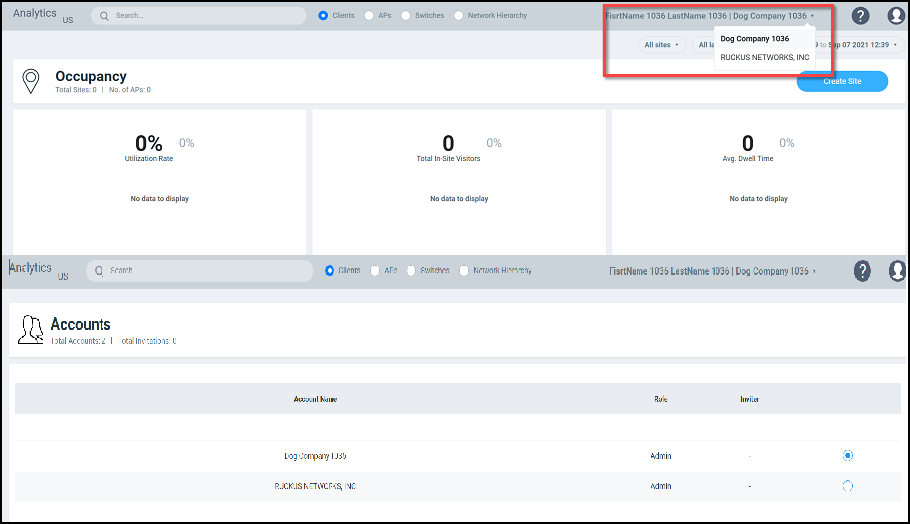
Displays the name of the currently logged-in account. Clicking on the account name displays the Accounts page, which lists the user's associated accounts. The invitation details are also displayed, notifying you of pending invitations that you can choose to accept or reject. You can view the name of the account and the user's role associated with the account. The account name with the icon is identified as the user's currently logged-in organization service account. Internal users or partners can conveniently switch account views without having to re-login. Different accounts can be selected from the Accounts page, and RUCKUS AI data can be viewed for that particular customer account. For more information, refer to Accounts.
Help
 icon
displays a drop-down list of user support information. Click the
  icon
to access the following options:
icon
to access the following options:- What's New: Displays the RUCKUS AI Release Notes HTML page. This document has information about the RUCKUS AI new features and updates.
- Documentation: Displays the RUCKUS AI User Guide HTML page. This document has detailed information about the RUCKUS AI web UI.
- How-To Videos: Displays the RUCKUS AI video playlist on the RUCKUS Networks Education YouTube channel. This page provides the RUCKUS AI training videos.
- License Information: Displays the RUCKUS AI Software Licensing Guide HTML page. This document has detailed information about RUCKUS AI licensing.
- Contact Support: Displays the https://support.ruckuswireless.com/contact-us page. This page provides access to community forums, support case entry, and chat, as well as world-wide and region-specific phone numbers.
- Open a Case: Displays the https://support.ruckuswireless.com/cases/new Open a new Support case page. If you are facing any issue, you can create a case using this option. For more information, refer to GUID-EC48334B-345E-48F4-8C8E-F70077197C86.html.
- Privacy: Displays the https://support.ruckuswireless.com/ruckus-cloud-privacy-policy page. This page displays the Privacy & Cookies Statement details.
User Icon
- My Profile: Displays the My Profile page where you can view information about the current user, customize the user interface language, and configure email notification settings. For more information, refer to My Profile.
- Log out: Logs you out of RUCKUS AI.
Accounts
To open the Accounts page,
click the account name in the upper-right corner of the Header
Panel in the UI. The Accounts page displays the
details of the user's associated accounts, including the account name and the user's
role associated with the account. The account name with the  icon
is identified as the user's currently logged-in organization service account. The
invitation details are also displayed, notifying you of pending invitations that you
can choose to accept or reject. If an invitation is rejected, it is immediately
removed from the account. Invitations that are accepted are included in the account.
Internal users or partners can conveniently switch account views without having to
re-login. Select an account in the table and the RUCKUS AI web UI is loaded
with the selected account's network data.


Users with one account will be directed to the Dashboard view of the RUCKUS AI user interface, by default. Those with multiple accounts will be directed to the Accounts page soon after logging into the RUCKUS AI user interface so they can choose the account from which to operate.