Customizing the Wi-Fi Radio Settings of a Venue

If you want the Wi-Fi radio settings of a venue to be different from the default radio settings, you can override them for a particular venue.

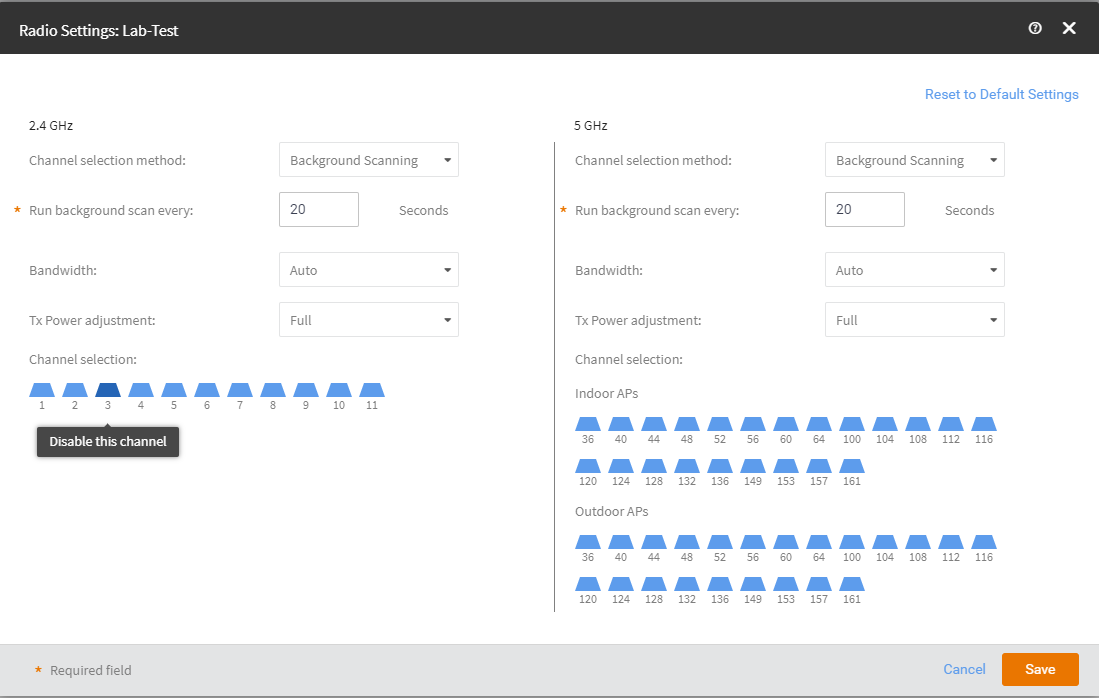
Note: The 2.4 GHz and 5 GHz radio settings, although very similar, must be configured separately.
Complete the following steps to customize the radio settings of a venue.
  1. From the navigation pane, click Venues.
  2. Click the name of the venue for which you want to customize the radio settings.
    The venue overview page is displayed.
  3. In the Venue Settings section, click View after the WiFi Radio Settings.
    The Custom Radio Settings page is displayed.
  4. Click Edit.
    The Radio Settings dialog box for the selected venue appears.
  5. Configure the following settings for both the 2.4 GHz and 5 GHz radios:
    • Channel Selection Method: Select either Background Scanning or ChannelFly.
    • Run background scan every [ ] seconds: If you selected Background Scanning, interval at which Ruckus Cloud will run the scan. The interval ranges from 1 through 65535 seconds. The default is 20 seconds.
    • Bandwidth: Select Auto, 20 MHz, or 40 MHz channel width for the 2.4 GHz radio, or Auto, 20, 40, 80, or 160 MHz channel width for the 5 GHz radio.
    • Tx Power Adjustment: Manually set the transmit power on all 2.4 GHz or 5 GHz radios. The default is Max.
    • Channel Selection: A blue icon above the channel number indicates that the channel is enabled for the radio. If there are channels that you do not want the radio to use, disable them by clicking their respective icons. When a channel is disabled, its blue icon changes to gray.
      Note: For the 5 GHz radio, you must configure a different set of channels for indoor APs and outdoor APs.
  6. Click Save, and then click Close.