Adding a CLI Profile
You can add a CLI profile for the switches and apply to a venue. When you add a CLI profile, it will be applied to all switches of the selected models that are added to the venue.
Complete the following steps to add a CLI profile.
Note: Beginning with the FastIron
09.0.10e release, certain CLI commands have been deprecated. For a list of
deprecated CLI commands, refer to the FastIron 09.0.10e for RUCKUS ICX Switches
Release Notes.
-
Select the
Configuration Profiles tab and then click Add
CLI Profile.
Note: If you apply a CLI Configuration profile to a venue, you cannot configure a reugular switch profile for the same venue by using the RUCKUS Cloud user interface.The Add CLI Configuration Profile dialog box appears.
Add CLI Configuration Profile 
-
In the
Models page, enter a profile name in the Profile Name field, select the switch models, and
then click Next.
You can filter the switch models under filter the switch model family. Use the Select All or Deselect All options to select or deselect all the switches.
Add CLI Configuration Profile 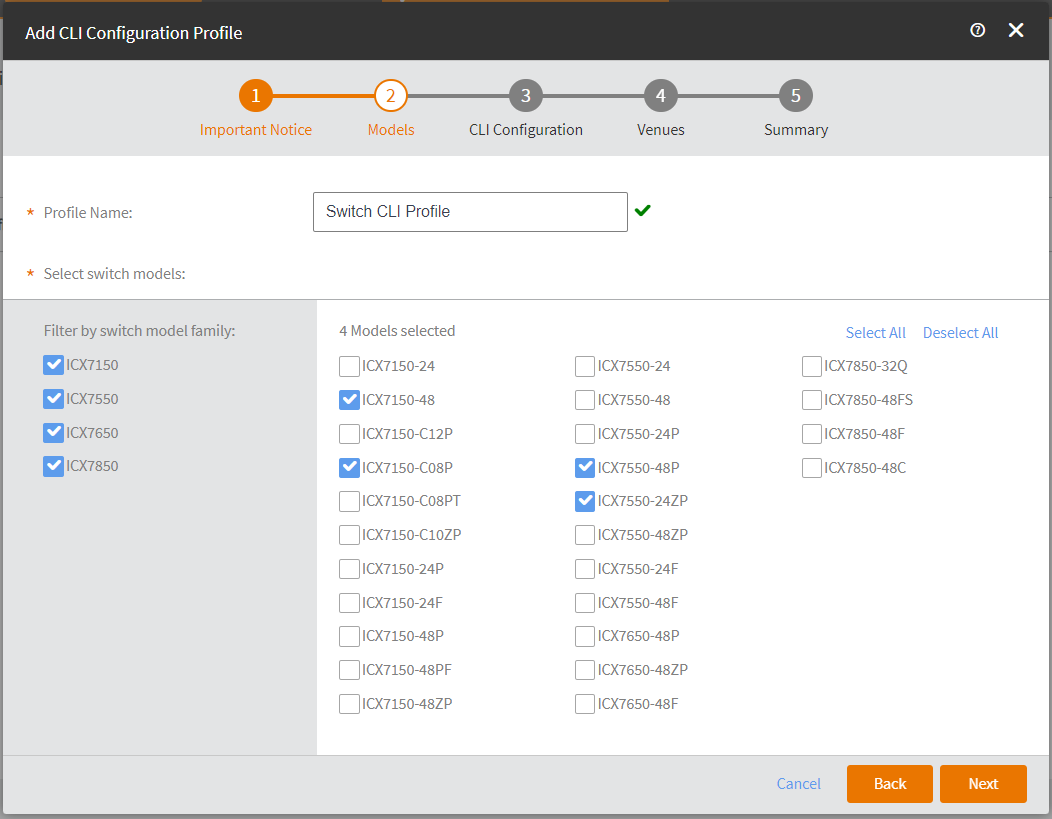
-
In the CLI
Configuration page, add the CLI commands by clicking + next to the
command name. Click Next.
Alternatively, click Import from file to import and CLI commands to the CLI Configuration proflile.
Add CLI Configuration Profile 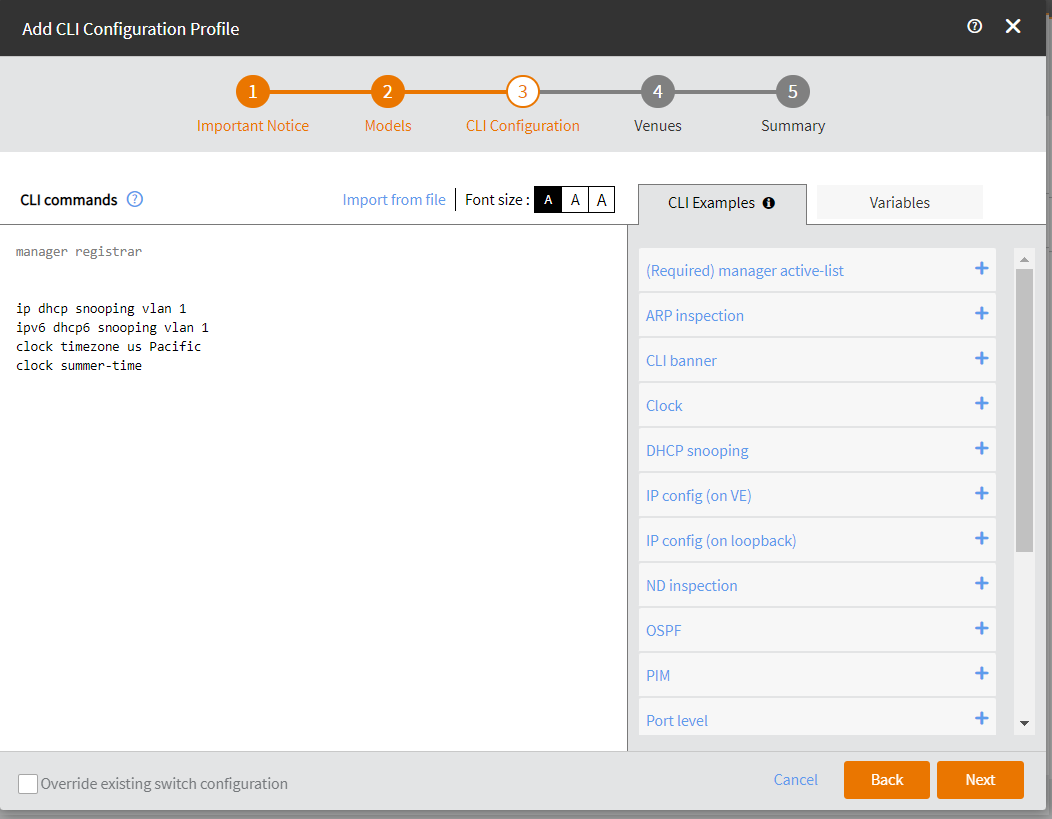
-
In the Venues page, select a venue and click Next.
Add CLI Configuration Profile 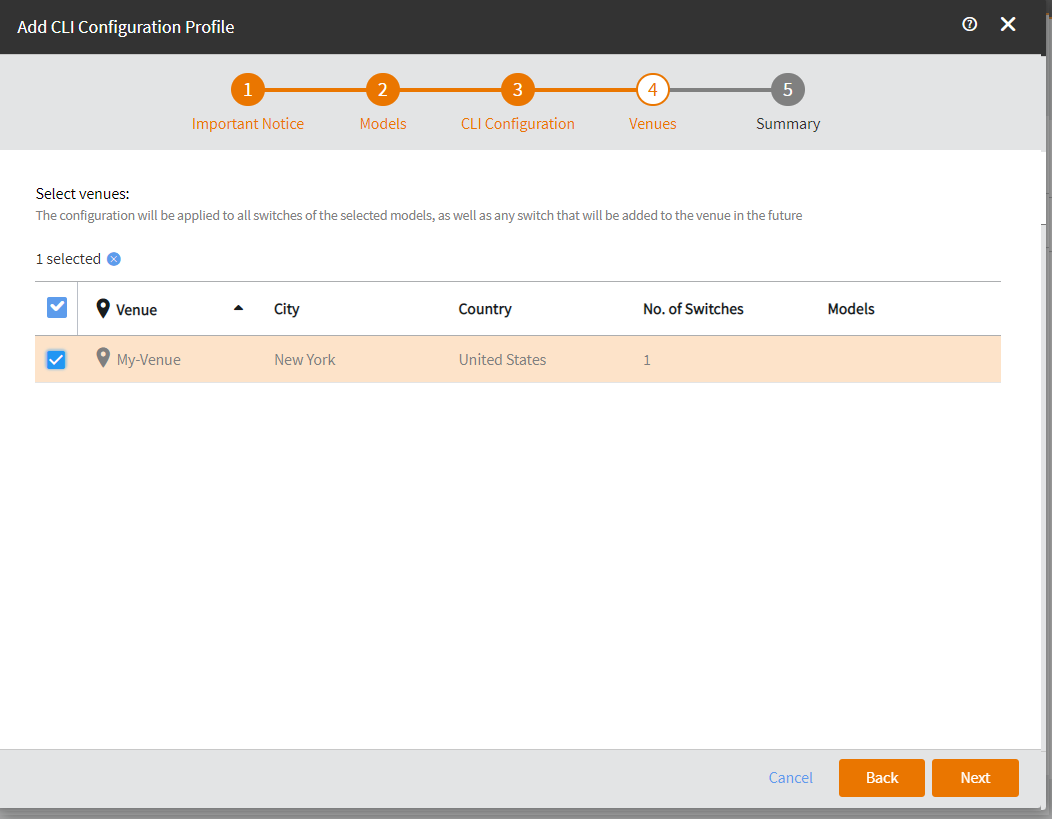
-
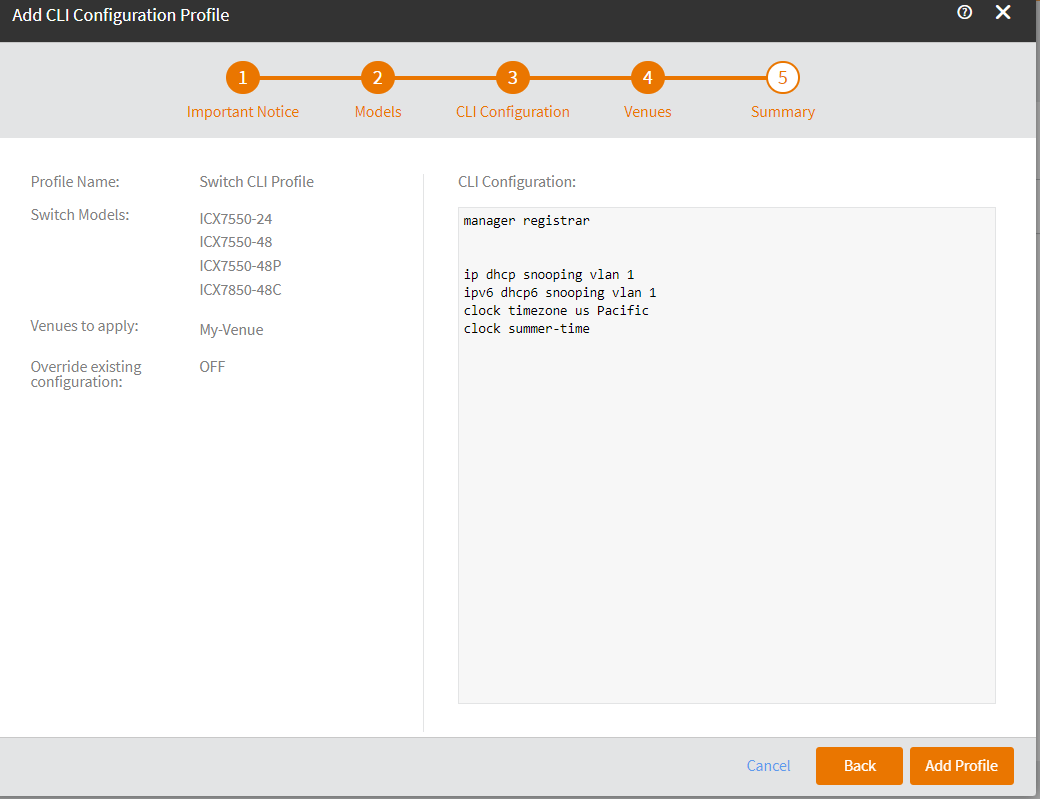
In the
Summary page, review the configuration details and then
click Add Profile to apply the new profile to
the venue.
Add CLI Configuration Profile