From the
Onboarding page of the Captive Portal Self Sign In network option, click the check mark next to the
Google option.
This will allow users to connect to the network using their Google account.
Click the Edit icon which
looks like a cog.
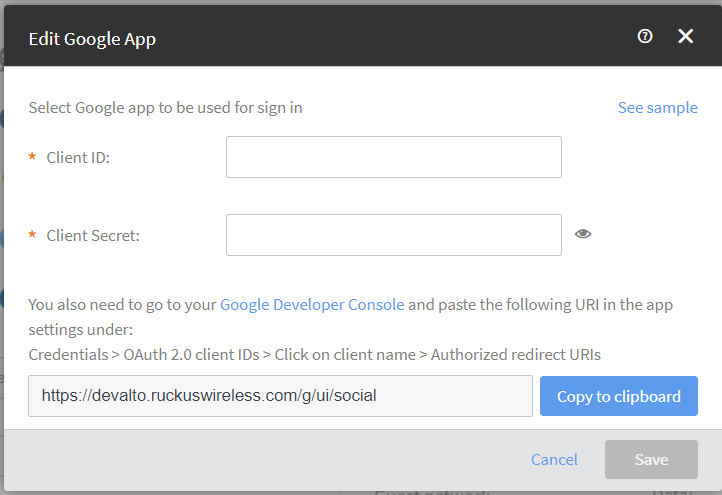
The Edit Google App window appears. Edit Google App
In the Client ID and Client Secret
fields, you must enter the valid user credentials, and then click
Save.
(Optional) Click See sample to
view an example of the Self Sign In screen.
When you have finished viewing the sample screens, click
Close.
Check the
Redirect Users to check box and enter a valid URL.
You can redirect users to your company website or another URL after they log in successfully. If the check box is not selected, users are sent to the page they originally requested.
Check the
Collect email addresses of users who connect to this network check box to save email address of the user.
As required for privacy compliance, the user will be informed on email being saved.
Click
Save.
You are returned to the Onboarding page of the Captive
Portal Self Sign In network option.