Network Configuration

Building your Network

Use the RUCKUS One interface (https://ruckus.cloud) to add venues and network devices (such as APs and switches), create wireless networks, and manage access policies. The following sections provide you with entry-level explanations for the process of getting started with building your network.

Adding and Configuring your First Venue

RUCKUS One venues represent the physical locations where networking devices such as access points and switches are deployed. Your RUCKUS One account comes with a default venue called My-Venue, but if you plan to have multiple physical locations managed in RUCUKS One, you will want to name your individual venues uniquely and descriptively. Adding a venue is the first step in designing your Wi-fi network. After adding a venue in RUCKUS One, you can configure a variety of settings to tailor the network to your specific needs.

Review the following characteristics:

  • Venues can range from small rooms to large multi-floor buildings.
  • Each venue can have multiple networking devices, but each device is associated with only one venue.
  • Each venue can have multiple Wi-Fi networks.
  • You can manage networks, access policies, and network devices at the venue level.
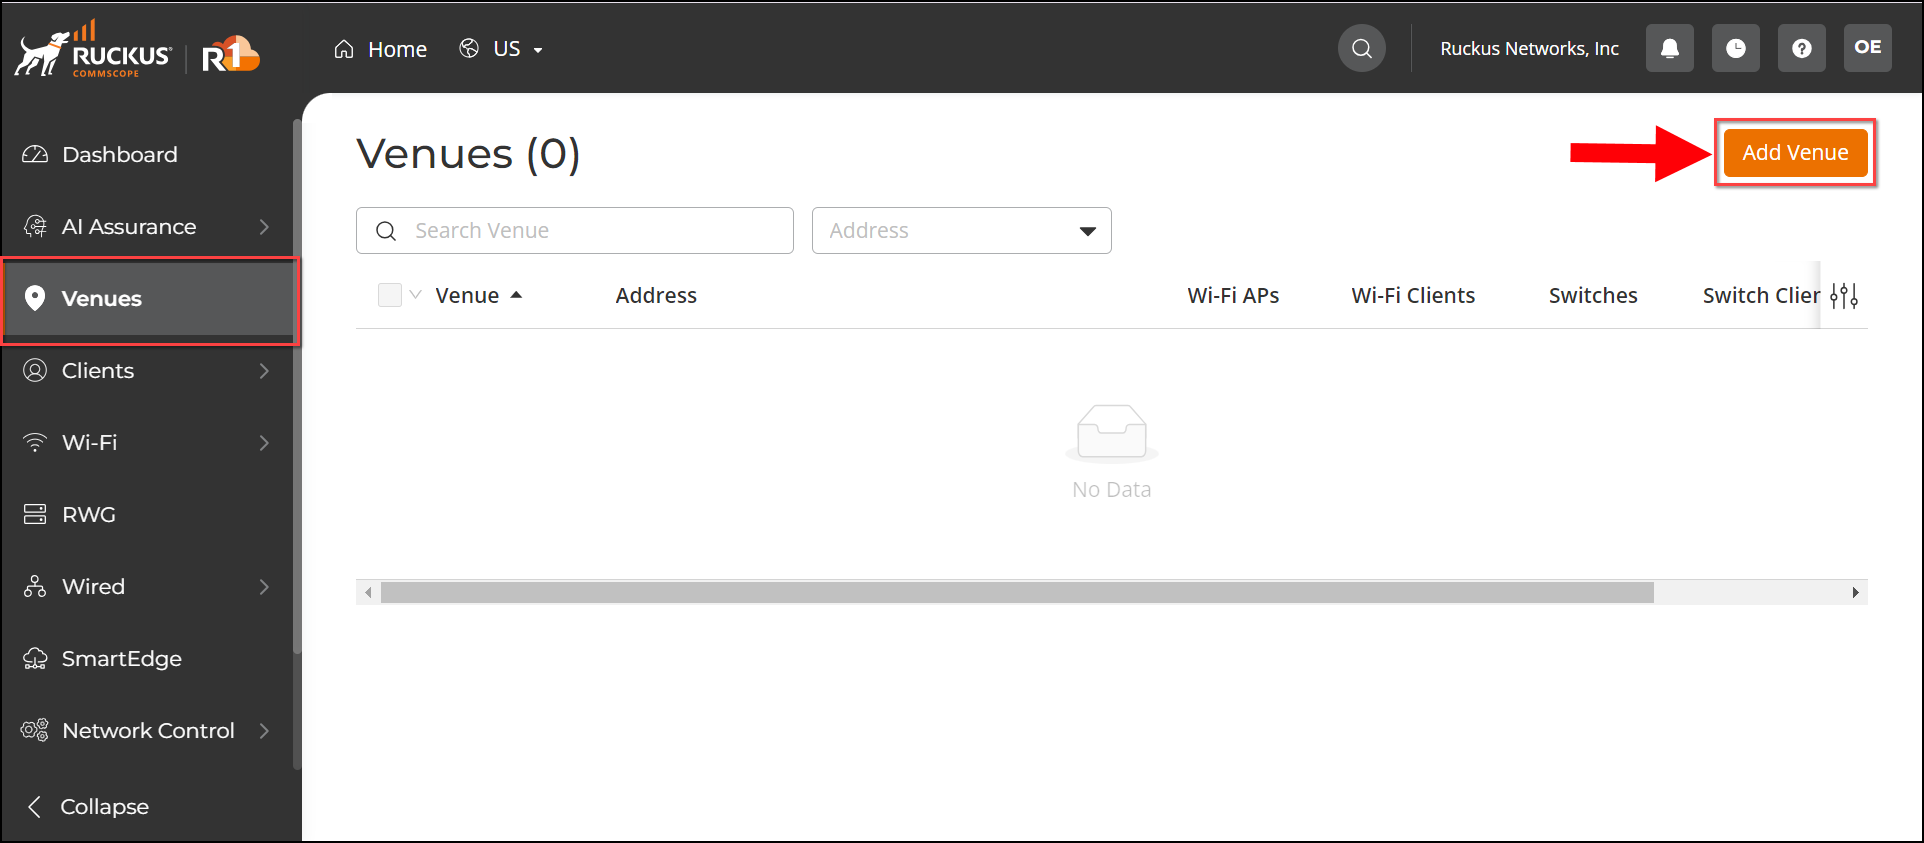
To add a venue:

  1. Click the Venues menu option, then click the Add Venue button. Alternatively, from the RUCKUS One Dashboard, click Add... > Venue.
    The Add New Venue page displays.
  2. Provide a unique venue name, a description, and the address of the venue.
  3. Click Add.
You have created your first venue.
Note: The Address field is mandatory.
Adding a Venue

The following additional resources offer detailed explanations for the process of adding a venue:

Table 1. Resources for Adding a Venue
Resource Description
RUCKUS One User Guide: Adding a Venue Step-by-step instructions to help you add a venue in your RUCKUS One account.
RUCKUS Education Services YouTube video: RUCKUS One: Adding a Venue Step-by-step video showing how to add a venue in your RUCKUS One account.

Adding Access Points

You can add APs to RUCKUS One by manually typing the serial number in the web-based interface, in bulk, by importing a CSV file with the list of the serial numbers, or automatically by scanning the AP QR code using the RUCKUS One mobile app on your mobile device.

Note: Before incorporating an AP into RUCKUS One, it is essential to confirm it is compatible with RUCKUS One. To check device compatibility, refer to the following webpage: RUCKUS One Supported Wi-Fi APs and Switches.
Note: Maintain a record of the serial number of the AP intended for use with RUCKUS One. The serial number for the AP can be on the label on the bottom of the device, or in a sticker labeling the box.

To add an access point using the RUCKUS One web interface:

  1. Click the Wi-Fi > AP List menu option, then click the Add button and select AP from the drop-down list. Alternatively, from the RUCKUS One Dashboard, click Add... > Device > Wi-Fi AP > .
    Adding an Access Point from the Dashboard

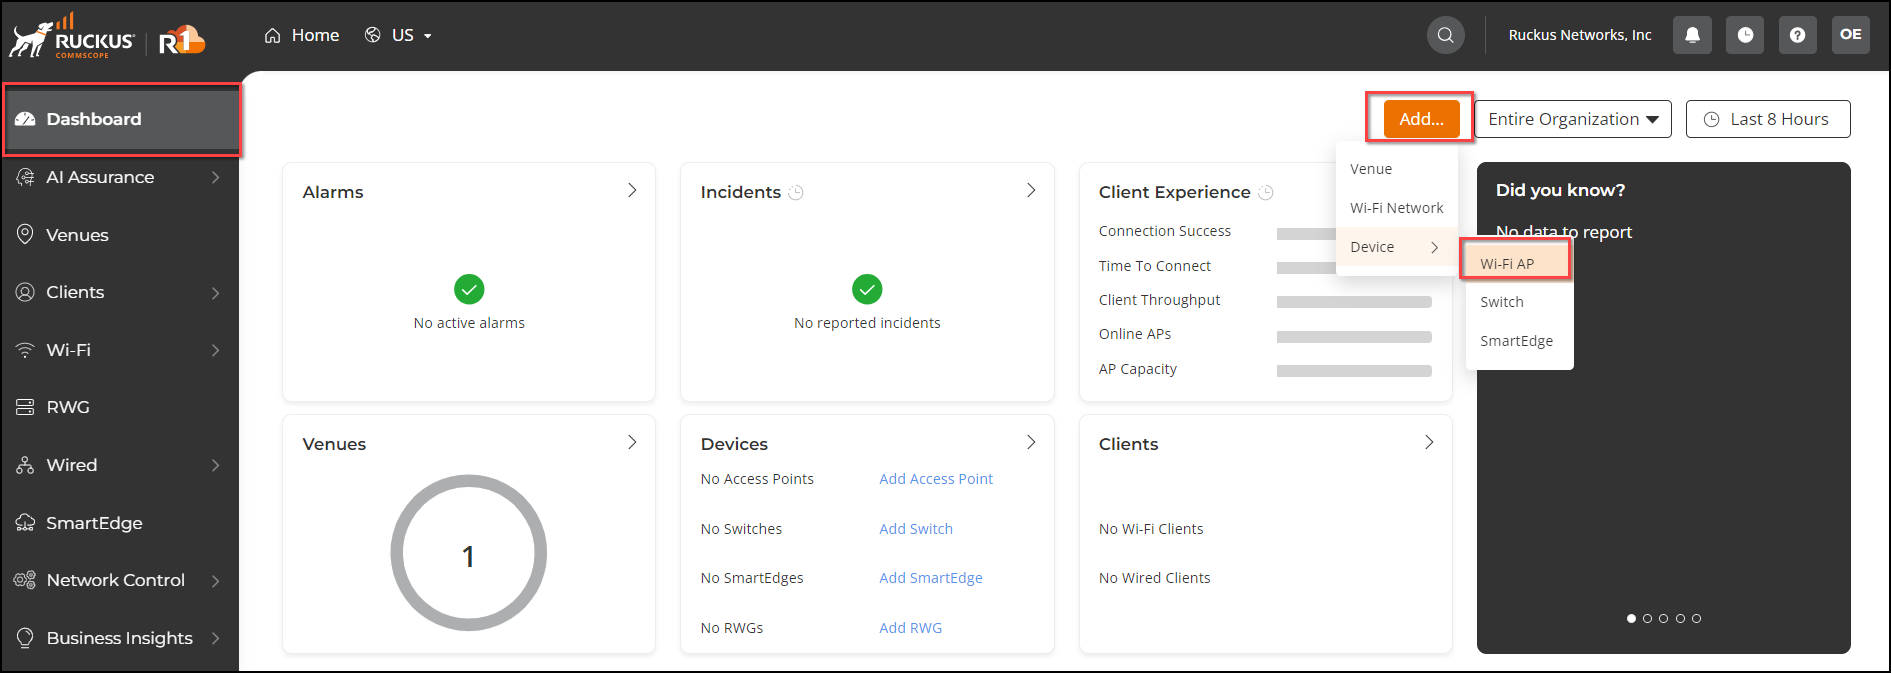
    The Add AP page displays.

  2. Assign an existing venue, type a name for this AP, and type the AP serial number.
  3. Click Add.
    The controller will contact the access point and onboard it in the specified venue.

    The following additional resources offer detailed explanations for the process of adding APs:

    Table 2. Resources for Adding an AP
    Resource Description
    RUCKUS Support Portal: RUCKUS Cloud Mobile Apps RUCKUS Support webpage describing the RUCKUS One cloud mobile app and providing links to download the app from the Android (Google) and Apple stores.
    RUCKUS Networks: RUCKUS One Supported Wi-Fi APs and Switches Provides a list of networking devices (APs and switches) supported by RUCKUS One.
    RUCKUS One User Guide: Adding an AP Step-by-step instructions to help you add an AP to your RUCKUS One account.
    RUCKUS Education Services YouTube video: RUCKUS One: Adding an Access Point Step-by-step video showing how to add an access point in your RUCKUS One account.
    RUCKUS One User Guide: Firewall Ports to Open for RUCKUS One Provides a list of firewall settings necessary for AP communication with RUCKUS One.
    RUCKUS One Release Notes: RUCKUS One AP Firmware Releases Provides a list of AP firmware versions supported by RUCKUS One.
    RUCKUS Self-Help: How to migrate SmartZone APs to RUCKUS Cloud using the Switch Over Cluster feature Step-by-step instructions to help you migrate a SmartZone-managed access point to your RUCKUS One account.
    RUCKUS Education Services YouTube video: RUCKUS One: Migrating an Access Point from ZoneDirector to RUCKUS One Step-by-step video showing how to migrate a ZoneDirector-managed access point to your RUCKUS One account.

Adding Switches

You can add RUCKUS ICX switches to RUCKUS One by manually typing the serial number in the web-based interface, in bulk, by importing a CSV file with the list of the serial numbers, or automatically by scanning the switch QR code using the RUCKUS One mobile app.

Note: Prior to incorporating a switch into RUCKUS One, it is essential to confirm that it is compatible with RUCKUS One. Refer to the Supported Wi-Fi APs and switches resource at RUCKUS One Supported Wi-Fi APs and Switches.

Complete the following steps to add a RUCKUS ICX switch using the RUCKUS One web interface:

  1. Connect the switch that you want to add to RUCKUS One to a network that is connected to the Internet and plug it into a power source to power it ON.
  2. Click the Wired > Switches > Switch List menu option, then click the Add button and select Switch from the drop-down list. Alternatively, from the RUCKUS One Dashboard, click Add… > Device > Switch. The Add Switch page is displayed.

    In the Add Switch page, complete the following fields:

    • Venue: Select the venue to which you want to deploy this switch.
    • Serial Number: Enter the 11-digit serial number of the switch.
    • Add as: Select the switch as a Standalone switch or Member in stack. If you select Member in a stack, then you will be prompted to select a stack from a drop-down menu.
    • Switch Name: (Optional) Assign a name to the switch.
    • Description: (Optional) Add a brief description of the switch.
    • Firmware Type: Choose a software image type as either Factory default, Switch, or Router.
      Note: The firmware type will only be applied to factory-default switches. To prevent connectivity loss, switches with a pre-existing configuration will not be affected by this setting.
    • DHCP Client: Select a VLAN from the drop-down list to be configured as the management VLAN for the switch. The switch will attempt to retrieve a DHCP address using this VLAN. Note that this setting will only be applied to factory-default switches. To prevent connectivity loss, switches with a pre-existing configuration will not get be affected by this setting.
  3. Click Add to add the switch.
    Note:

    When RUCKUS One completes adding the switch, the switch that you added is displayed in the Switch List page. Its Status displays Never contacted cloud and then Initializing, which indicates that the switch has been successfully added and is currently being updated with the latest software from RUCKUS One. When this update is completed, its Status column displays Operational.

    To add a RUCKUS ICX switch using the RUCKUS One mobile app, click the + icon in the lower-right corner of the screen, tap Add Switch then select option Add Switch. Choose an existing venue from the drop-down list. Enter the serial number by either typing it manually or tapping the Scan Serial Number button. Select the Add as option (either Standalone switch or Member of a stack). You may optionally type a Switch Name and a Description. Click Add Switch.

    The following additional resources offer detailed explanations for the process of adding switches:

    Table 3. Resources for Adding a Switch
    Resource Description
    RUCKUS Support Portal: RUCKUS Cloud Mobile Apps RUCKUS Support webpage describing the RUCKUS One cloud mobile app and providing links to download the app from the Android (Google) and Apple stores.
    RUCKUS One Supported Wi-Fi APs and Switches: https://www.ruckusnetworks.com/ruckus-one-supported-network-devices/ Provides a list of networking devices (APs and switches) supported by RUCKUS One.
    RUCKUS One User Guide: Adding a Switch Step-by-step instructions to help you add a switch to your RUCKUS One account.
    RUCKUS Education Services YouTube video:RUCKUS One: Adding an ICX Switch Step-by-step video showing how to add a switch to your RUCKUS One account.
    RUCKUS One Release Notes: RUCKUS ICX FastIron Firmware Releases Provides a list of ICX switch firmware versions supported by RUCKUS One.

Creating Wireless Networks

Wi-Fi networks correspond to the SSIDs broadcasting by the access points. Too add a Wi-Fi network:

  1. Click the Wi-Fi > Wi-Fi Networks List menu option, then click the Add Wi-Fi Network button. Alternatively, from the RUCKUS One Dashboard, click Add… > Wi-Fi Network.
    The Create New Network page appears.
    Adding a Wi-Fi Network

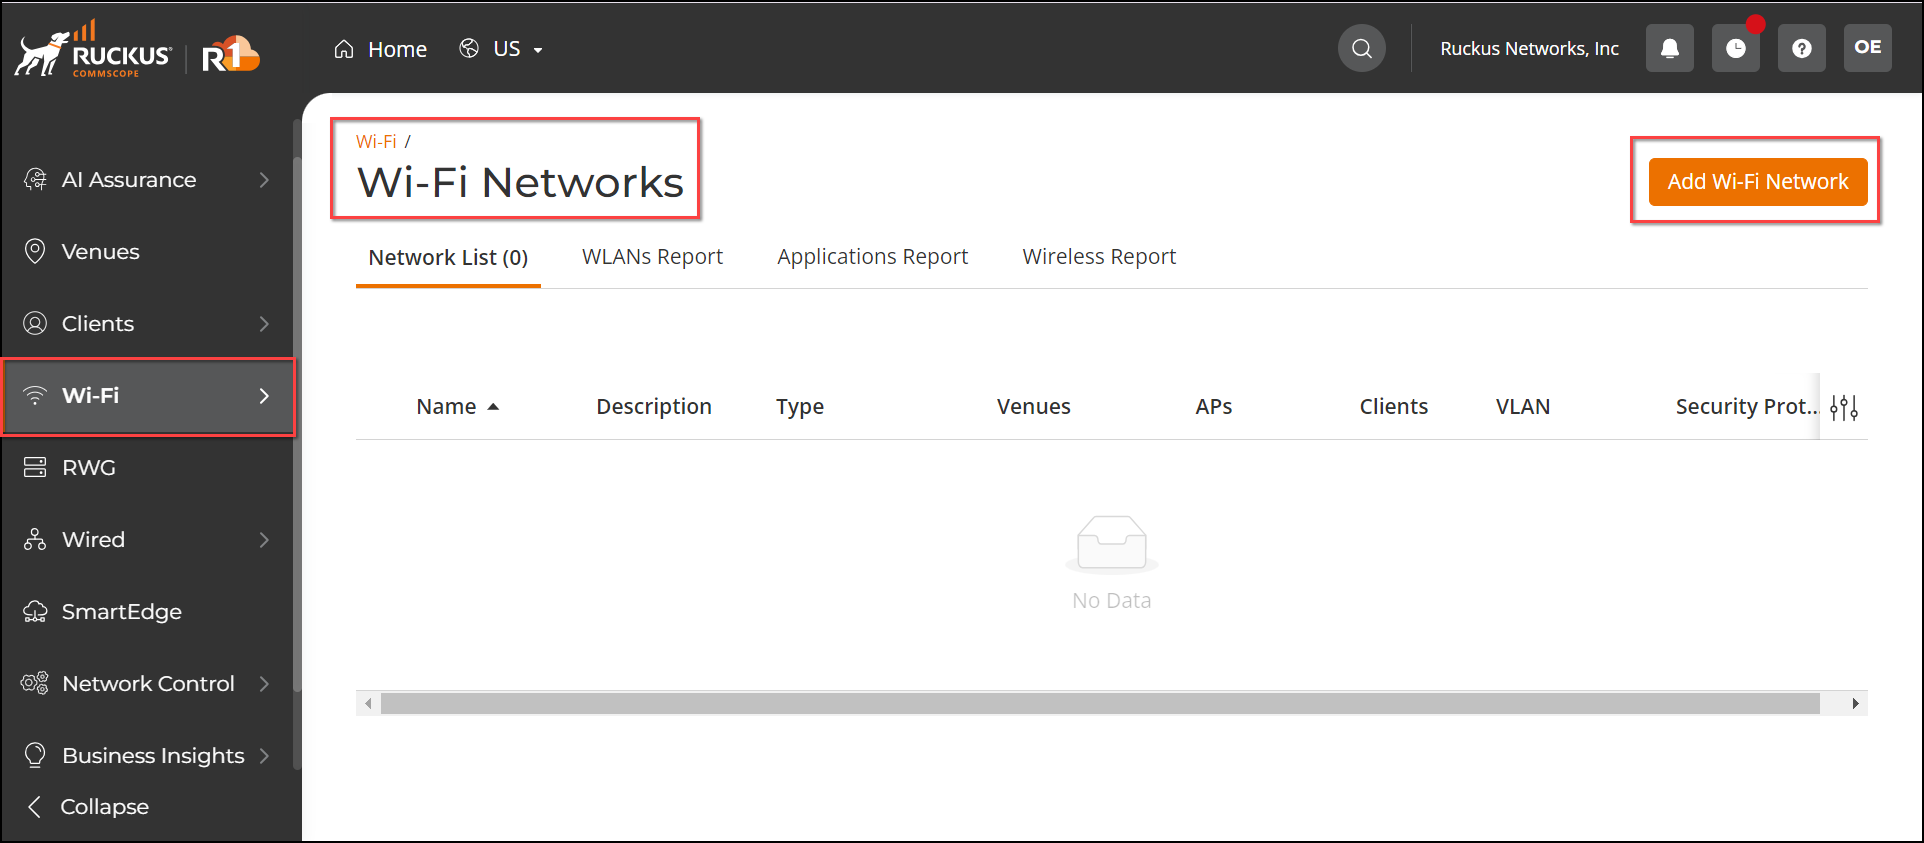
    Configure the network details such as name, description, network type, settings, and select the venue(s) where you want the network activated. Note that RUCKUS One provides default values for most settings to help you get your network up quickly and running optimally. Navigate through the configuration sections using the Back and Next buttons. After you have verified the network configuration on the Summary screen, click Add.

    When you create a wireless network, the most important part to consider is the network type. This setting will dictate how users will connect to the network. And depending on this setting, other dependent settings will be made available to configure. RUCKUS One supports the following authentication methods:

    • Passphrase (PSK/SAE): Require users to enter the passphrase (that you have defined for the network) to connect.
    • Dynamic Pre-Shared Key (DPSK): A unique passphrase is manually created for each user to connect to the network.
    • Enterprise AAA (802.1X): Use 802.1X standard and WPA2 security protocols to authenticate users using an authentication server on the network.
    • Hotspot 2.0 Access: Enable users to automatically and securely connect to Wi-Fi networks while roaming by supporting multiple roaming partners over a single SSID.
    • Captive Portal: Use a third-party captive portal and authentication service to authenticate users. There are six methods that allow users to gain access through the captive portal; you will be prompted to select one of these portal types:
      • Click-Through: Allow users to accept Terms and Conditions to access the network.
      • Self Sign In: Allow users to access the network using their social media account or register their details and get a personal password.
      • Cloudpath Captive Portal: Allow users to connect through an enhanced captive portal with Cloudpath.
      • Host Approval: Allow users to register their details in the portal including their host email. A host must approve the guest request to provide the temporary network credentials to the guest user.
      • Guest Pass: Allow users to access the network temporarily using a personal password which they receive in advance from the network administration staff.
      • 3rd Party Captive Portal (WISPr): Allow users to access the network through a 3rd-party captive portal, authenticated by a RADIUS server.
    • Open Network: Allow users to access the network without any authentication. If network security is a concern, this option is not recommended.

    The following additional resources offer detailed explanations for the process of adding adding a Wi-Fi network:

    Table 4. Resources for Adding a Wi-Fi Network
    Resource Description
    RUCKUS One User Guide: Wireless Networks Overview Provides a list of each available Wi-Fi network type and a link to the step-by-step instructions for creating each type of network in your RUCKUS One account.
    RUCKUS Education Services YouTube video: RUCKUS One: Adding a Wi-Fi Network Step-by-step video showing how to add a Wi-Fi network to your RUCKUS One account.
    RUCKUS Education Services YouTube video: RUCKUS One: Choosing a Network Type Tutorial video to help you make an informed decision regarding network type by providing in-depth explanations of how each of the RUCKUS One Wi-Fi network types operate.