From the RUCKUS One web
interface, you can add supported ICX switches to your RUCKUS One account.
Alternatively, use the RUCKUS One Mobile App to scan the QR code of the ICX switches and add them to your
RUCKUS One
account.
Ensure that the switch intended for management by RUCKUS One
management is powered on and is connected to the Internet. Refer to the model-specific
RUCKUS ICX Switch Hardware Installation Guide for more information.
Complete the following steps to add an ICX
switch to RUCKUS One.
On the RUCKUS One web interface, navigate to Wired >
Switches > Switch
List. The Switch List page is displayed.
Alternatively, from the RUCKUS OneDashboard, click Add.. > Device > Switch and skip to 4.
Click Add in the upper-right corner of the Switch
List page.
Select Switch from the
drop-down menu.
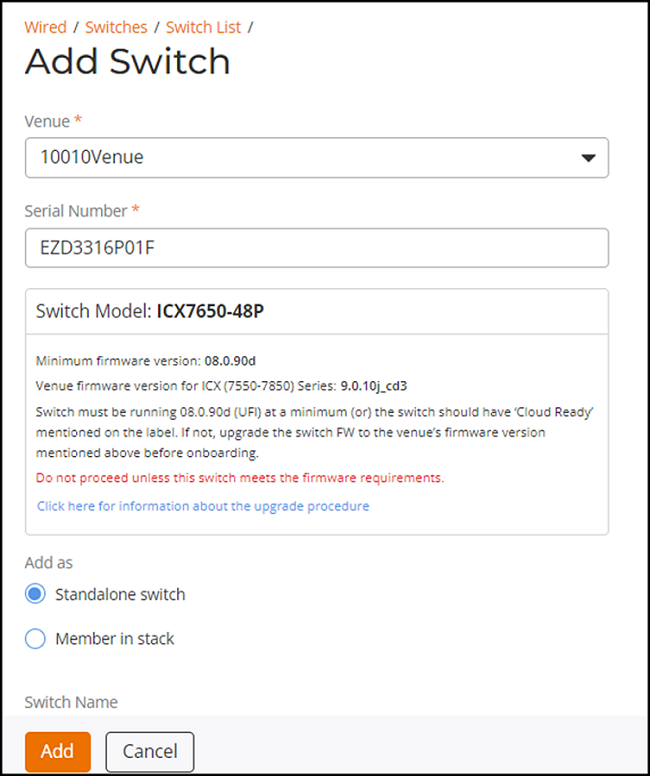
The Add Switch page is displayed.Adding a
Switch
For more information
about the switch upgrade procedure, refer to the following figure.
Hardware &
Configuration Requirements
Complete the following
configuration in the Add Switch page:
Venue: Select the venue to which you want to add this
switch.
Serial Number: Enter the valid 11-digit serial number of
the switch.
Add as: Select
the switch as a Standalone switch or
Member in stack. If choosing Member in stack,
then you will also be prompted to select a stack from the menu.
Note: Since the RUCKUS ICX
8100 switch does not support stacking, if you enter the switch
serial number in Add
Switch, the Member in
stack option is grayed out.
Switch Name: (Optional) Assign a name to the
switch.
Description: (Optional) Add a brief description of the
switch.
Firmware
Type: (Optional) Select a firmware type to upload to the
switch. Options include Switch,
Router and Factory
default.
Note: The selected firmware
type will only be applied to switches having factory default
settings. To prevent disconnections, switches with existing
configurations are not affected by this setting.
DHCP Client:
(Optional) Select a VLAN from the Select VLAN
drop-down.
Note: The
DHCP client interface VLAN is only applied to switches having
factory default settings. To prevent disconnections, switches with
existing configurations are not affected by this
setting.
Note: The RUCKUS ICX 8100 switch does not support onboarding with DHCP
Client setting.
Click Add.
The switch that you added is
displayed in the Switch List page. Its Status displays Never contacted cloud and then Initializing, which indicates
that the switch has been successfully added and is currently being updated with the
latest software from RUCKUS One. If the devices require an update to the latest software, their
status will transition from Initializing to Firmware
Updating.When this update is completed, its Status column displays Operational.
Note:
Demonstration of Adding an
ICX Switch. This video walks you through the process of adding an ICX
Switch to the Venue.