Managing DHCP Service
Follow these steps to enable and manage DHCP service.
- On the Dashboard, click
Venues. The Venues page appears.
- Select a venue by clicking the name.
- Select the DHCP tab.
- Toggle the DHCP Service switch to ON. By default, the DHCP Service is set to OFF.
-
In the upper-right corner of the
page, click Manage
DHCP service.
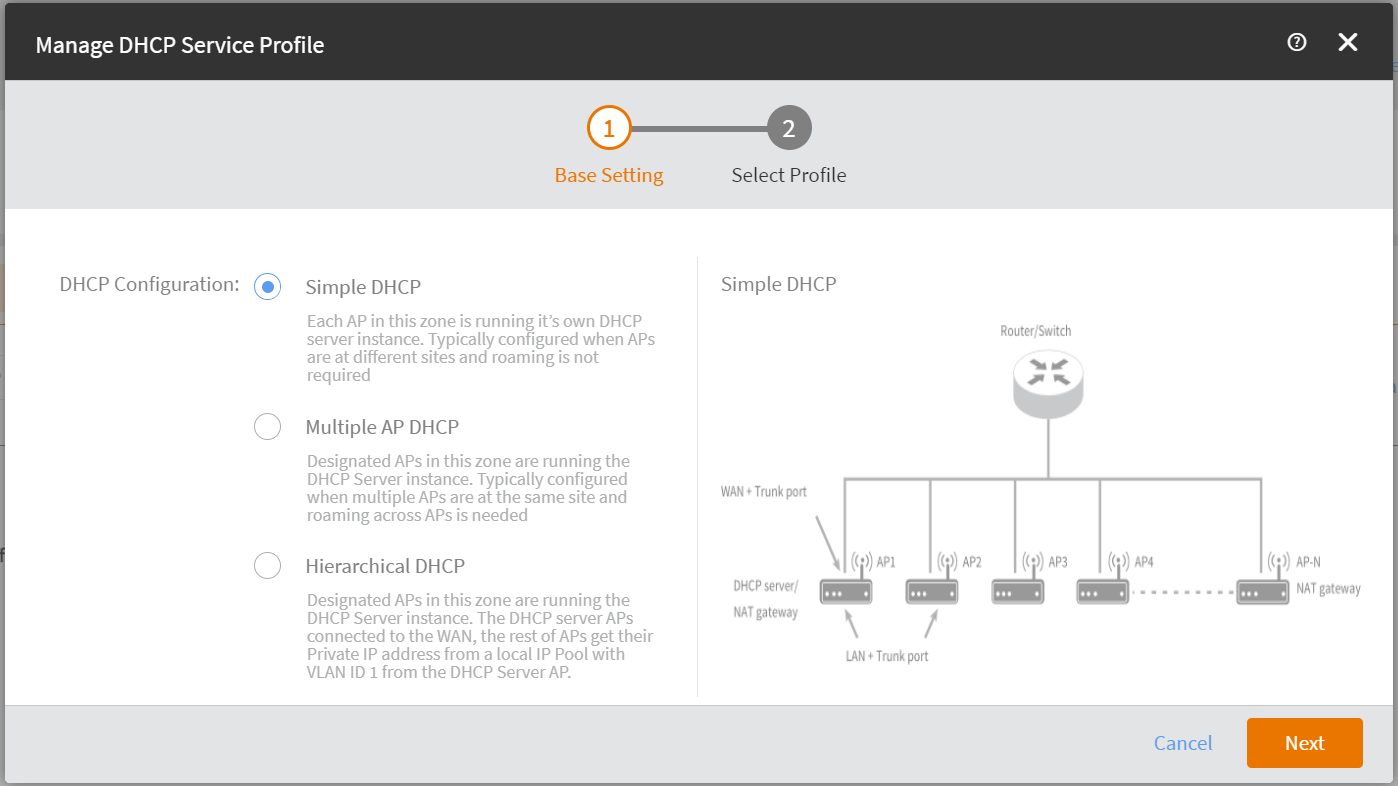
The Manage DHCP Service Profile dialog box appears.
Manage DHCP Service Profile 
-
In the
DHCP Configuration section, choose one of the following types.
- Simple DHCP: Each AP in this zone is running it’s own DHCP server instance. In general, simple DHCP is configured when APs are at different sites and roaming is not required.
- Multiple AP DHCP: Designated APs in this zone are running the DHCP server instance. In general, multiple AP DHCP is configured when multiple APs are at the same site and roaming across APs is needed.
- Hierarchical DHCP: Designated APs in this zone are running the DHCP Server instance. The DHCP server APs are connected to the WAN, the rest of the APs get their private IP addresses from a local IP pool with VLAN ID 1 from the DHCP server AP.
The following example shows how to configure Hierarchical DHCP.
- In the Base Setting page, select Hierarchical DHCP.
- Click Next. The Select Profile page appears.
-
In the Select Profile page, select up to four DHCP service profiles by
toggling the switch to ON.
Click Add DHCP service profile to add a new DHCP service profile. To clone an active profile in a venue, go to Services > DHCP > Name > Profile > Clone Profile.
-
Click Next.
The Select AP page appears.
-
In the Select AP page, select and AP as DHCP
server and gateway.
- Primary Server: Select an AP from the drop-down as DHCP server.
- Secondary Server: Select an AP from the drop-down as DHCP server.
- Gateway: Select an AP from the drop-down as gateway. Click Add Gateway to add gateway.
- Click Save.