-
From the navigation pane, click
Services.
The Services page appears.
-
Select the DHCP sub-tab.
The
DHCP page appears.
DHCP Service Profiles
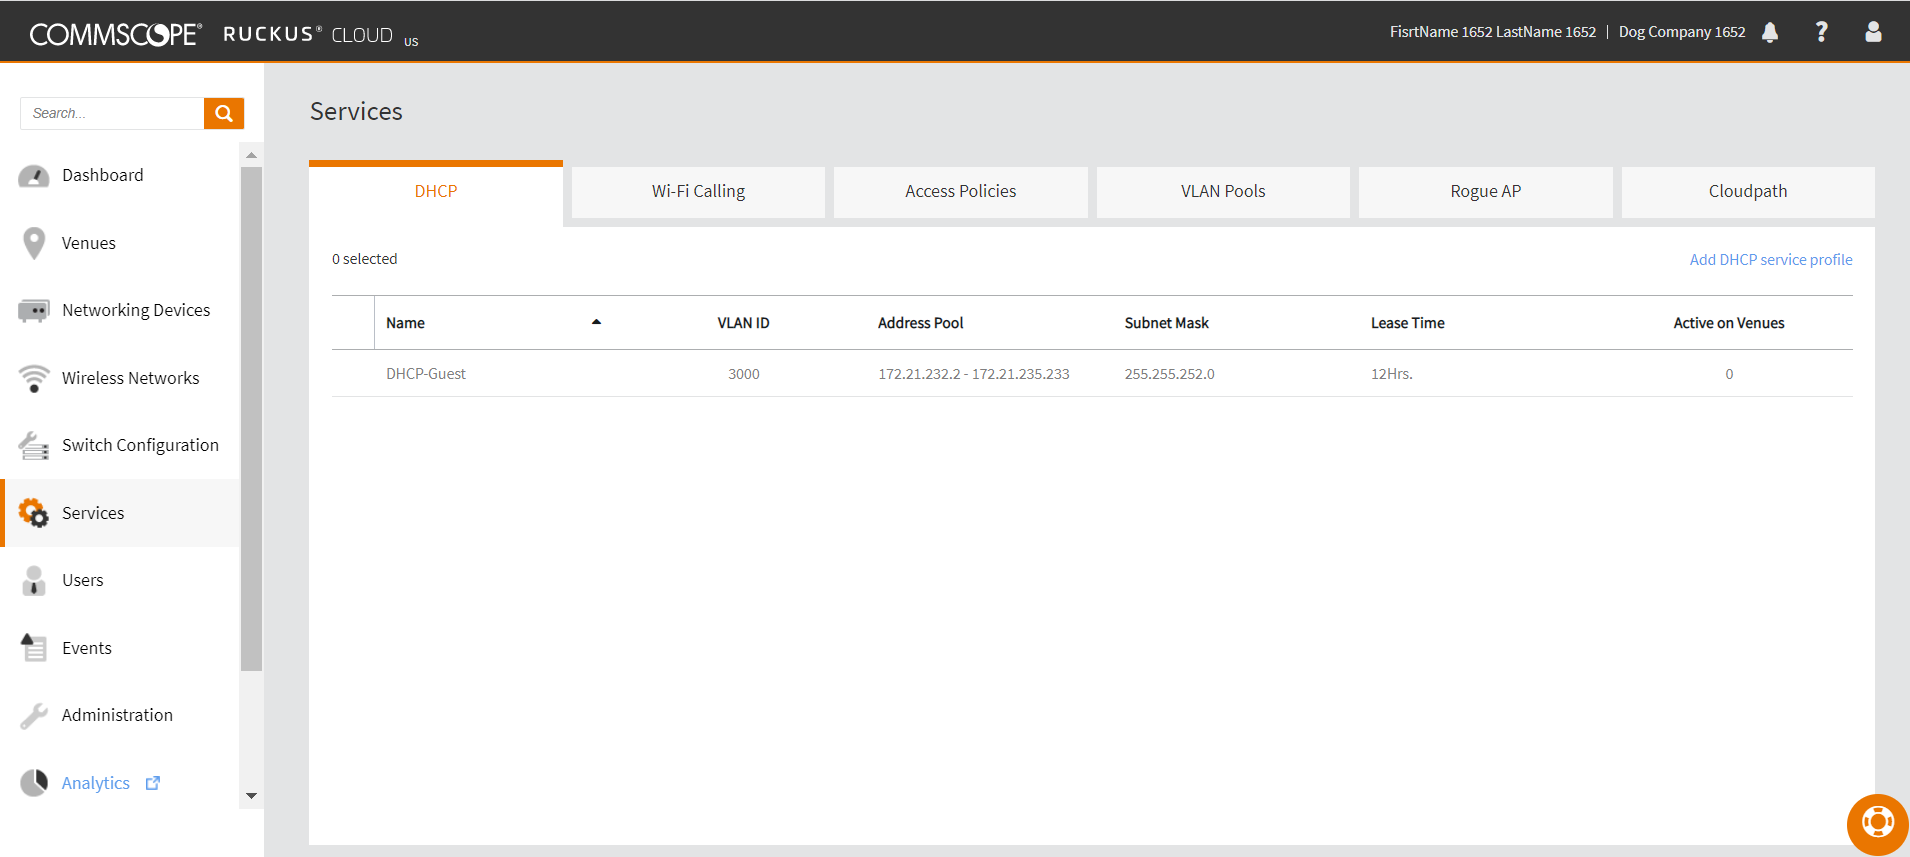
- Click Add
DHCP service profile.
The
Add DHCP Service Profile dialog box
appears.
Add DHCP Service Profile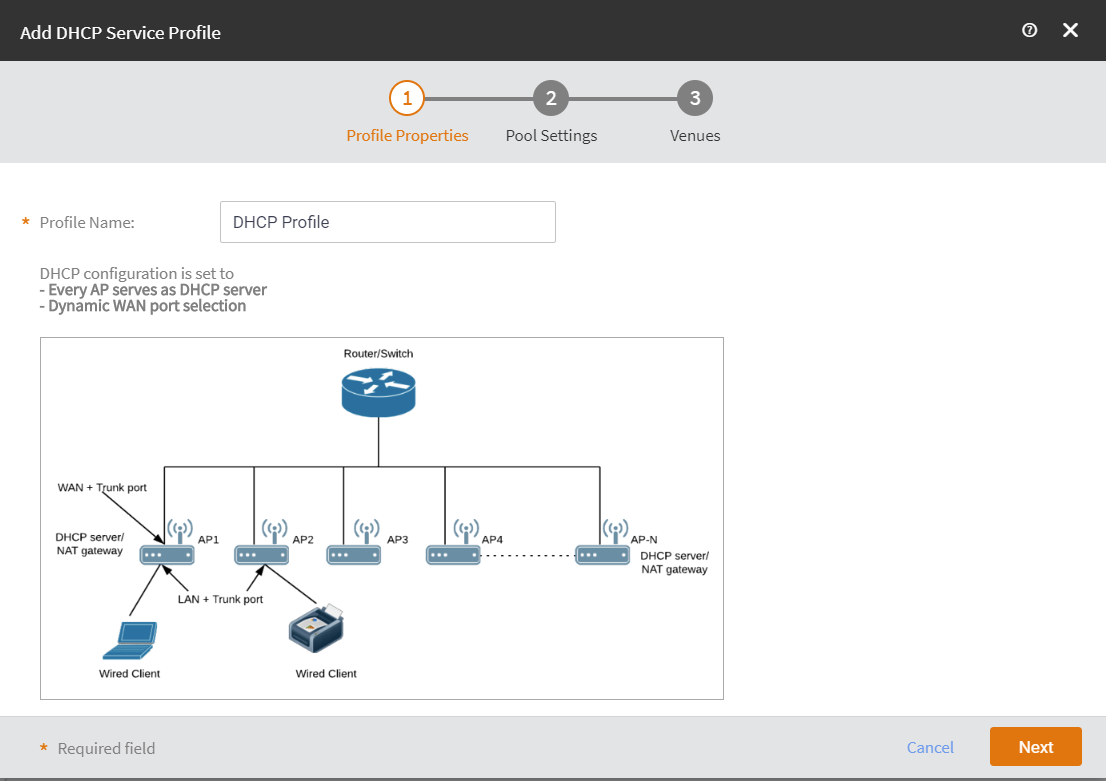
- In the Profile Name
field, enter a DHCP profile name.
- Click Next.
The Pool Settings page appears.
- Complete the following and then click Next.
Add DHCP Service Profile: Pool Settings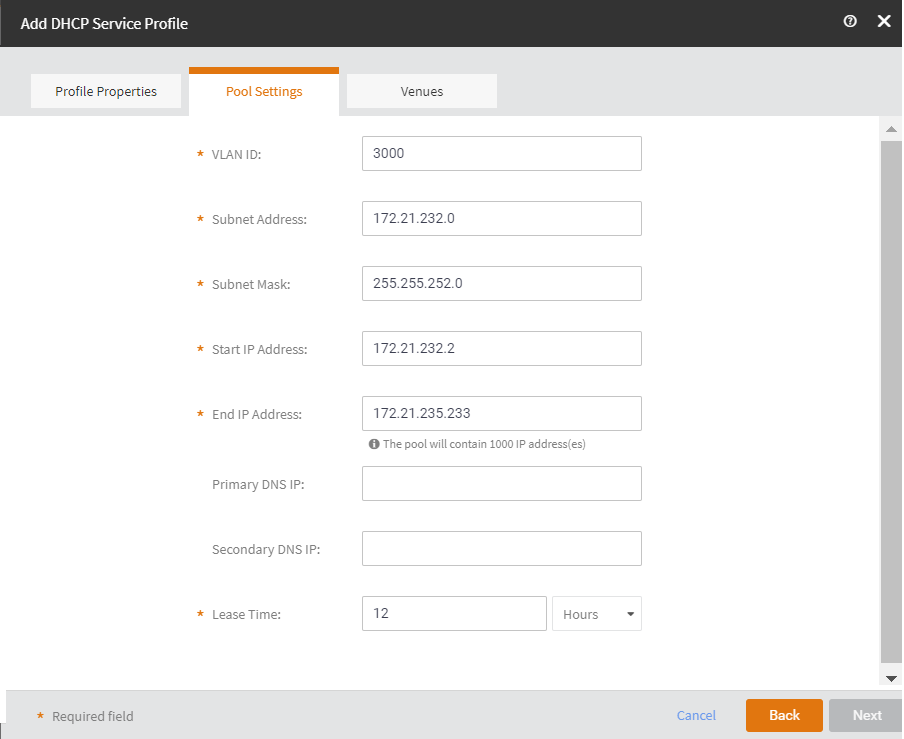
- VLAN ID: Enter the VLAN ID.
- Subnet Address: Enter the subnet address.
- Subnet Mask: Enter the subnet mask
address.
- Start IP Address: Enter the start IP
address.
- End IP Address: Enter the end IP address.
- Primary DNS IP: (Optional) Enter the primanary
DNS IP address.
- Secondary DNS IP: (Optional) Enter the
secondary DNS IP address.
- Lease: Enter the lease period in hours or in
munutes.
- Click Next.
- Select the venue to set the pool on and toggle the Set to
ON.
Add DHCP Service Profile: Venues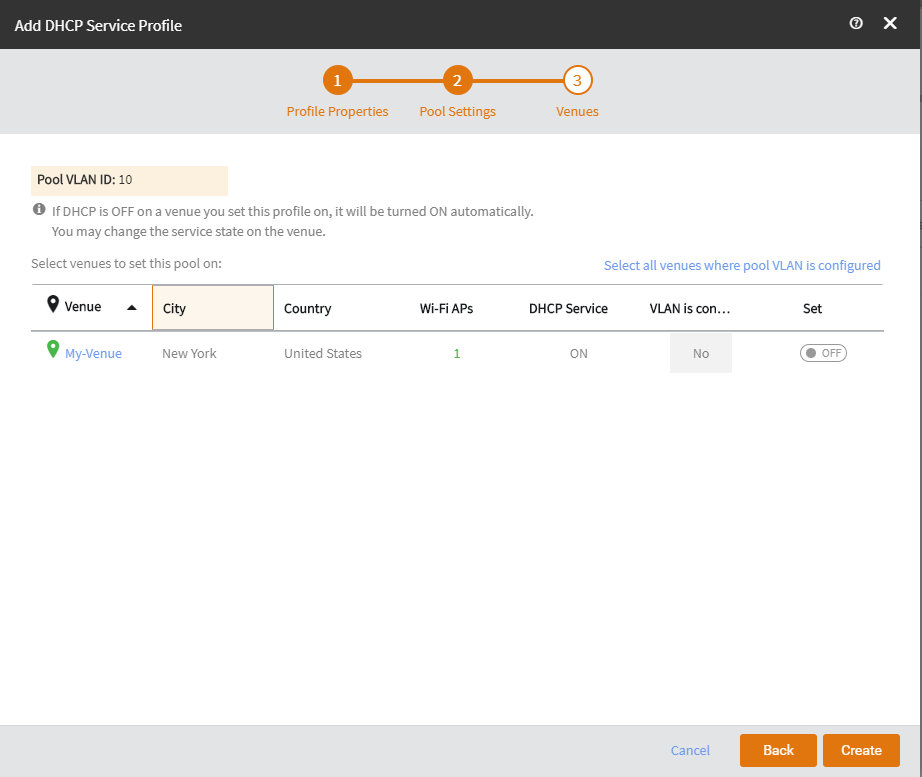
- Click Create.
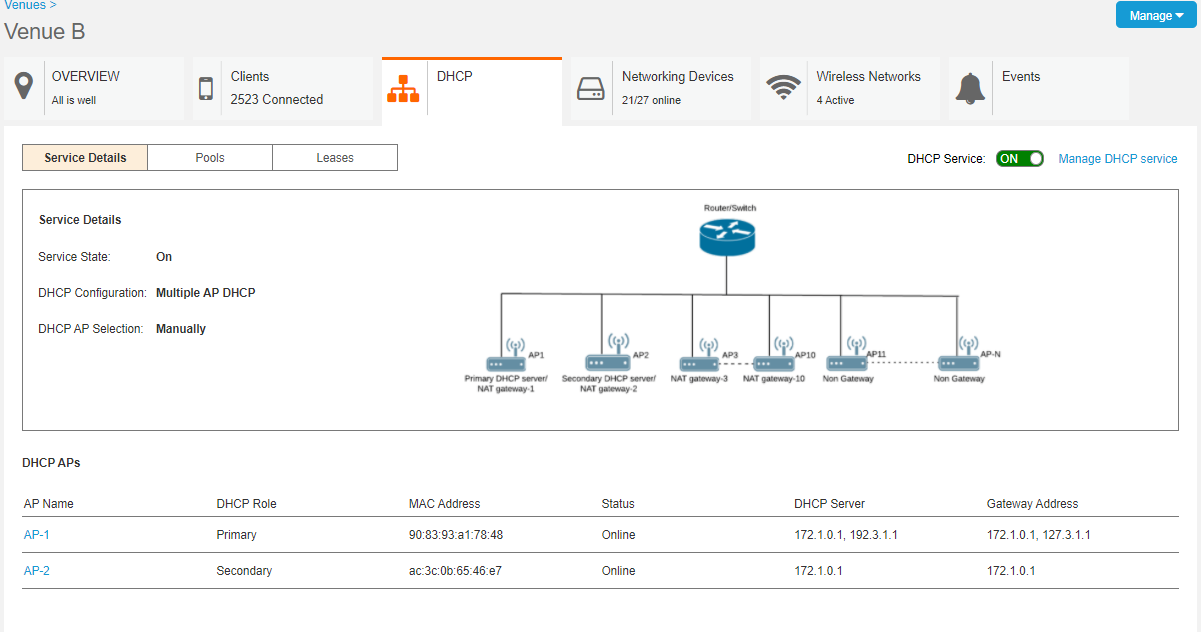
You can view the DHCP service details from the Venue Overview
page.
Viewing DHCP Serice Details