Importing DPSK Passphrases from a CSV File
Note:
- You must have permission to import passphrases for the selected DPSK service.
- Before importing DPSK
passphrases, ensure that the CSV file meets the following requirements:
- The file must be in CSV format, must not exceed 5 MB in size, and must contain no more than 10,000 entries.
- The file must include all required column headers from the downloaded template. Header names must match exactly.
- The file must contain at least one valid data row.
- Only one MAC address value is supported per row.
- When editing the file in Microsoft Excel, save it in CSV format and set all cells to Text to preserve UTF‑8 encoding.
-
Click the
Passphrases tab.
Passphrases Tab 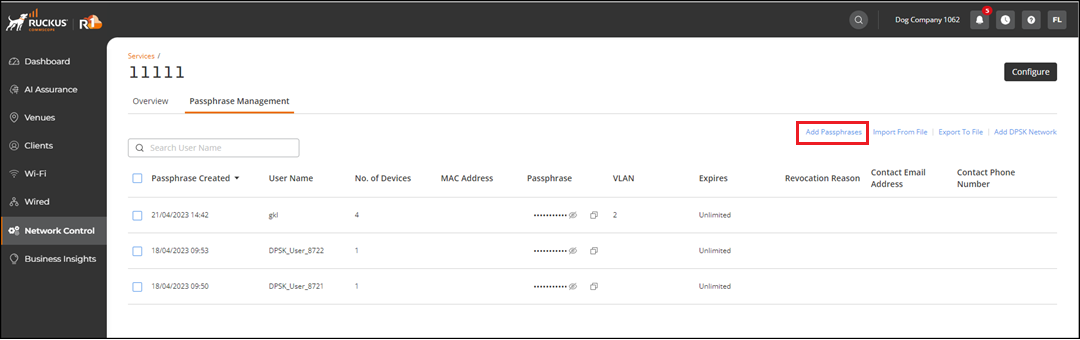
-
Select Import From
File.
The Import from file sidebar is displayed.
Import from file 
-
Click the Details link to
view the Activity Details sidebar.
Note: The toast notification remains on the screen until all import activities are complete.
Activity Details Sidebar 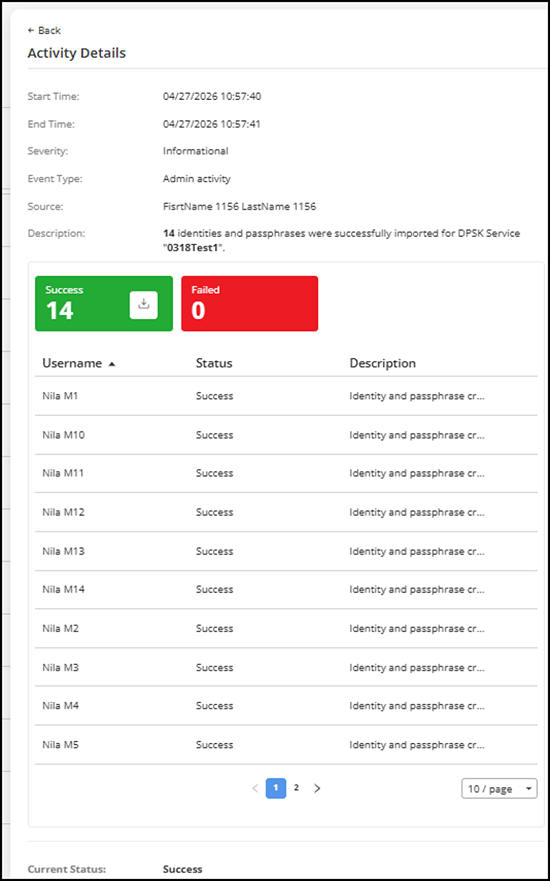
The Activity Details view refreshes automatically and displays information about the DPSK passphrase import.
The view displays the Start Time, End Time, Severity, Event Type, Source (the user who initiated the import), and a Description. While the import is in progress, the description shows the number of identities and passphrases being created and the overall completion percentage. After the import completes, the description displays the final number of successful and failed entries and includes the Download the error report link if failures occurred.
The Activity Details view includes the following status panels:- Success: Displays a green panel showing the number of identities and passphrases imported successfully.
- Failed: Displays a red panel showing the number of identities and passphrases that failed to import.
- In Progress: Displays a gray panel showing the number of identities and passphrases still being processed.
The table in the Activity Details view displays the import results for each entry:
- Username: Displays the username associated with the passphrase entry.
- Status: Indicates the import status for the entry. Status values include In Progress, Success, and Failed.
- Description: Displays the failure reason when an entry fails to import.
-
(Optional) You can download the
success report by clicking the
 icon on the Success panel. Similarly, you can download the error report by
clicking the Download
Error Report link in the Description field
or the icon on the Failed
panel.
The report file is downloaded to your local system. Review the error report, fix the failed entries in the CSV file, and re-import it to complete the process.Note: The reports are available for download for 24 hours after generation. After this period, download access is disabled.Note: The reports are also available for download in .
icon on the Success panel. Similarly, you can download the error report by
clicking the Download
Error Report link in the Description field
or the icon on the Failed
panel.
The report file is downloaded to your local system. Review the error report, fix the failed entries in the CSV file, and re-import it to complete the process.Note: The reports are available for download for 24 hours after generation. After this period, download access is disabled.Note: The reports are also available for download in .