To edit a DHCP service profile, follow
these steps.
On the navigation pane, click
Venues.
The Venues page appears. In the upper-right corner of the page,
click DHCP service
profiles
Alternatively, on the
Dashboard, click Services.
Select the DHCP tab.
In the DHCP page, select the DHCP that you want to modify and then click
Edit.
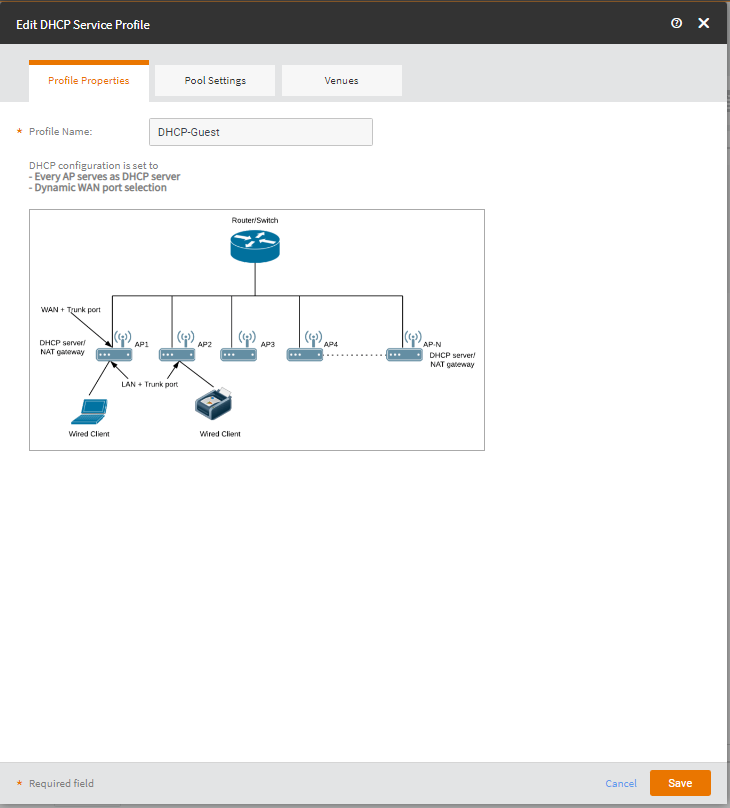
The Edit DHCP
Service Profile dialog box appears.Edit DHCP Service
Profile
In the Profile
Properties tab, you can edit the profile name by entering the a
new name in the Profile Name text box.
Click Save.
The Pool Settings page appears.
Edit he following and then click
Save.
Allowed Wired Clients
VLAN
ID
Subnet
Address
Subnet
Mask
Start IP
Address
End IP
Address
Primary DNS
IP
Secondary
DNS IP
Lease
Time
Click Save.
Click Select all
venues where pool VLAN is configured to apply the DHCP profile
to all venues or select the venue to set the pool on and toggle the
Set to ON.