From the RUCKUS Cloud web interface, you
can add RUKCUS ICX switches that are supported by RUCKUS Cloud.
To add an ICX switch to RUCKUS Cloud, follow
these steps:
Connect the switch that you want
to add to RUCKUS Cloud to a network that is connected to the Internet, and then
plug it into a power source to power it on.
On the navigation bar, click
Devices and then select Switch.
In the upper-right corner,
click Add.
The Add
Switch dialog box appears. Alternatively, from the Venue page, select a venue, select Devices , select
Switch, and then click Add. Adding a
Switch
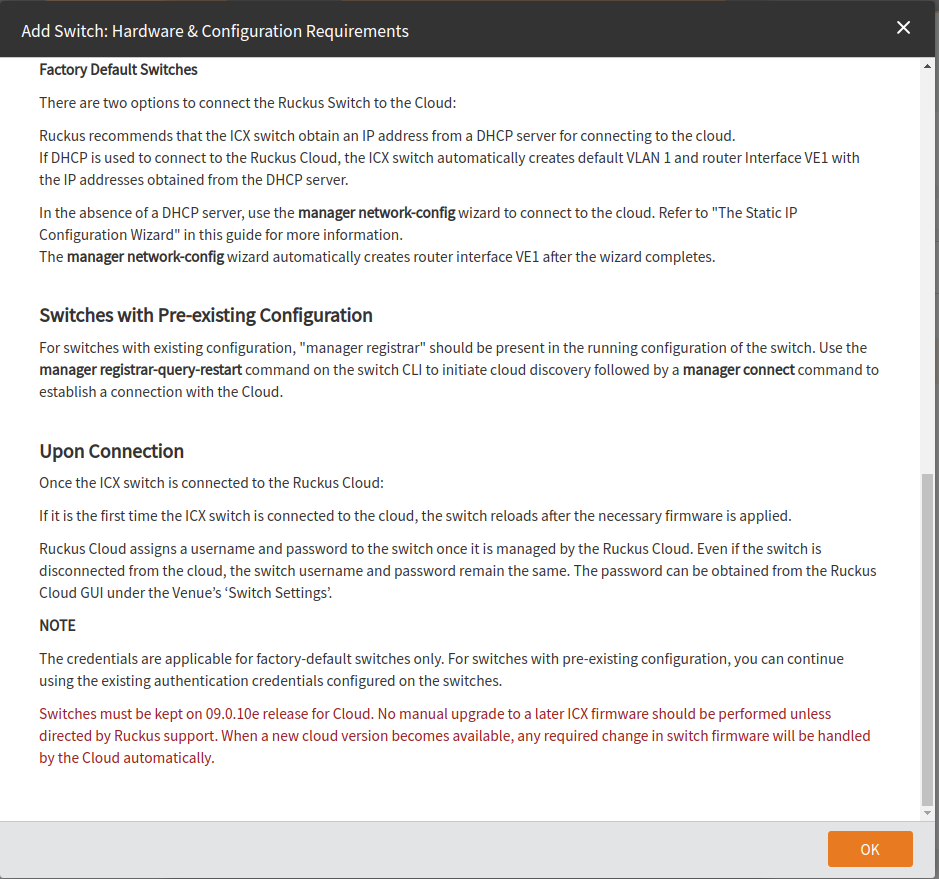
For more information
about the switch upgrade procedure, refer to the following figure.
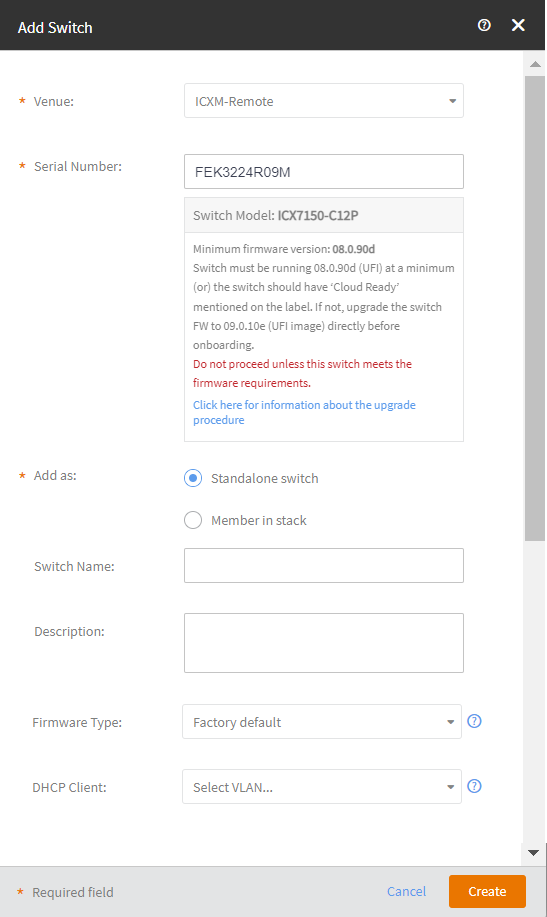
In the Add
Switch dialog box, complete the following fields:
Venue: Select the venue to which you want to deploy this
switch.
Serial Number: Enter the 11-digit valid serial number of
the switch.
Add
as: Select the switch as a Standalone switch or Member in
stack. Select a stack from the menu.
Switch
Name: (Optional) Assign a name to the switch.
Description:
(Optional) Add a brief description of the switch.
Choose a software image type either as a Switch or
Router from the Firmware Type
drop-down. By default, Factory default is loaded.
Note: Firmware type will only be applied to factory defaults switches. Switches
with the pre-existing configurations will not be affected by this settings
as to prevent loss of connectivity.
In the DHCP Client field, select a VLAN from the
Select VLAN drop-down.
Note: DHCP Client interafce will only be applied to factory defaults switches.
Switches with the pre-existing configurations will not get the change as to
prevent loss of connectivity.
Click
Create to add a switch.
When RUCKUS Cloud completes adding the
switch, the switch that you added is displayed on the below the Switch tab. Its Status column shows Never contacted cloud, then Initializing, which indicates
that the switch has been successfully added and is currently being updated with the
latest software from RUCKUS Cloud. When this update is completed, its Status column shows Operational.