Labels
Labels created in the organization network hierarchy can be used in Brand 360 dashboard to focus on dataset of interest. Labels can also be used with Data Studio reports to 'filter' the results to the narrow set required for analysis.
Labels help the brand to organize and monitor properties. A brand can create and attach a color-coded label to the properties managed by the partners. Depending on the business requirement, multiple properties managed by different partners can be grouped under a single label. Multiple labels can be attached for the same set of properties. Both partners and brand have the ability to create labels. The labels created from the partner's account are also displayed on the brand 360 dashboard. The color-coded labels help the brand to identify the properties managed by different partners spreading across different locations, sites, geographical regions, or networks. Labels can be used as filters to aggregate data across multiple partners.
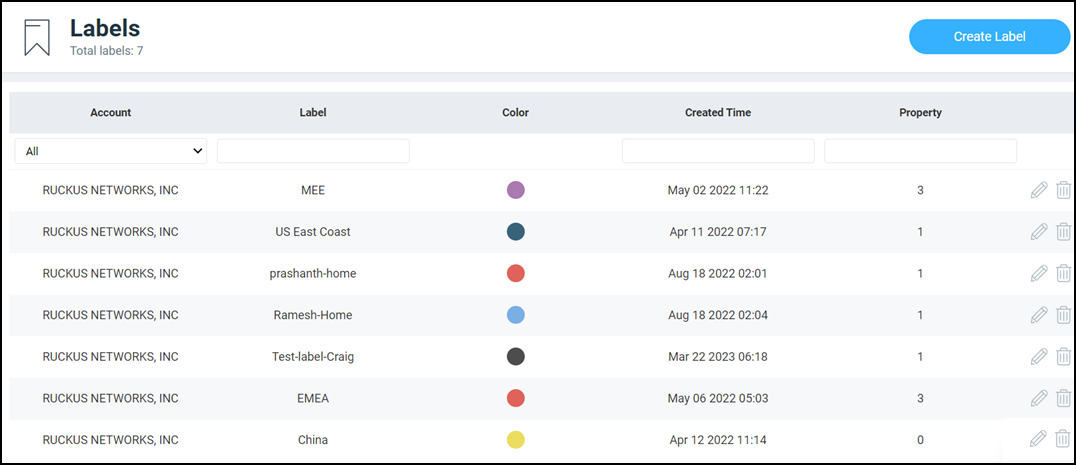
The Labels page
displays the number of labels and labels table. The table displays the attributes
such as user account, label, color, created time, and property. Under each attribute
is a search field to limit the labels list based on the search criteria. To create a
label, refer to Creating a Label section. All the created
labels are displayed in the labels table. Click the  icon
to edit a created label. Click the
icon
to edit a created label. Click the  icon
to delete the label. You can select the number of labels displayed in the table from
the Show rows drop down at the bottom of the table. The range
is from five labels per table to 200 labels per table.
icon
to delete the label. You can select the number of labels displayed in the table from
the Show rows drop down at the bottom of the table. The range
is from five labels per table to 200 labels per table.
Creating a Label
Complete the following steps to create a label.
- On the Navigation bar, click . The Label page is displayed.
- Click Create Label
icon. The Create Label dialog box is displayed.
Create Label Dialog BOx 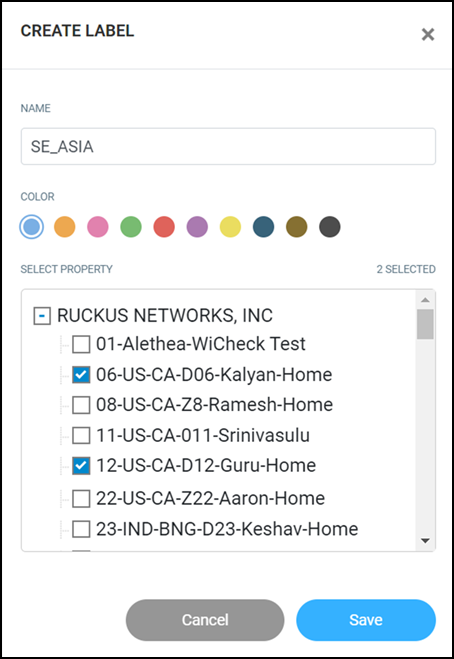
- Complete the following fields:
- Name: Enter a name for the label.
- Color: Pick a color for the label.
- Select Property: Select the property that you want to attach to the labels.
- Click Save to create the label.