Security Settings
- From the navigation pane, click Venues.
- Select a venue to go to the Wi-Fi Settings page.
- Click Settings on upper-right corner and then select Wi-Fi Settings from the drop-down.
-
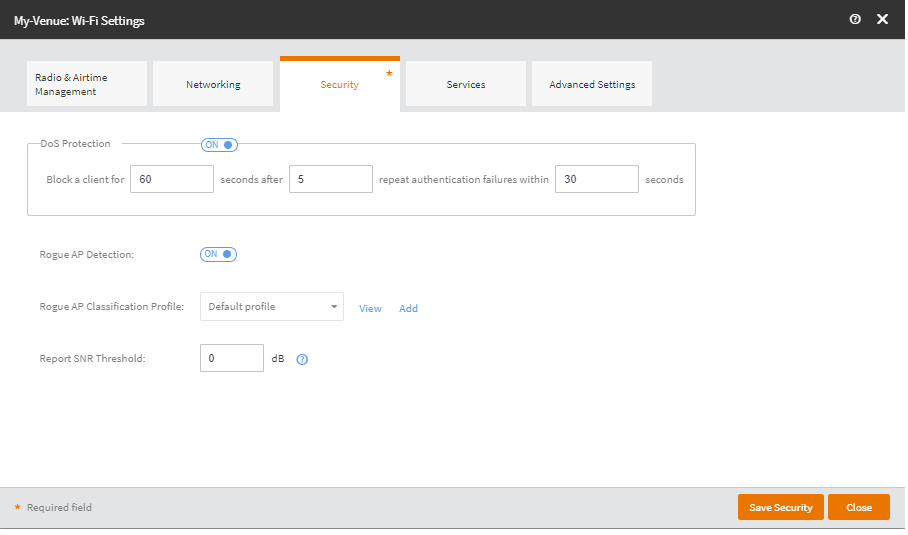
Select the Security tab.
The Security page appears.
Security Settings 
- Switch the DoS Protection button to ON. By defaut, this button is set to OFF.
- Specify the time in the Block a client for field, seconds after field, and repeat authentication failures within field.
- Switch the Rogue AP Detection button to ON.
- Select a Rogue AP Classification Profile from the drop-down.
-
Click View to review the Rogue AP classification
profile.
The View Rogue AP Classification Profile dialog box appears. The Rogue AP Classification Profile page has two sub-tabs: Profile Settings and Classification Rule.
-
Click Add to add a Rogue AP classification profile.
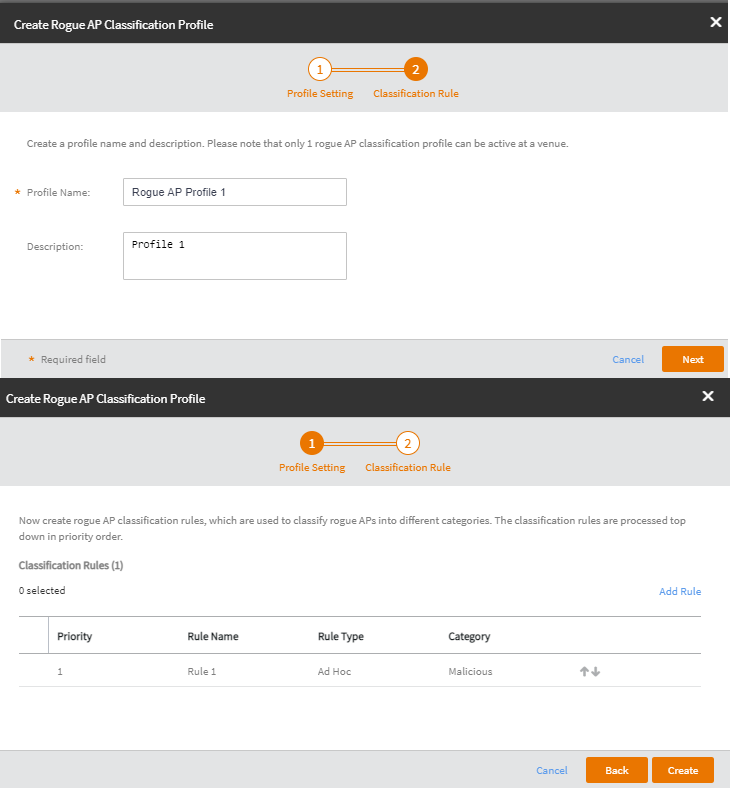
The Create Rogue AP Classification Profile dialog box appears.
Create Rogue AP Classification Profile 
- Enter a name in the Profile Name field and add the profile description in the Description field.
- Click Next.
-
In the Classification Rule page, click Add
Rule.
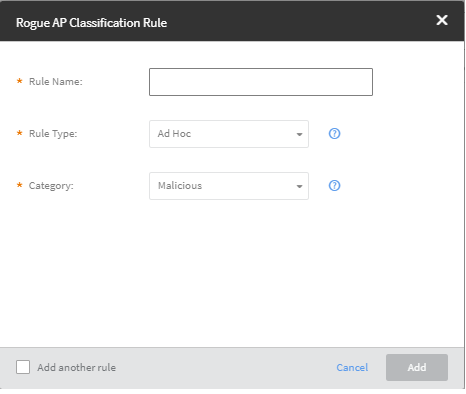
The Rogue AP Classification Rule dialog box appears.
Rogue AP Classification Rule 
- Add a name in the Rule Name filed.
-
Select the type of rule from the Rule Type
drop-down.
- Ad Hoc
- CTS Abuse
- Deauth Flood
- Disassoc Flood
- Excessive Power
- Low SNR
- MAC OUI
- MAC Spoofing
- Null SSID
- RTS Abuse
- Same Network
- SSID
- SSID Spoofing
-
Select a category from the Category dorp-down.
You can select one of the following.
- Ignored
- Known
- Unclassified
- Malicious
- Click Add to add the rule and return to the Rogue AP Classification Profile page.
- Click Create.
- Specify the value for the Report SNR Threshold. The range is from 0 to 100.
- Click Save Security, and then click Close.