If you want the Wi-Fi radio settings of a
venue to be different from the default radio settings, you can override them for a
particular venue. In addition, set the external atnena.
Note: The 2.4 GHz and 5 GHz radio settings,
although very similar, must be configured separately.
Complete the following steps to customize the radio settings of a venue.
From the navigation pane, click
Venues.
Select a venue to go to the
Wi-Fi Settings page.
Click Settings on
upper-right corner and then select Wi-Fi Settings from the
drop-down.
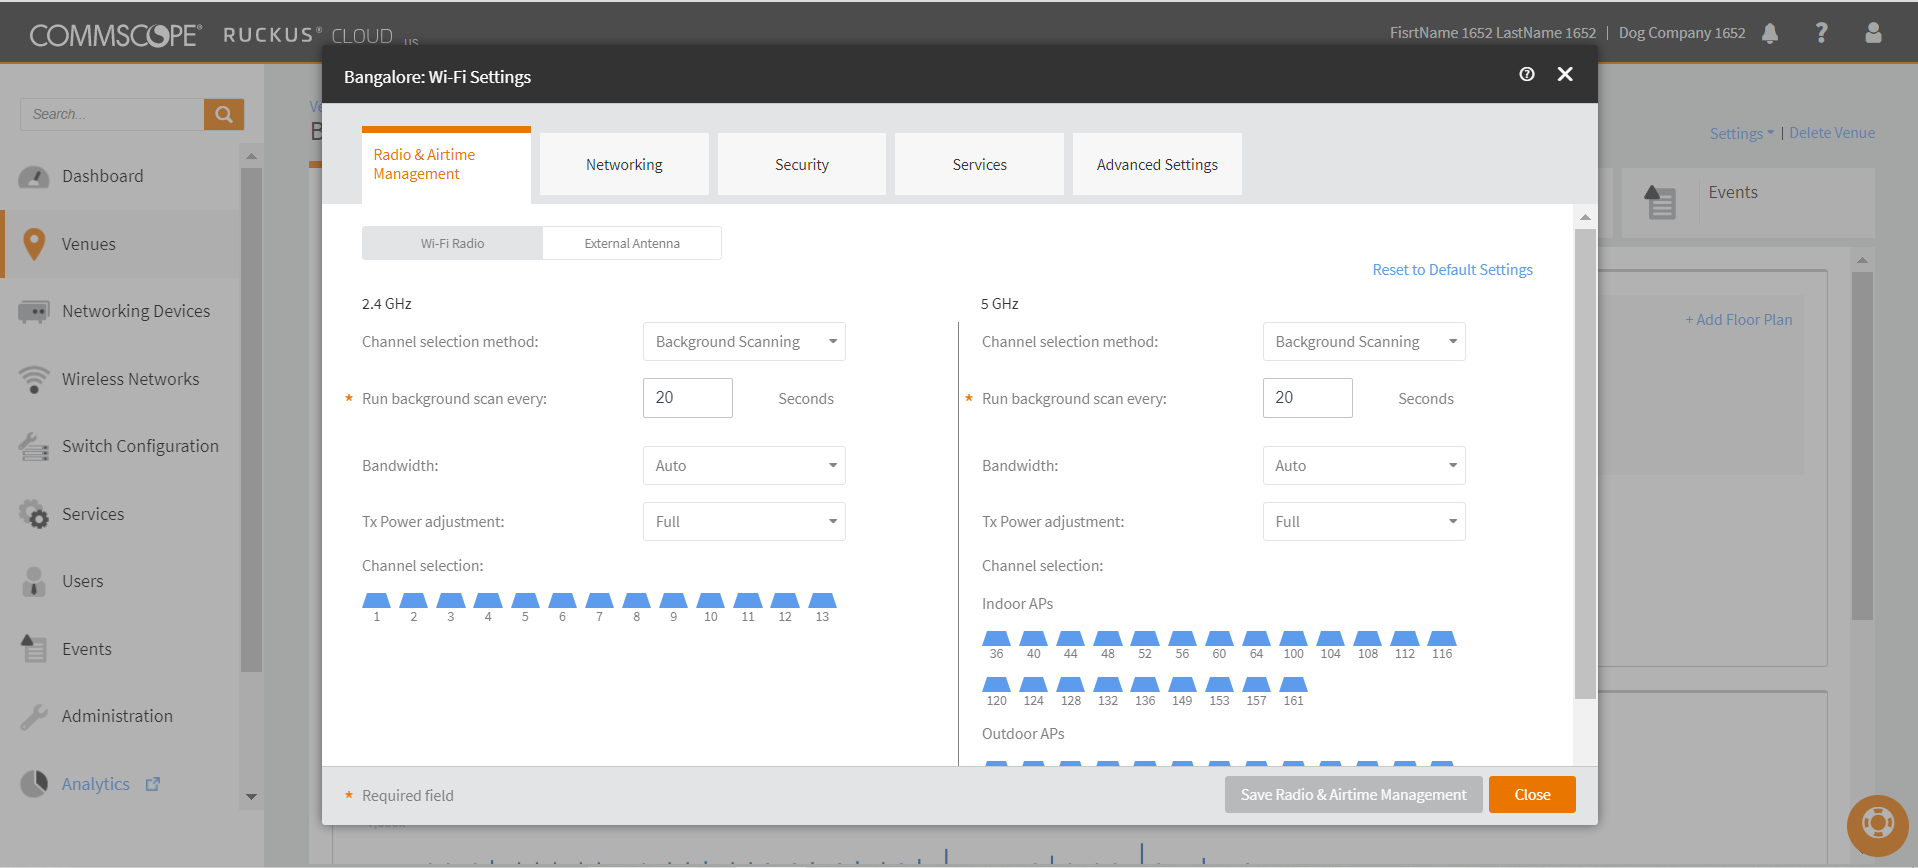
The Radio
& Airtime Management page appears.Radio & Airtime
Management Settings
Select the Wi-Fi Radio sub-tab.
Configure the following settings for both the 2.4 GHz and 5 GHz radios:
Channel Selection Method: Select either
Background Scanning or
ChannelFly.
Run background scan every [ ] seconds: If you selected
Background Scanning, interval at which Ruckus Cloud will run the scan. The interval ranges from 1 through 65535 seconds. The default is 20 seconds.
Bandwidth: Select
Auto,
20 MHz, or
40 MHz channel width for the 2.4 GHz radio, or
Auto,
20,
40,
80, or
160 MHz channel width for the 5 GHz radio.
Tx Power Adjustment: Manually set the transmit power on all 2.4 GHz or 5 GHz radios. The default is
Max.
Channel Selection: A blue icon above the channel number indicates that the channel is enabled for the radio. If there are channels that you do not want the radio to use, disable them by clicking their respective icons. When a channel is disabled, its blue icon changes to gray.
Note: For the 5 GHz radio, you must configure a different set of channels for indoor APs and outdoor APs.
Click Save Radio & Airtime
Management, and then click Close.
(Optional) Click Reset to Default Settings to revert to
default settings.
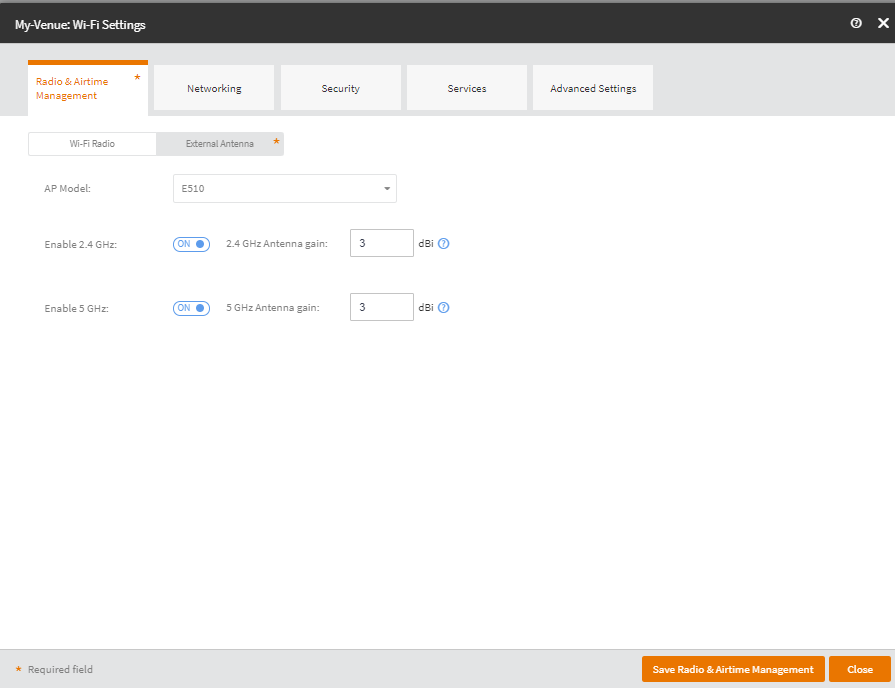
Complete the following steps to customize the external antenna settings.
After Step 3, select the Extenal Antenna sub-tab.
External Antenna Settings
Select an access point from the AP Model drop-down.
(Optional) Switch the Enable 2.4 GHz option to
ON. By default, this option is set to
OFF.
Set a value for the 2.4 GHz antenna gain field.
(Optional) Switch the Enable 5 GHz option to
ON. By default, this option is set to
OFF.
Set a value for the 5 GHz Antenna gain field.
Click Save Radio & Airtime Management, and then
click Close.