Adding and Managing the Brand Property
After setting up the customer portal, you can add brand properties and assign Integrators or Installers to them.
Note: For information on how to set up a
customer portal, refer to Setting Up a Customer Portal.
-
On the Brand
Properties page, click Add Property.
The Add Brand Property Account page is displayed.
Adding Brand Property Account 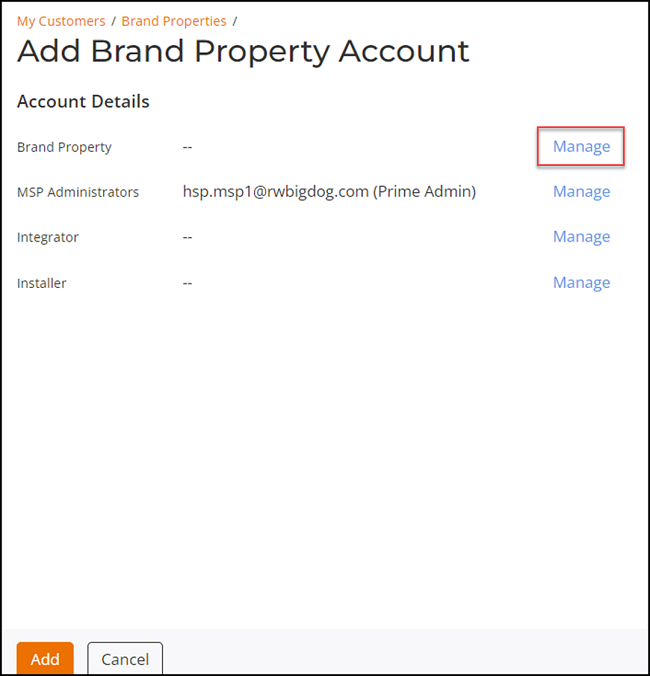
You can click Manage next to Brand Property, MSP Delegations, Integrator, and Installer to manage these attributes.
-
Click
Manage next to Brand
Property.
The Manage Brand Property sidebar is displayed, with all existing brand properties with the same HSP brand name, along with their property IDs and addresses, that do not already have a RUCKUS One account managed in the brand MSP.
Manage Brand Property 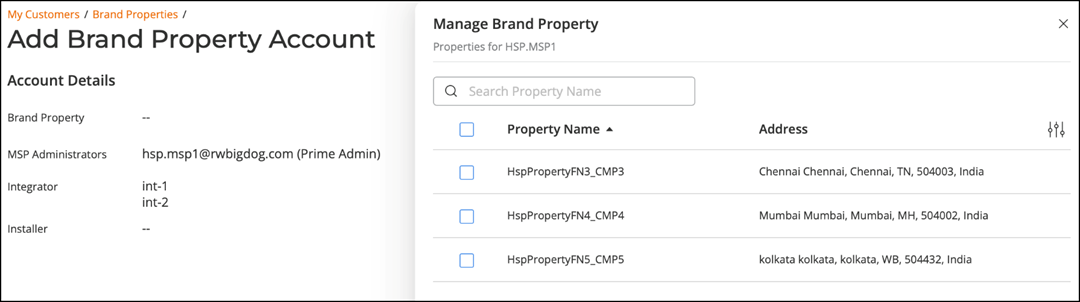
-
(Optional) You can manage the
Brand Properties page using the following
options:
Brand Properties - Property Management Options 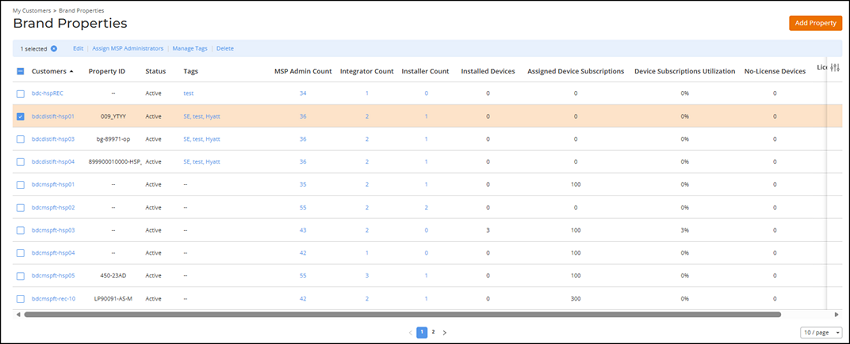
- Edit:
Click the checkbox alongside the customer name and click EditThe Brand Property Account page is displayed. Modify the following configuration settings, as necessary:
- Enable
access to Ruckus SupportNote: If checked, the Ruckus Support team is granted temporary administrator-level access for 21 days. Enable when requested by the Ruckus Support team.Note: When editing a brand property, a user with Prime Administrator permission can masquerade to the brand property and override the application recognition and control (ARC) settings, but this applies only to newly added WLANs. Refer to Configuring Privacy Settings for more information on ARC modification.
- Enable
access to Ruckus Support
- Assign MSP Delegation: Click the checkbox alongside the customer name and click Assign MSP Delegation. Refer to Assigning MSP Administrators to Multiple End Customers for more details.
- Manage
Tags: Click the checkbox alongside the customer name and
click Manage
Tags.
The Manage Tags sidebar is displayed.
Add tags by typing in the Tags field.Note: You can add up to 20 tags per End Customer, and each tag must begin with an alphabet, be no longer than 60 characters, use only letters (A–Z, a–z), numbers (0–9), or the special characters (such as -, #, :, ., $, *, and _) and cannot contain spaces. - Delete:
Click the checkbox alongside the customer name and click Delete.
A delete configuration confirmation dialog box appears. Type the word Delete to confirm. Click Delete Property to confirm deletion.Note: When a brand property is removed from a Brand 360 portfolio, RUCKUS One generates a webhook notification for subscribed endpoints.
- Edit:
Click the checkbox alongside the customer name and click Edit
You can click Manage My Account to go to the tenant portal for your own RUCKUS One and view brand property activities under .
For more instructions on how to manage and monitor networks and devices, refer to MSP User Operations.