Adding a Switch

Complete the following steps to add a switch to your RUCKUS Cloud account.
  1. Connect the switch that you want to add to RUCKUS Cloud to a network that is connected to the Internet, and then plug it into a power source to power it on.
  2. On the Dashboard, click Networking Devices and select the Switch tab.
  3. Click Add Switch in the upper-right corner.
    The Add Switch dialog box is displayed. Alternatively, from Venue page, select a venue, select Networking Devices , select Switch, and click Add Switch.
    Adding a Switch

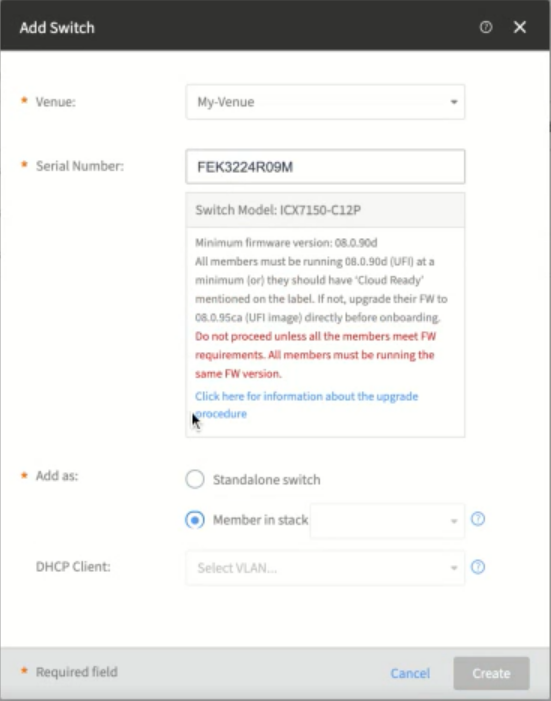
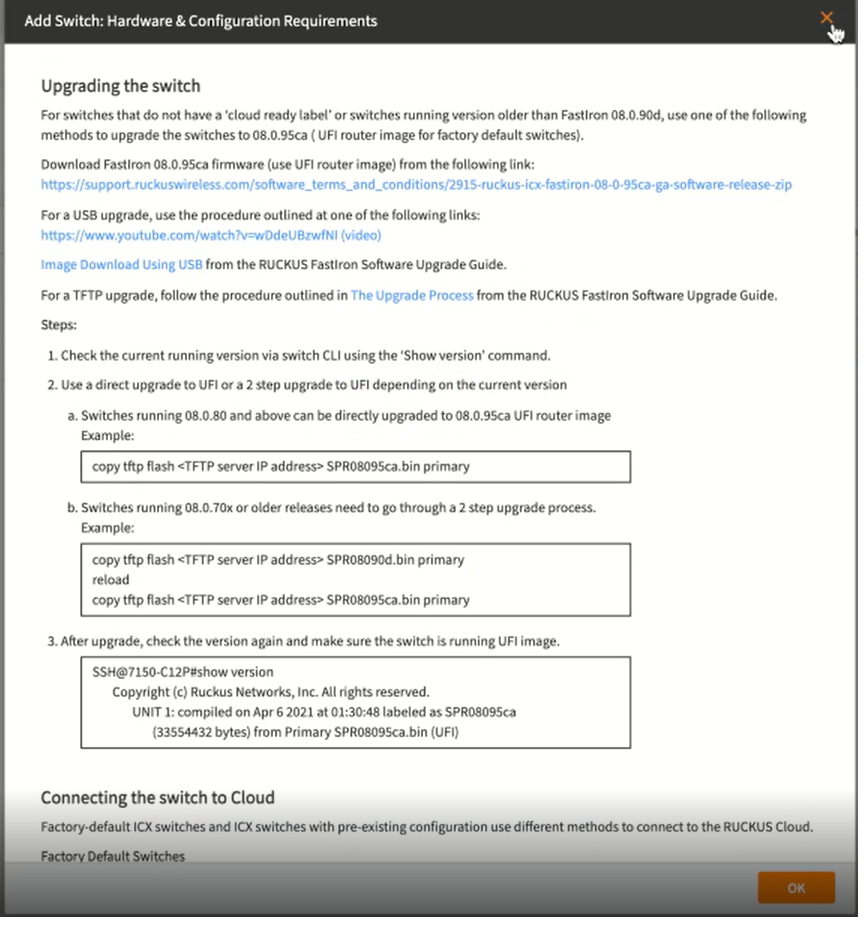
    For more information about the switch upgrade procedure, refer to the following figure.

    Hardware & Configuration Requirements
  4. Complete the following fields to add a switch:
    • Venue: Select the venue to which you want to deploy this switch.
    • Serial Number: Enter the 11-digit valid serial number of the switch.
    • Add as: Select the switch as a Standalone switch or Member in stack. Select a stack from the menu.
    • Switch Name: Assign a name to the switch. This field is required only for a standalone switch.
    • Description: (Optional) Add a brief description of the switch. This field is required only for a standalone switch.
  5. Click Create to add a switch.
When RUCKUS Cloud completes adding the switch, the switch that you added is displayed on the below the Switch tab. Its Status column shows Never contacted cloud, then Initializing, which indicates that the switch has been successfully added and is currently being updated with the latest software from RUCKUS Cloud. When this update is completed, its Status column shows Operational.