To edit CPI details, follow these steps.
-
On the Dashboard, click
Administration.
-
On the
Administration page, click the
CPI Details tab.
The existing CPI details such as CPI Name, CPI ID, and private key are displayed under the
CPI Details.
-
Click
Edit.
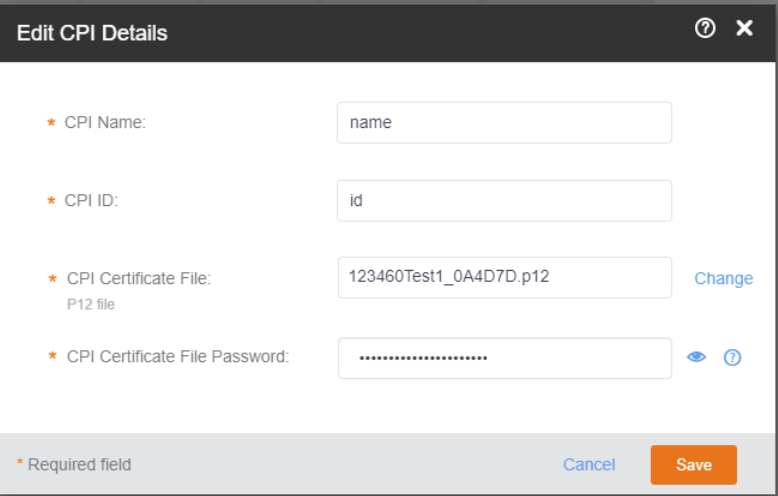
The
Edit CPI Details dialog box appears.
-
You can edit the following: field.
-
CPI Name: The name of the CPI.
- CPI ID: The ID of CPI.
- CPI Certificate File (P12 file): The CPI certificate file. Click
Change to select and upload another CPI certificate file from your computer.
- CP Certificate File Password: The password for the CPI file.
-
Click
Save to save the updated CPI details.
Note: The CPI details are saved in the browser only. You must add the CPI details again after closing the session or reloading the page.
-
(Optional) Click
Delete to remove the CPI details.
You have completed editing CPI details.