Turning AP LEDs ON/OFF
To turn on or off AP LEDs, follow these steps.
-
Click an AP name to view details about the AP.
The Overview page of the AP appears. Under the AP Properties section, you can see the status of the AP LEDs. You can click More to expand the AP Properties to view the status of the AP LEDs . to By default, the AP LEDs are set to ON. You can also configure the AP LEDs at the Venue level. The AP LEDs status is displayed as Same As Venue, if the default value of the associated venue is inherited by the AP. If the AP LEDs setting is different from the venue the AP is associated with, the AP LEDs status is displayed as Customized.
Access Points Overview 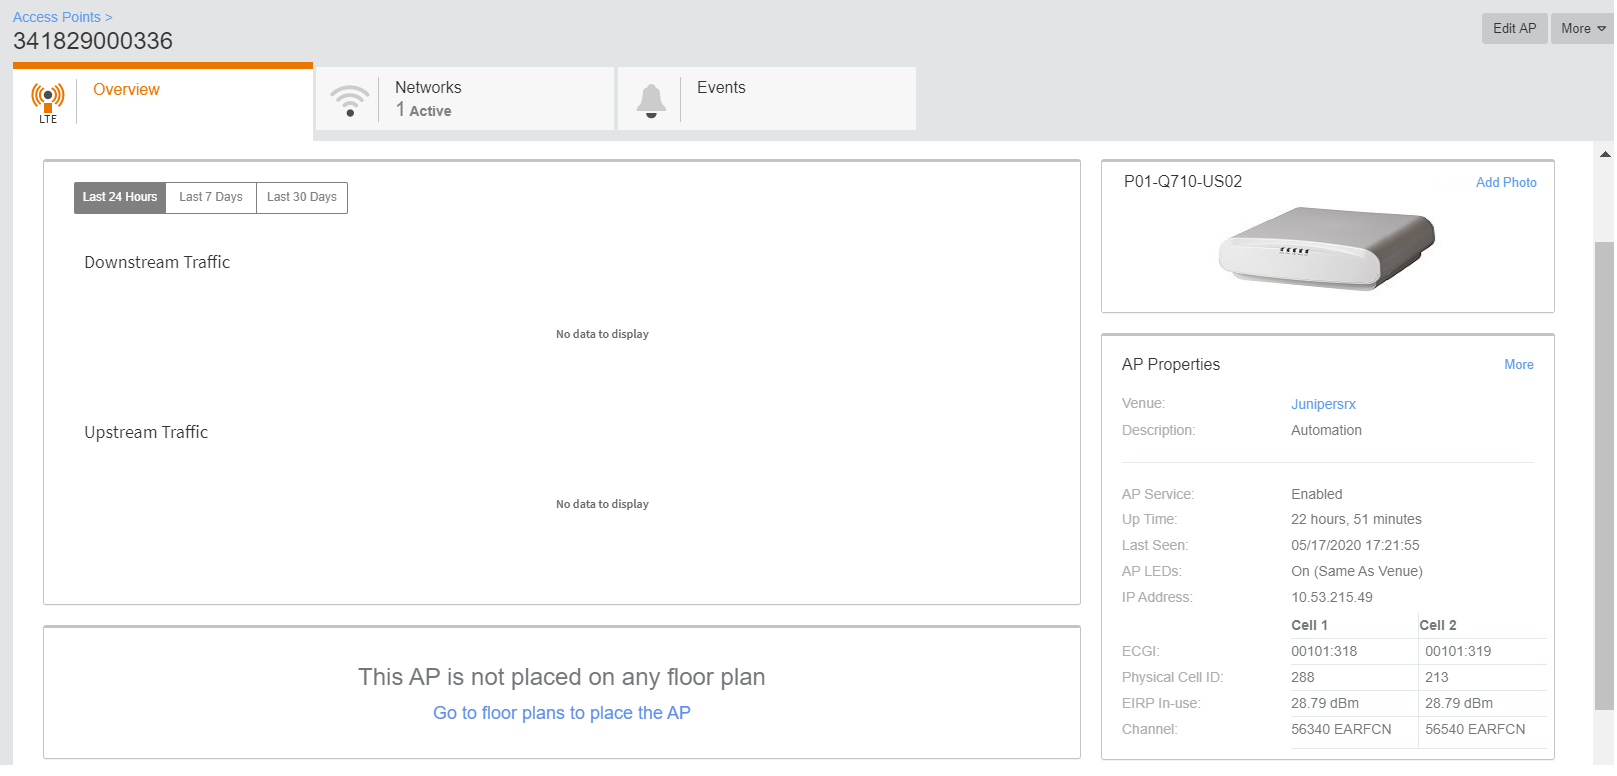
-
From the upper-right corner of the AP
Overview page, click
More to access the AP LEDs configuration option.
A drop-down menu appears.
AP Settings 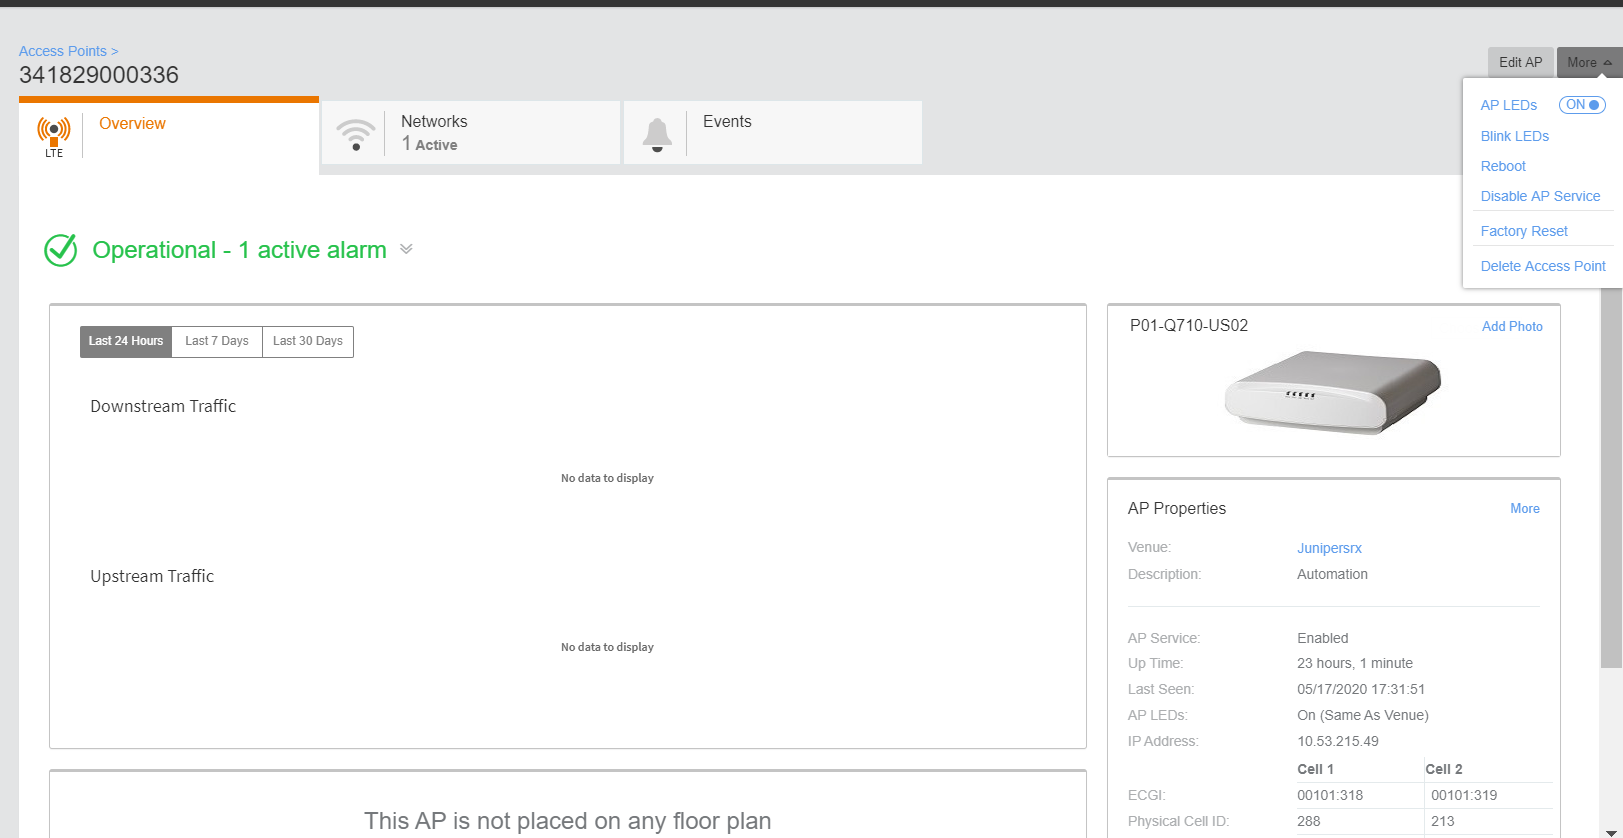
-
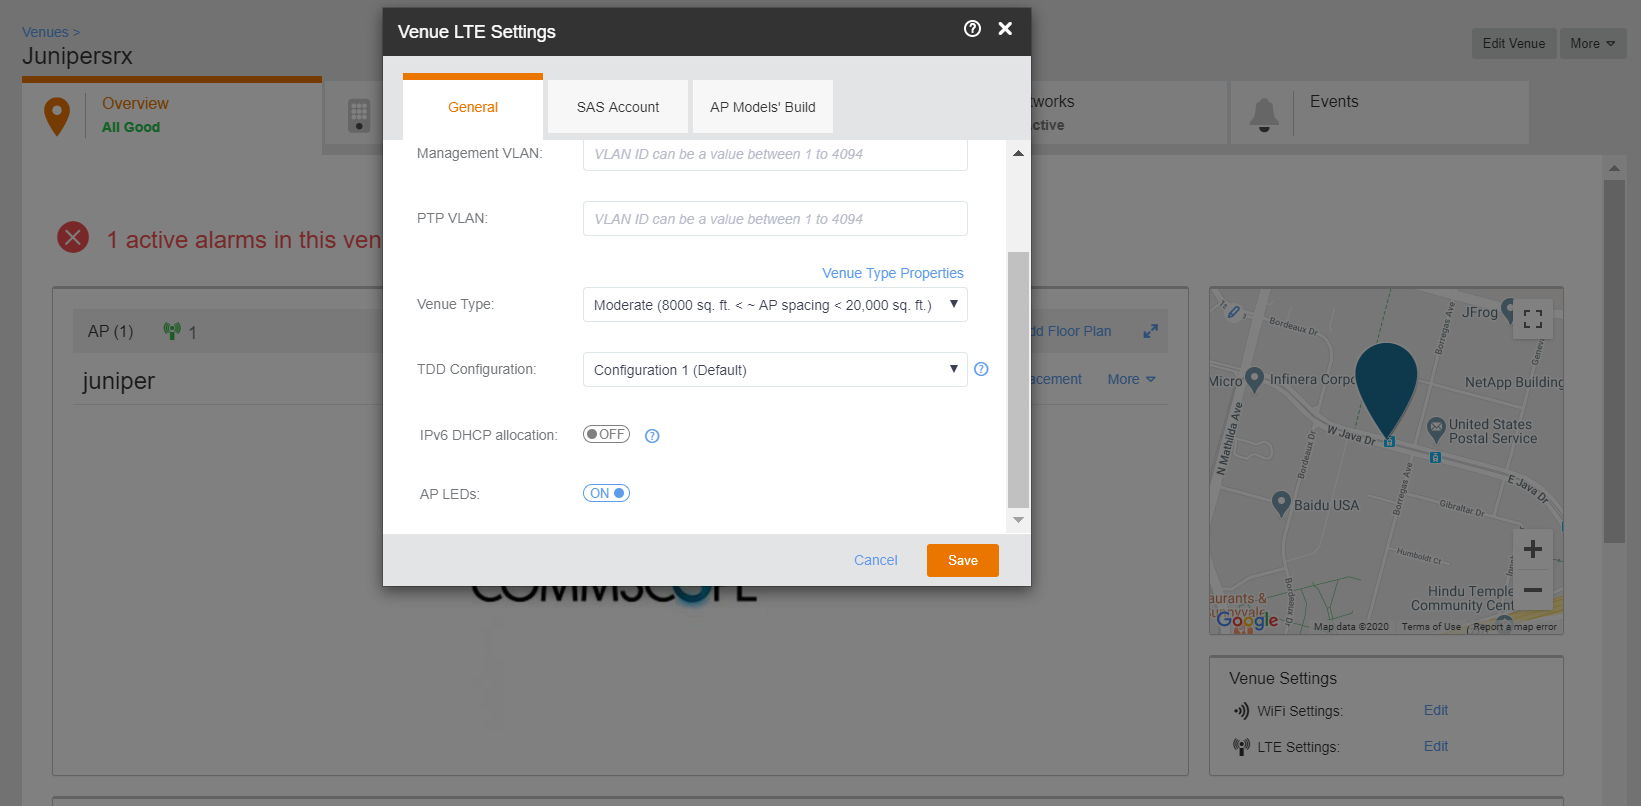
From the bottom-right corner click
Edit for
LTE Settings.
The Venue LTE Settings dialog appears.
Venue LTE Settings