Editing an AP Group
You can edit an AP Group if you want to change its venue, the group name, and add or remove APs from the group.
-
On the navigation bar, click
Wi-Fi > Access
Points > AP Group
List.
The Access Points page is displayed. By default, the AP Group List tab is selected.
-
Select the checkbox next to the
AP group name and click Edit.
Alternatively, you can click the AP group name and click Configure.
The Edit AP Group page is displayed.
Edit AP Group 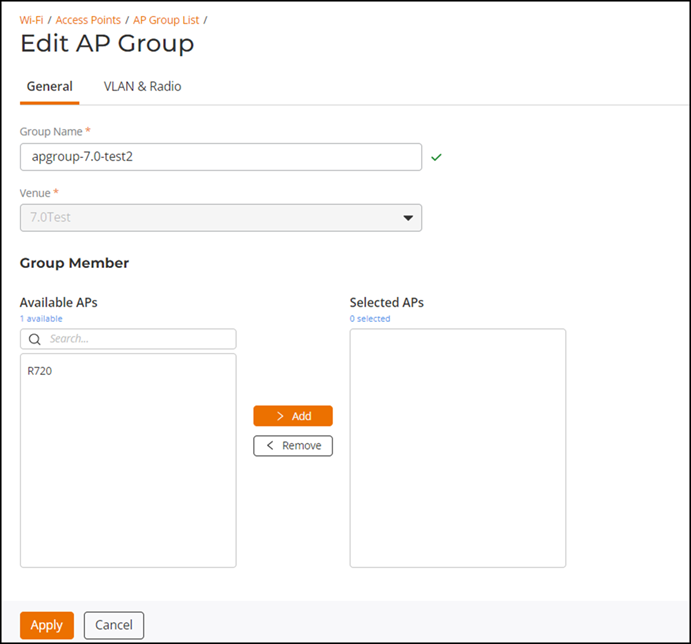
-
In the
General tab, you can edit any of the following fields:
- Group Name: Enter a name for the AP group. You can use a department name or another name that identifies the AP Group. No special characters are allowed. Spaces are allowed only between the name.
- In the Group Members section, you can select from the available APs and AP groups. To add an AP or AP group, select the AP name or group from the Available APs column and click Add.To remove an AP or AP group, select the AP from the Selected APs column and click Remove AP.
-
In the
Radio tab, select Wi-Fi Radio from
the left panel and edit the required fields:
- Wi-Fi Radio Settings:
In Wi-Fi 6/7 band
management, select Use inherited
settings from Venue to apply Venue-level radio settings
or Customize
settings to allow editing radio settings for this AP
Group. Selecting Customize
settings enables Add Model
hyperlink.
- Click Add
Model. In the Wi-Fi Band
Management sidebar, select the Model and Band
Operation Mode from the drop-down. The
Band Operation Mode options are Dual-band or Tri-band. Dual-band is for 2.4 and 5 GHz bands,
and tri-band is for 2.4, 5, and 6 GHz bands. For more
information, refer to Switchable Radio Frequency Support.Note: Only AP models that support band management are included in the drop-down menu and can be configured (such as R670, T670, and R760 APs).
A warning message "Modifying the band operation mode will reboot the AP and the Mesh connection will also be disconnected when rebooting" is displayed. Click Add to add the AP model.
- Click Add
Model. In the Wi-Fi Band
Management sidebar, select the Model and Band
Operation Mode from the drop-down. The
Band Operation Mode options are Dual-band or Tri-band. Dual-band is for 2.4 and 5 GHz bands,
and tri-band is for 2.4, 5, and 6 GHz bands. For more
information, refer to Switchable Radio Frequency Support.
- Choose the bands for the AP group to operate from: 2.4 GHz, 5 GHz, and 6 GHz.
- Choose the band (2.4 GHz, 5 GHz, or 6 GHz) you want to configure. For the selected band, choose how the settings are applied: Use inherited [band] settings from Venue or Customize [band] settings.
-
Configure the radio parameters (band-specific options will appear):
- Channel Selection Method: Select either ChannelFly, Manual channel selection, or Background Scanning.
- Channel Change Frequency: This option is displayed only if you select the Channel Selection Method as ChannelFly. Adjust the frequency between 1-100. By default, 33 is selected.
- Run background scan every [ ] seconds: If you selected Background Scanning, the interval at which RUCKUS One runs the scan ranges from 1 through 65535 seconds. For 2.4 GHz and 5 GHz, the default is 20 seconds.
- Bandwidth: Select Auto, 20 MHz, or 40 MHz channel width for the 2.4 GHz radio, or Auto, 20 MHz, 40 MHz, 80 MHz, or 160 MHz channel width for the 5 GHz radio, or Auto, 20 MHz, 40 MHz, 80 MHz, 160 MHz, or 320 MHz channel width for the 6 GHz radio.
- Transmit Power Adjustment: Select the transmit power adjustment from the drop-down list. The default setting is Full.
- Channel
Selection: A blue icon above the channel
number indicates that the channel is enabled for the radio.
If there are channels that you do not want the radio to use,
disable them by clicking their respective icons. When a
channel is disabled, its blue icon changes to gray. Note: For the 5 GHz, Lower 5 GHz, and Upper 5 GHz bands, you must configure a different set of channels for indoor APs and outdoor APs.Note: For 6 GHz bands, the channel range for both indoor and outdoor Access Points (APs) can be configured individually to distinguish indoor and outdoor channel ranges, considering the diverse channel availability across different countries. APs located within the venue can adopt these indoor or outdoor channel configurations based on their model’s capabilities, provided they are set to use the venue’s settings.
- Configure 6 GHz-only
options (if 6 GHz is selected):
- BSS Min Rate: Set the lowest allowed client data rate. Select HE MCS 0, HE MCS 1, HE MCS 2, or HE MCS 3 from the drop-down list.
- Mgmt Tx Rate: Set the transmit rate for management frames. Select 6 Mbps, 9 Mbps, 12 Mbps, 18 Mbps, or 24 Mbps from the drop-down list.
- Multicast Rate Limiting: Toggle the
switch on to enable the feature, which controls the maximum
upload and download speeds for multicast traffic on the network.
When enabled, you can configure separate bandwidth limits for
multicast upload and download using the sliders.
- Upload Limit: Apply a limit on multicast upload traffic. Use the slider to set the maximum upload rate (for example, 20 Mbps). The value can be configured between 1 Mbps and 100 Mbps.
- Download Limit: Apply a limit on multicast download traffic. Use the slider to set the maximum download rate (for example, 3 Mbps). The value can be configured between 1 Mbps and 3 Mbps.
- Indoor / Outdoor APs: Select allowed channels based on AP type.
- Client Admission
Control: APs adaptively allow or deny new client
connections based on the connectivity thresholds set per radio. Select
Use
inherited settings from Venue or Customize
settings. You can also enable 2.5 GHz or 5 GHz radio,
however, this disables band balancing and load balancing on the AP.
- Toggle the
2.4 GHz or 5
GHz switch on to enable Client Admission for
that band, or off to disable it. Once enabled, adjust the
sliders for each enabled band:
- Min client count: Minimum number of clients required before admission rules apply.
- Max radio load (%): Limit the radio load to prevent oversubscription.
- Min client throughput (Mbps): Ensure a minimum throughput for connected clients.
- Toggle the
2.4 GHz or 5
GHz switch on to enable Client Admission for
that band, or off to disable it. Once enabled, adjust the
sliders for each enabled band:
- Antenna: Choose how settings are applied by selecting either Use inherited settings from Venue or Customize settings, then select the AP model from the dropdown to view the antenna configuration.
- Wi-Fi Radio Settings:
In Wi-Fi 6/7 band
management, select Use inherited
settings from Venue to apply Venue-level radio settings
or Customize
settings to allow editing radio settings for this AP
Group. Selecting Customize
settings enables Add Model
hyperlink.
- Click Save.