MSPs with valid licenses can customize
their customers' portal for branding and support. Before adding a customer, you must set up
the customer's portal.
To set up a portal for a customer, perform the following
steps.
From the
Customer tab, click Set-up your customer's
portal.
For MSPs that operate in North
America, Europe and other regions, customer portal needs to be set for each
region.
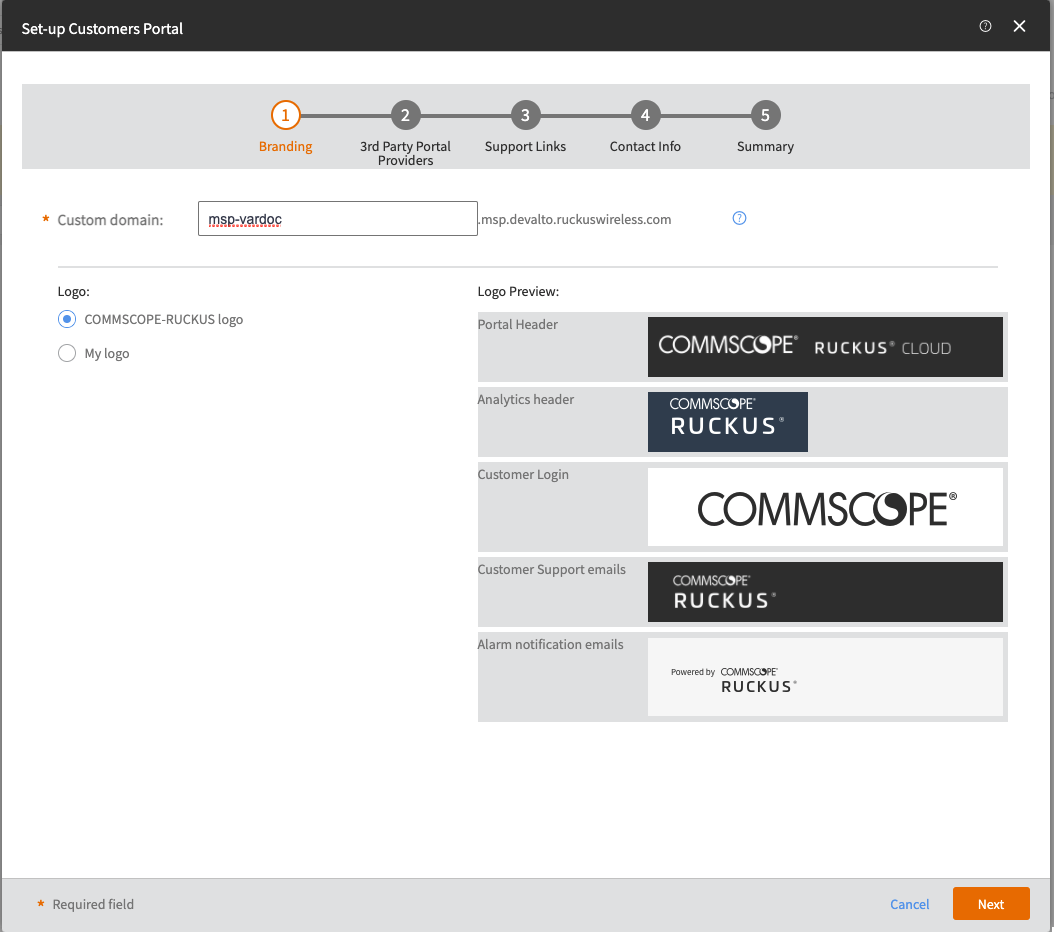
The Set-up
Customers Portal page box appears.
Enter a desired domain name, in
the Custom
domain field.
Note:
The domain name will be
followed by .msp.ruckus.cloud. RFC-1035 describes the permitted syntax for the
domain.
In the Logo
section, choose either COMMSCOPE-RUCKUS logo, or My logo to
customize your branding. Click Add Logo to upload a logo
with the recommended size of 125x41 pixels, transparent image to
highlight the MSPs brand. You can add different logos for portal header,
analytics header, customer login, customer support emails, and alarm
notification emails. After previewing the logos, click
Next.
In the 3rd-Party Portal Provider page, select a preferred
portal provider from the Select Portal Provider drop-down
and then click Next.
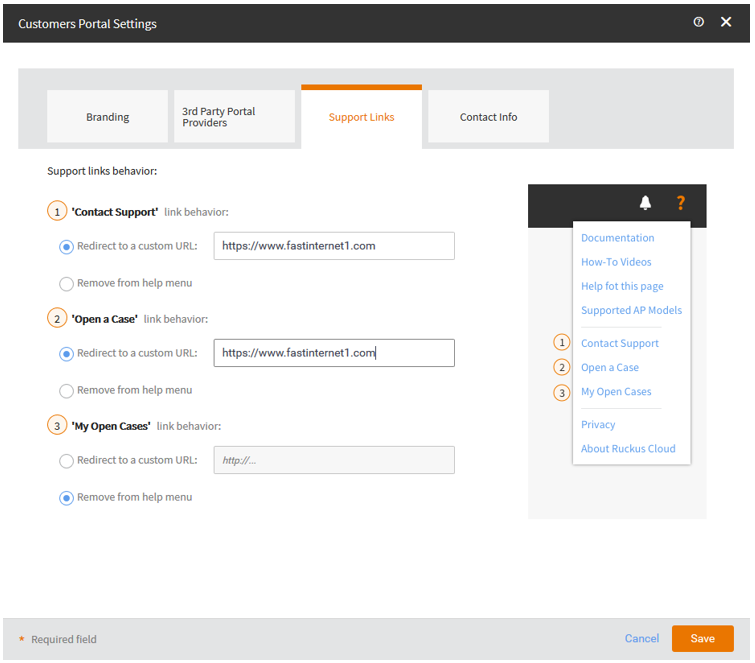
The Support Links page appears. Support Links
In the Support Links dialog, enter the URLs, specify their behaviors
and then click Next.
If you are an MSP providing support to your customers without getting RUCKUS
involved, you can customize support URLs for contact, open cases and existing
cases.
For the Contact Support link
behavior, enter a URL in the Redirect to a custom
URL field or click Remove from help
menu.
For the Open a case link
behavior, enter a URL in the Redirect to a custom
URL field or click Remove from help
menu.
For the My Open cases,
enter a URL in the Redirect to a custom URL field or click Remove from help
menu.
In the Contact
Info page, enter the contact number, email, and website.
Contact information for the email footer:
Phone: Your contact number.
Email: A valid email address.
Website: Enter the URL of your company's website.
In the Summary page, review the information that you have provided for
the customer's portal settings and then click Done.