Adding an Integrator or Installer Account
MSP Administrators can create a new role, an Integrator or Installer, and assign them with the task of managing MSP-ECs.
-
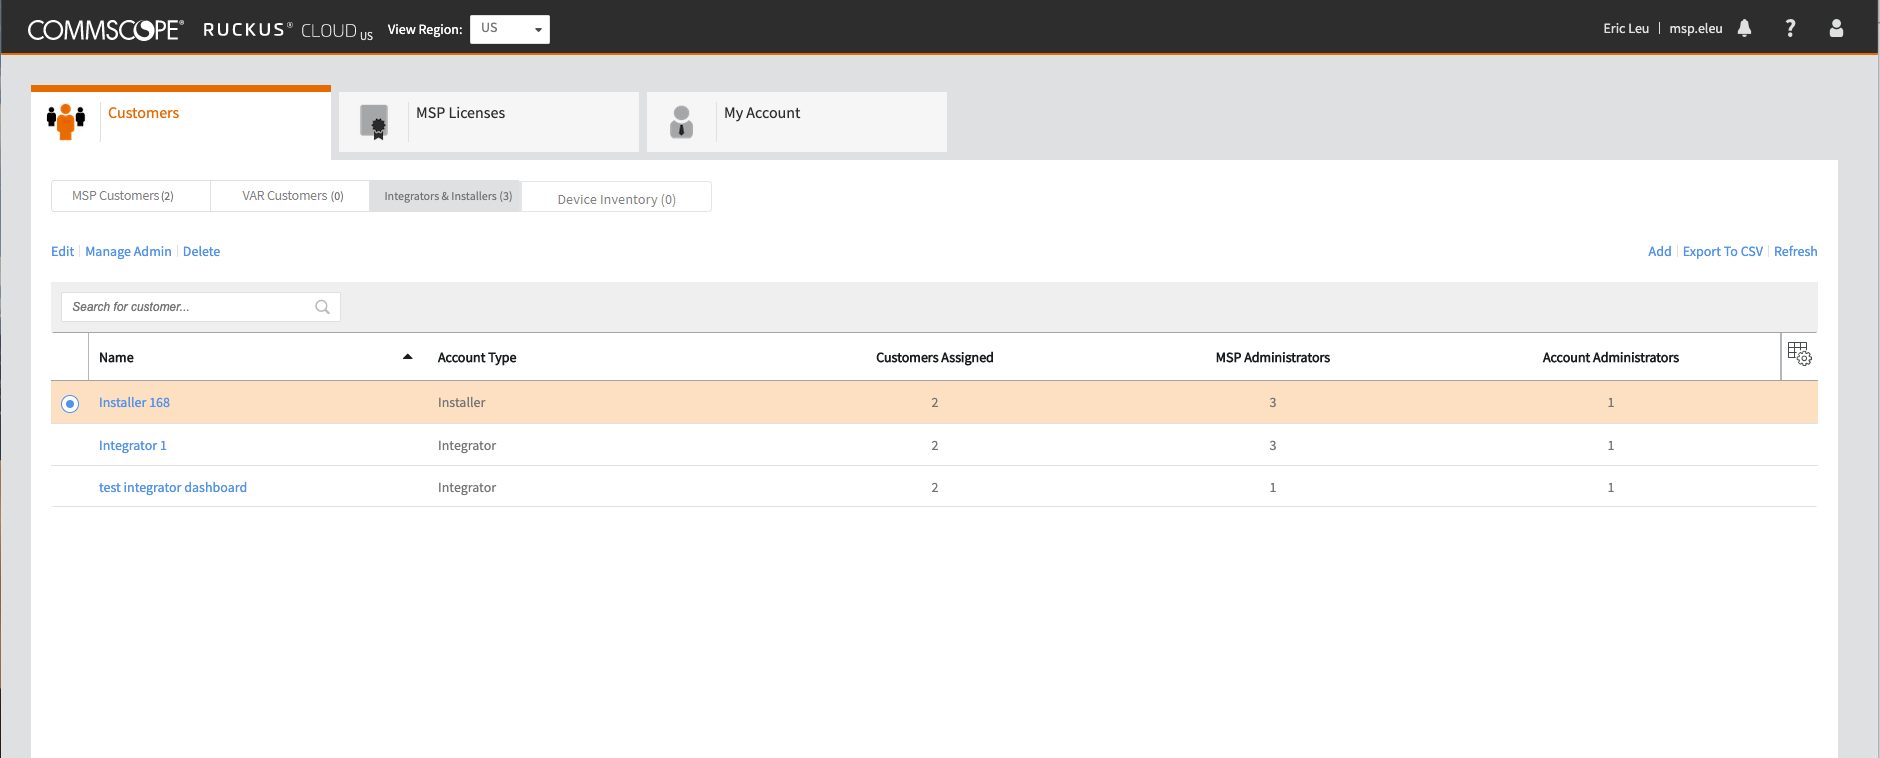
In the Customers
page, select the Integrator & Installer
sub-tab.
Using the Integrator & Installer wizard, you can add a new Integrator or Installer account.
 The Add Account diaglog box appears.
 -
On the upper right corner, click
Add.
The Add Account dialog box appears.
Add Account (Account Details) 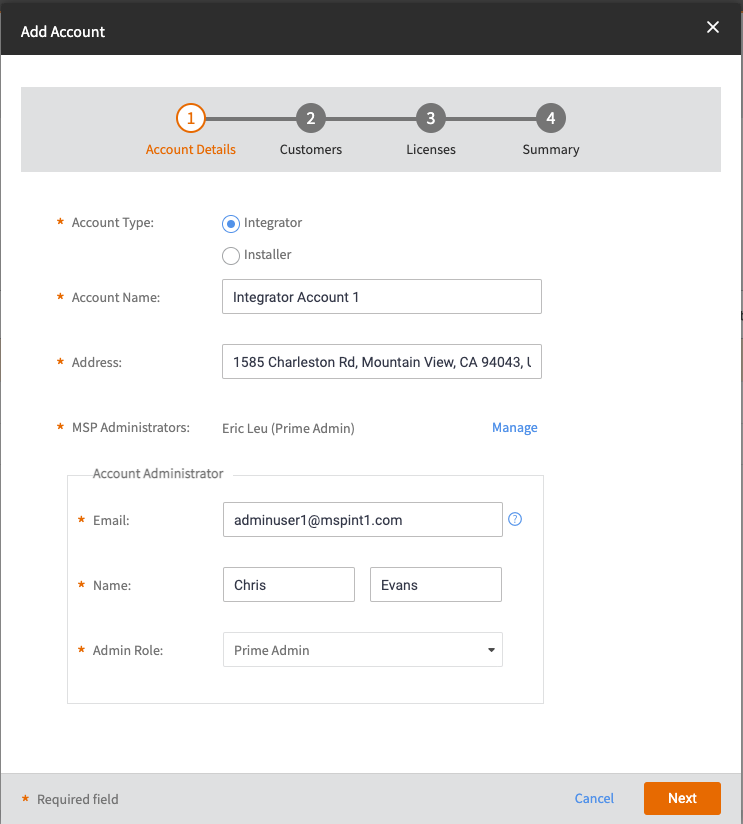
-
In the
Customers page, specify the access period and select
the customer accounts to assign to this account, and then click
Next.
Using the Seach Customer feature, you can search for a specific customer to assign to the Integrator or Installer account.
Add Account (Customers) 
-
In the
Licenses page, allocate the required Wi-Fi licenses and
Switch licenses and set the service expiration date and then click Next.
The Service Start Date is the day on which the account was created. You can customize the Service Expiration Date or choose a value from the drop-down.
Add Account (Licenses) 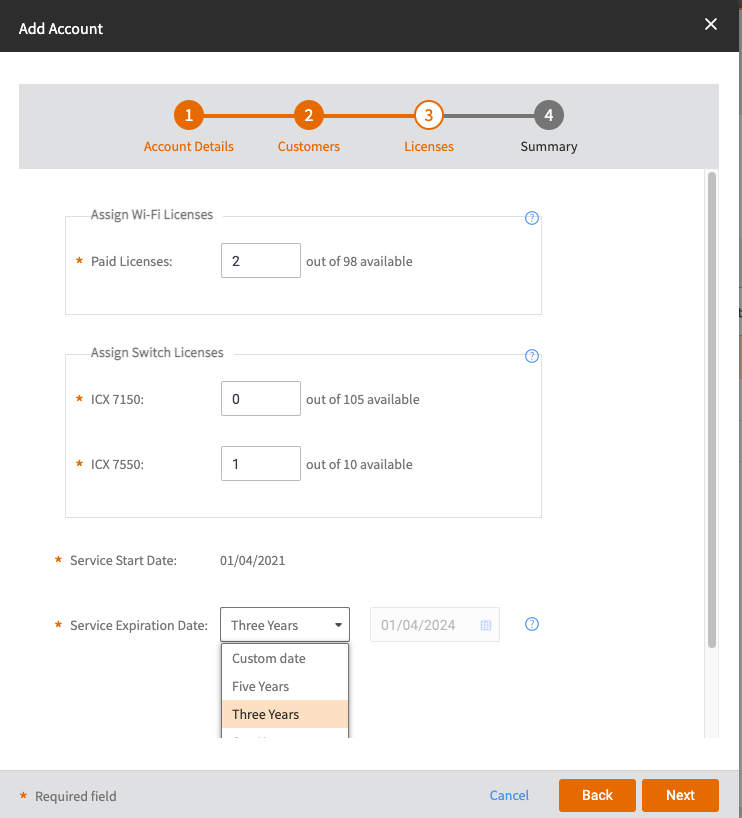
-
In the Summary page, review the account details and then
click Add.
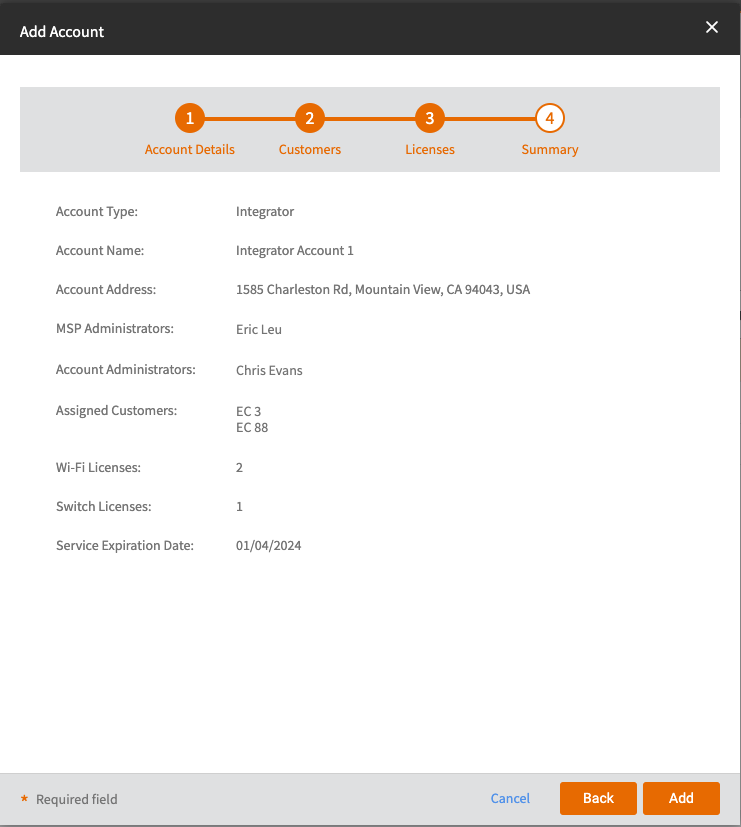 The newly added account appears under the the Integrators & Installers sub-tab. You can view the list of Integator or Installer accounts in the MSP Dashboard.