Customizing the Radio Settings of an AP

If you want the radio settings of an AP to be different from the default radio settings of the venue, you can override them.

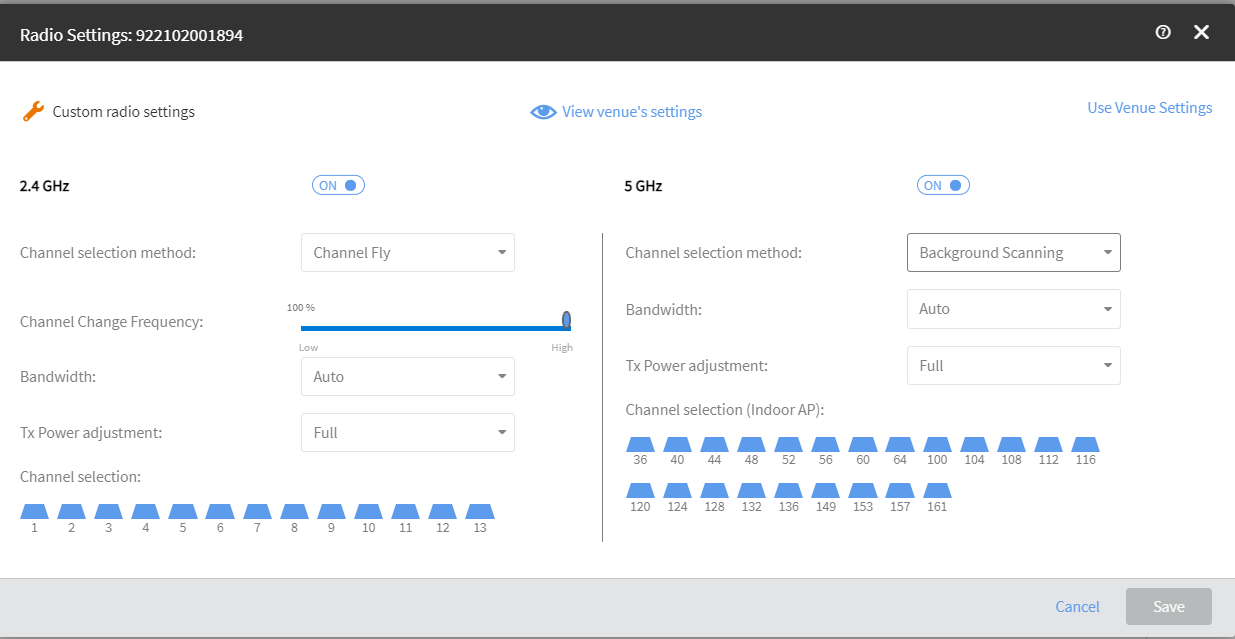
Note: The 2.4 GHz and 5 GHz radio settings, although very similar, must be configured separately.
Complete the following steps to customize the radio settings of an AP.
  1. From the navigation pane, click Networking Devices and select the Wi-Fi tab.
  2. Click the name of the AP for which you want to customize the wireless radio settings.
  3. In the Settings section, click Edit after the Wireless Radio Settings.
    The Wireless Radio Settings pageis displayed. The AP overview page is displayed.
    Radio Settings
  4. Configure the following settings for both the 2.4 GHz and 5 GHz radios:
    • Channel Selection Method: Select either Background Scanning or ChannelFly or Manual.
    • Channel Change Frequency : Adjust the channel change frequency: Low or High.
    • Bandwidth: Select Auto, 20 MHz, or 40 MHz channel width for the 2.4 GHz radio, or Auto, 20, 40, 80, or 160 MHz channel width for the 5 GHz radio from the drop-down.
    • Tx Power Adjustment: Manually set the transmit power on all 2.4 GHz or 5 GHz radios from the drop-down. The default is Full.
    • Channel Selection: A blue icon above the channel number indicates that the channel is enabled for the radio. If there are channels that you do not want the radio to use, disable them by clicking their respective icons. When a channel is disabled, its blue icon changes to gray.
      Note: For the 5 GHz radio, you must configure a different set of channels for indoor APs and outdoor APs.
  5. Click Save.