Viewing Existing Venues
The Venues page displays information about the venues that you have created in your account, including their locations, number of networks, number of networking devices, and number of currently associated clients.
-
The Venues page displays a list of existing venues, including the
following information:
- Venue: Displays the name assigned to the venue. To view details about this venue, click the venue name.
- Address: Displays the city where the venue is physically located.
- Status: Displays the status of the venue. Options
include:
- In Setup Phase: This status is displayed when the venue is currently undergoing initial configuration and setup.
- Transient Issue: This status signifies a problem or error at the venue that is temporary and typically resolves on its own without needing significant intervention.
- Requires Attention: This status indicates that there is an issue or problem that needs to be addressed.
- Operational: This status indicates that the venue is fully operational and functions as expected.
- Wi-Fi
APs: Displays the number of access points that have been
added to the venue. To view details about the APs, pause your pointer on
or click the AP number. If present, the
 icon alerts you to possible feature
incompatibilities between the APs and the features in this venue.
icon alerts you to possible feature
incompatibilities between the APs and the features in this venue. - Wi-Fi Clients: Displays the number of clients that are currently connected to the Wi-Fi network.
- Switches: Displays the number of switches that have been added to the venue. To view details about the switch, pause your pointer on or click the switch number.
- Switch Clients: Displays the number of switch clients that are currently associated.
- RUCKUS Edges: Displays the number of SmartEdges that have been added to the venue.
- Tags: Displays the tag provided for the venue based on which it can be searched.
You can customize which fields must appear in the Venues table by clicking the
 icon and selecting the desired column names. Optionally, you can click
Reset to
default to have all columns appear in the Venues table.
icon and selecting the desired column names. Optionally, you can click
Reset to
default to have all columns appear in the Venues table. -
Click a specific
Venue name to view detailed information about it.
The selected venue page opens, displaying the Overview tab by default.
Venue Details 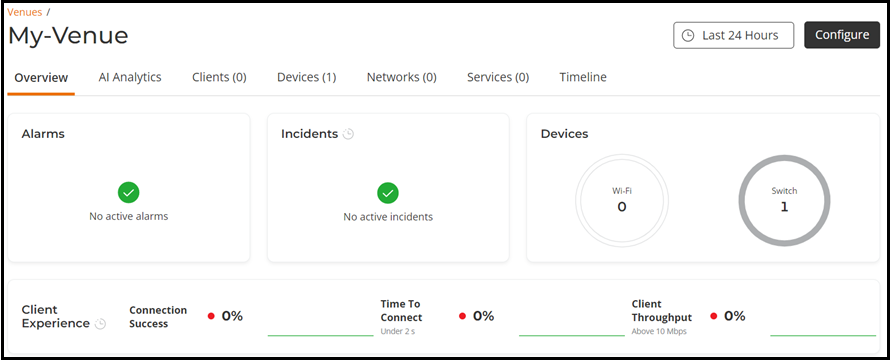 Note:
Note:Demonstration of Viewing Venue Data and Metrics. This video walks you through the Venue page and explains the Venue metrics.