Adding and Managing a DHCP Service Profile for Wi-Fi
You can add a DHCP service profile and add the profile to a venue.
-
From Add DHCP Service, select Wi-Fi (default) and
Click Next.
The Add DHCP for Wi-Fi page is displayed.
Adding a DHCP Service for Wi-Fi 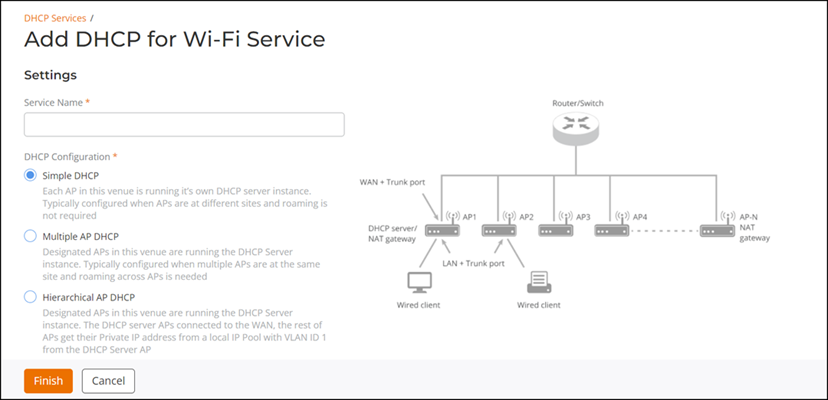
-
Complete the following
fields:
- Service Name: Enter a DHCP profile name.
- DHCP
Configuration: Select from the following options.
- Simple DHCP: Each AP in this venue is running it’s own DHCP server instance. In general, simple DHCP is configured when APs are at different sites and roaming is not required.
- Multiple AP DHCP: Designated APs in this venue are running the DHCP Server instance. In general, multiple AP DHCP is configured when multiple APs are at the same site and roaming across APs is needed.
- Hierarchical AP DHCP: Designated APs in this venue are running the DHCP Server instance. The DHCP server APs connected to the WAN, the rest of APs get their Private IP address from a local IP Pool with VLAN ID 1 from the DHCP Server AP.
- Set DHCP
Pools: Select the DHCP Pools from the table below or to
add a new DHCP pool, click Add DHCP
Pool. The Add DHCP
Pool dialog box is displayed.Note: Select the Add another pool option, if you want to add more than one pool. This does not close the Add DHCP Pool dialog box.
Add DHCP Pool Dialog Box 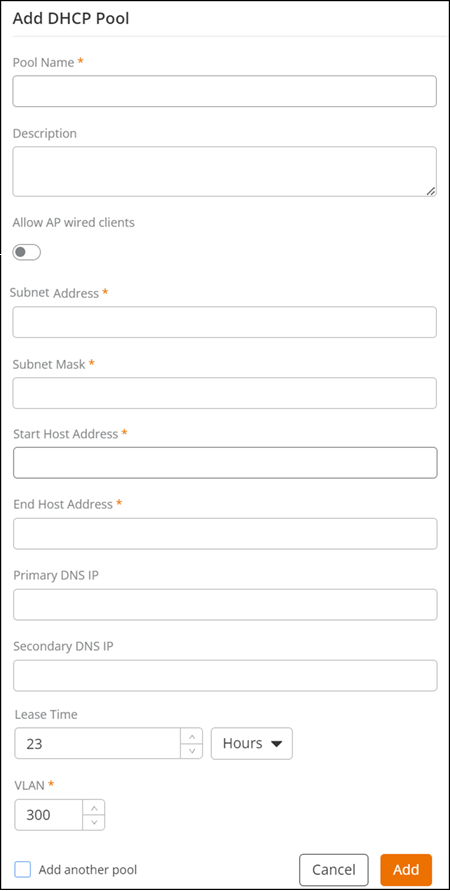
Complete the following fields and click Add:
- Pool Name: Enter a pool name.
- Description: Enter description about pool.
- Allow AP wired clients: Enable this option to allow wired clients connected to the AP to obtain addresses from the DHCP pool. You must enable this field when you configure Hierarchical AP DHCP.
- Subnet Address: Enter the subnet address.
- Subnet Mask: Enter the subnet mask address.
- Start Host Address: Enter the start host IP address.
- End Host
Address: Enter the end host IP address.Note: When using Multiple AP DHCP mode, an additional 10 IP addresses must be reserved per pool to support internal DHCP servers and gateway functions. As a result, the Number of Hosts value shown in the Set DHCP Pools table is reduced by 10 from the total available IPs.
- Primary DNS IP: (Optional) Enter the primary DNS IP address.
- Secondary DNS IP: (Optional) Enter the secondary DNS IP address.
- Lease Time: Enter the lease period in hours or in minutes.
- VLAN: Enter VLAN ID.