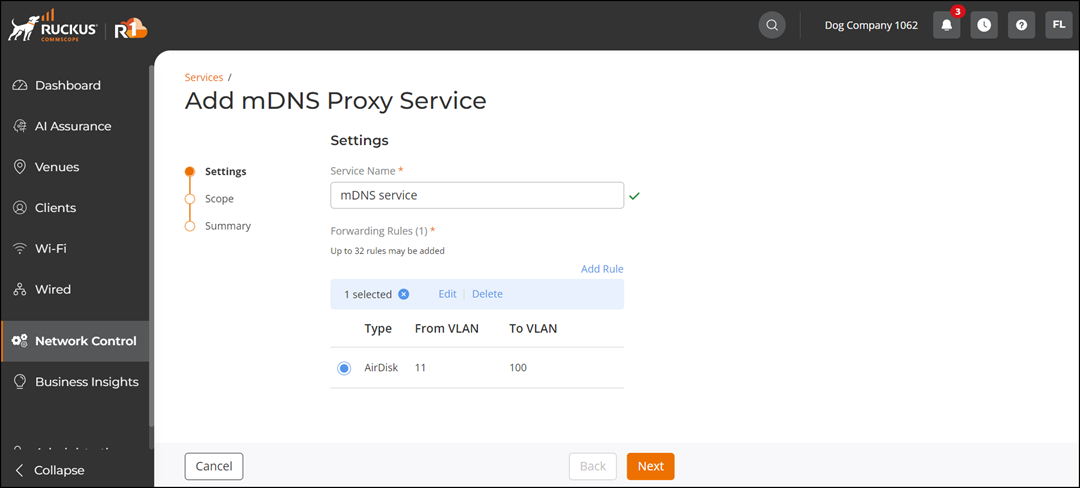
You can add an mDNS Proxy service by
defining forwarding rules and applying the service to selected venues and access
points.
Complete the following steps to add the mDNS Proxy
service:
Add the mDNS Proxy service to
your tenant account. From the navigation bar, select Network
Control > Service
Catalog. Alternatively, you can select Network
Control > My
Services, then click Add Service.
Find the Add mDNS Proxy
tile and click Add.
From the Add mDNS
Proxy Service page, select Wi-Fi (default),
and click Next.
The Add mDNS
Proxy Service page is displayed.Add mDNS Proxy
Service
In the
Settings page, complete the following fields:
Enter the Service Name.
Click Add Rule in the Forwarding
Rule section.
The Add Rule sidebar is displayed.
Select a type
from the Type list.
Note: You
cannot create duplicate rules with the same
Type and VLAN IDs.
Enter the Service Name and select the
Transport Protocol.
Note: These fields appear only when the type
is set to Other.
Enter From VLAN and To
VLAN values.
Note: Ensure
that the From VLAN and To
VLAN values are different.
(Optional) Select Add another rule to add
additional rules.
Click Add.
To manage rules, select a rule by selecting the radio button
alongside the Type column, and click
Edit or
Delete.
Click
Next.
The Scope page is displayed.
Select a venue, click Select APs, choose the required APs from the
sidebar, and click OK.