Switch Settings: AAA
From the RUCKUS One web interface, you can configure a RADIUS server, TACACS+ server, and Local Users for a switch.
You must configure RADIUS server, TACACS+ server, and Local Users
in order to support authentication, authorization, and accounting processes on RUCKUS
One managed ICX switches associated with a specific venue.
-
Select the .
The AAA tab is displayed.
AAA Tab 
-
Click Servers and
Users to configure a RADIUS server, TACACS+ server, and Local
Users.
-
Select a specific RADIUS
Server from the table to edit, or add a RADIUS Server.
- Click Add RADIUS
Server to add a new RADIUS Server. The
Add RADIUS Server sidebar is
displayed.
Add RADIUS Server Sidebar 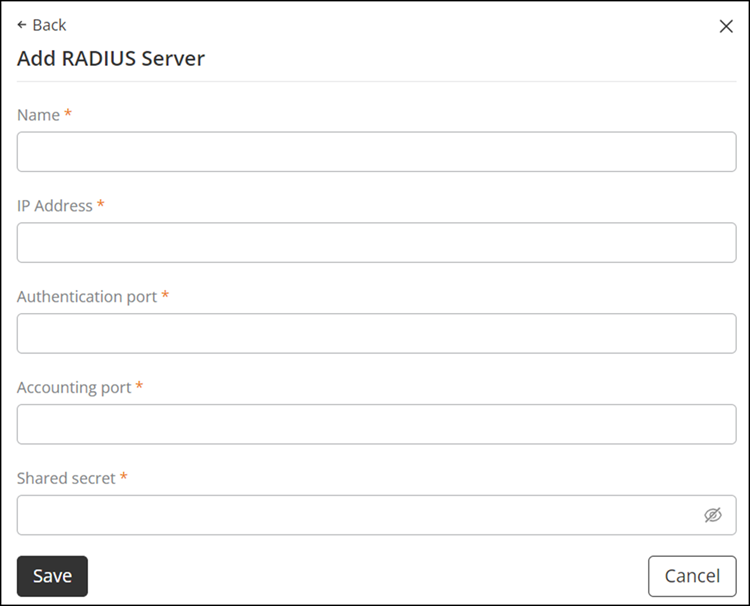
- Complete the
following fields:
- Name: Enter the RADIUS server name.
- IP Address: Enter an IP address for the RADIUS server.
- Authentication Port: Enter a port number for authentication.
- Accounting Port: Enter a port number for accounting.
- Shared Secret: Enter the shared secret.
- Click Save.
- Click Add RADIUS
Server to add a new RADIUS Server. The
Add RADIUS Server sidebar is
displayed.
-
Select a specific
TACACS+ Server from the table to edit or add a TACACS+ Server.
- Click Add TACACS+
Server to add a new TACACS+ Server. The
Add TACACS+ Server sidebar is
displayed.
Add TACACS+ Server Sidebar 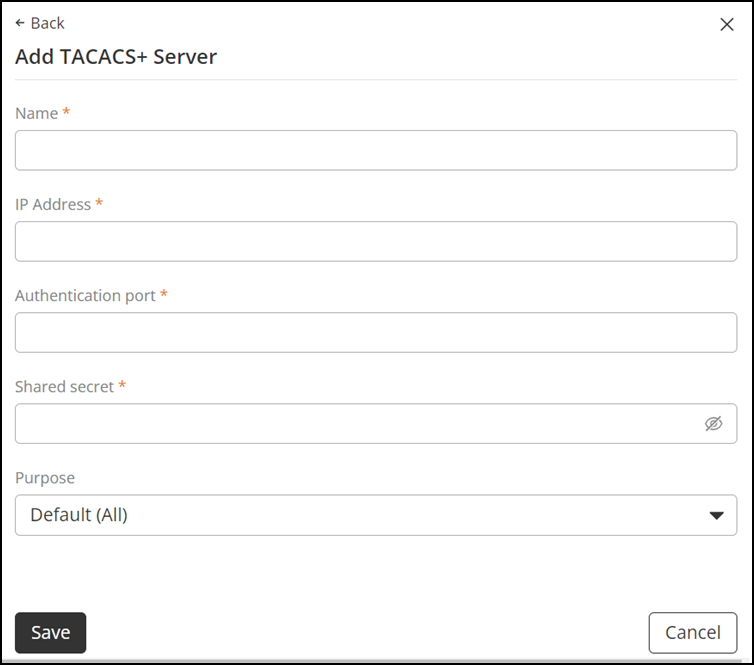
- Complete the
following fields:
- Name: Enter the TACACS+ server name.
- IP Address: Enter an IP address for the TACACS+ server.
- Authentication Port: Enter a port number for authentication.
- Shared Secret: Enter the shared secret.
- Purpose: Select Default (All), Authentication, Authorization, or Accounting. By default, Default (All) is selected.
- Click Save.
- Click Add TACACS+
Server to add a new TACACS+ Server. The
Add TACACS+ Server sidebar is
displayed.
-
Select a specific Local
Users from the table to edit or add Local Users.
- Click Add Local
User. The Add Local User
sidebar is displayed.
Add Local User Server Sidebar 
- Complete the
following fields:
- User Name: Enter a local user name.
- Password: Enter the password for the local user.
- Privilege: Select Port Config, Read Only, or Read Write.
- Click Save.
- Select a username
to view or edit the associated password, or display information
on how many switches use this password.
Viewing Local User Password Used In Switches 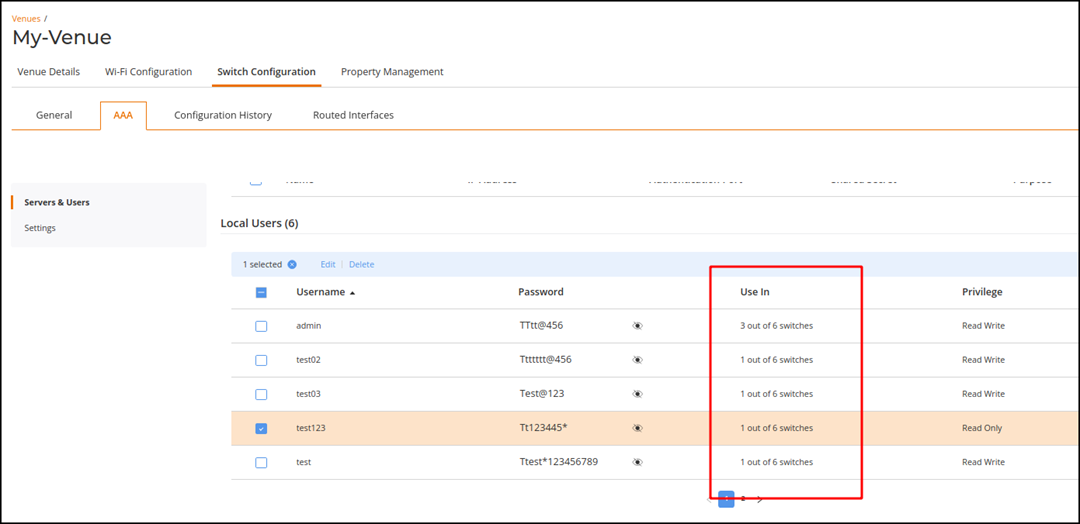 Note: The Use In column displays information on the total number of switches in the venue and the total number of switches that use the password.
- Click Add Local
User. The Add Local User
sidebar is displayed.
-
Select a specific RADIUS
Server from the table to edit, or add a RADIUS Server.