Advanced Settings
You can configure advanced AP settings such as LED status, USB support, BSS Coloring, AP Management VLAN, AP auto-reboot, and AP IP mode from the Advanced tab in the Wi‑Fi Configuration section.
-
Click the Wi-Fi
Configuration tab, and then select the
Advanced sub-tab
The Advanced sub-tab is displayed.
Venue Wi-Fi Configuration: Advanced Tab 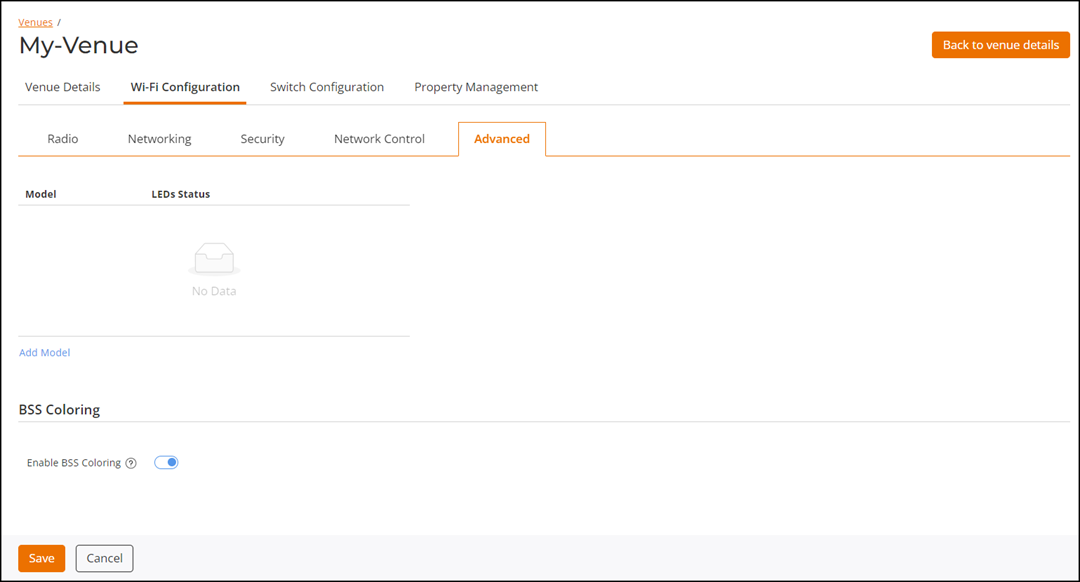
-
(Optional) In the Access
Point LEDs, click Add Model and
complete the following steps:
- Select a model from the Model list.
- (Optional) Toggle the LEDs Status switch off. By default, the LEDs Status is enabled.
-
(Optional) Click the
 icon to delete a model.
-
Toggle the BSS
Coloring switch on to enable or disable the feature.
BSS Coloring reduces interference between Wi-Fi access points by assigning unique colors, minimizing collisions. Supported model families include 802.11ax and 802.11be.
Click the
 icon to view the feature synopsis and the supported AP model families
(denoted by their applicable IEEE 802.11 standard). Click See the compatibility
requirements to view compatibility information such as the
number of incompatible APs, the minimum required version, and supported AP
model families.Note: If you disable or enable one of the features that depends on AP compatibility, then RUCKUS One automatically checks AP compatibility as part of the venue or network configuration update. Click the
icon to view the feature synopsis and the supported AP model families
(denoted by their applicable IEEE 802.11 standard). Click See the compatibility
requirements to view compatibility information such as the
number of incompatible APs, the minimum required version, and supported AP
model families.Note: If you disable or enable one of the features that depends on AP compatibility, then RUCKUS One automatically checks AP compatibility as part of the venue or network configuration update. Click the icon in the upper-right corner of the UI header, then click the related
network or venue settings activity to view the Activity
Details.
icon in the upper-right corner of the UI header, then click the related
network or venue settings activity to view the Activity
Details. Perform the following actions:
- View the status of the resulting AP compatibility check.
- Click See incompatible report to view a list of the incompatible APs.
-
In Access Point Management
VLAN, enter the Management VLAN ID or use
the arrows to select the VLAN ID. The VLAN ID must be
between 1 and 4094.
The Management VLAN is used to segregate management traffic between the AP and RUCKUS One.Note:
- Verify that the configuration of the uplink switch is correct before attempting to change the AP management VLAN ID. By default, the Management VLAN ID for a venue is set to 1.
- To avoid the isolation of the APs, it is essential to configure the network switches with the corresponding settings.
Note: A confirmation message is displayed only when there is a change in the AP Management VLAN setting or if an AP using the venue's AP Management VLAN setting is moved to another venue having a different Management VLAN setting.You can view the configured VLAN ID per AP in the table in the Management VLAN column. This column is hidden by default. To display this column, click the icon and select the Management
VLAN check box.
icon and select the Management
VLAN check box.Access Points: AP List Tab 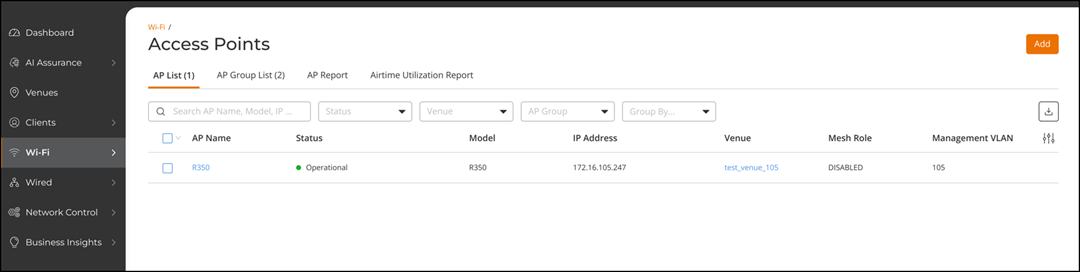 Also, refer to AP Management VLAN at the Venue Level to know more about this feature.