Network Control Settings
In the Wi-Fi Configuration page, you can configure the Network Control services such as Syslog Server, mDNS Fencing, AP SNMP, IoT Controller, and Location Based Service that you want to provide in a venue.
-
Select the Wi-Fi
Configuration tab and Network Control
sub-tab.
The Network Control sub-tab is displayed. Within the Network Control sub-tab, customize the services of your preference and click Save. Refer to the following instructions to configure each of the available network control services:
- Syslog Server
- Configuring an mDNS Fencing Profile
- Configuring an SNMP Agent Profile
- Configuring an IoT Controller
- Configuring Location Based Service
Network Control Sub-tab 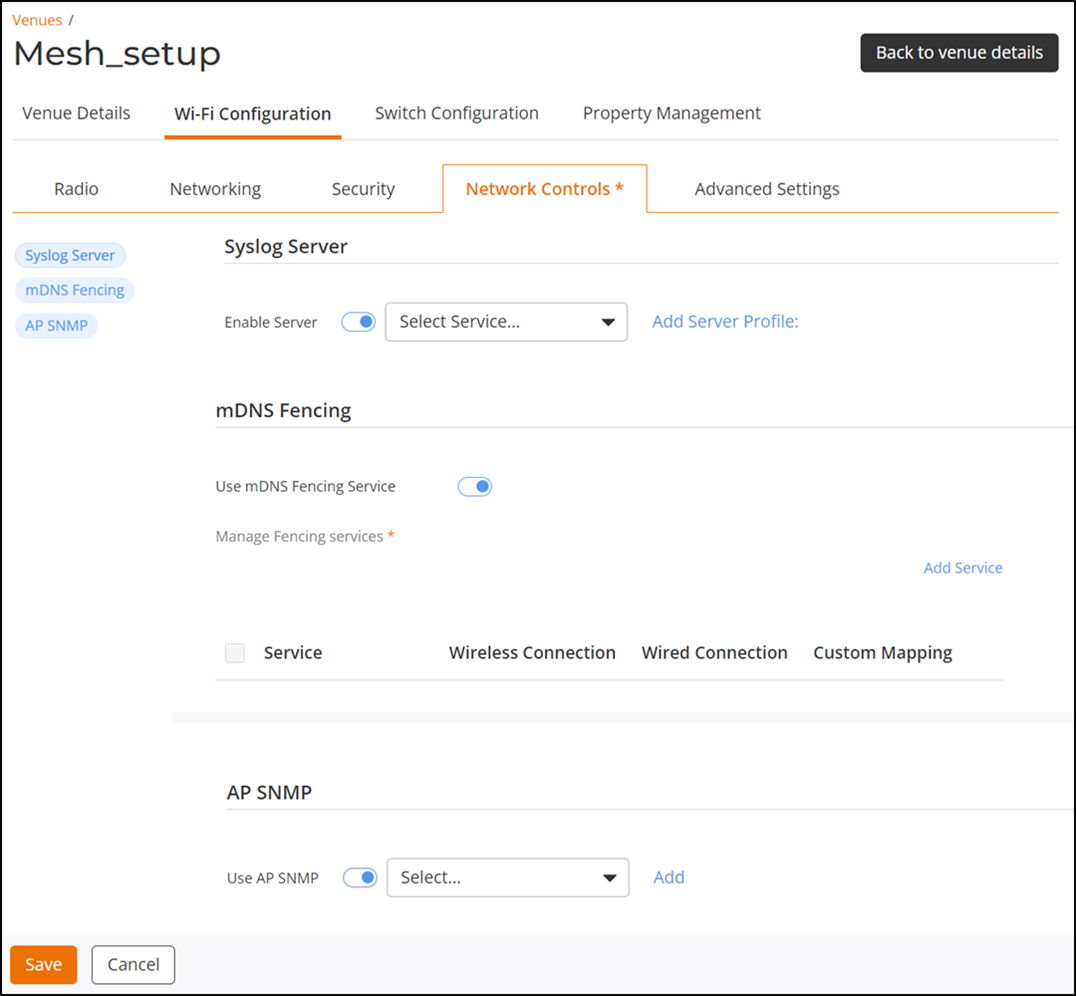
Configuring a Syslog Server Policy
- To customize the Syslog Server, you must first toggle the Enable Server switch to enable the server. By default, Syslog Server is disabled.
- Select a Syslog Server profile from the drop-down list or click Add Server Profile to add a new Syslog Server profile. Refer to Creating a Syslog Server Policy to create a profile.
Configuring an mDNS Fencing Profile
-
Click Add
Service to add a new mDNS Fencing Profile.
The Add Service sidebar is displayed.
Add Service Sidebar 
-
Complete the following
fields:
- Service: Select a service from the drop-down list.
- Description (Optional): Enter the description about the server.
- Wireless
Connection: Toggle the button to enable the wireless
connection fencing range. By default, Wireless
Connection is disabled.
Wireless Connection  Fencing Range: Select one of the following options.
- Same AP (default selection)
- 1-hop AP neighbors
- Wired
Connection: Toggle the button to enable the wired
connection fencing range. By default, Wired
Connection is disabled.
Wired Connection 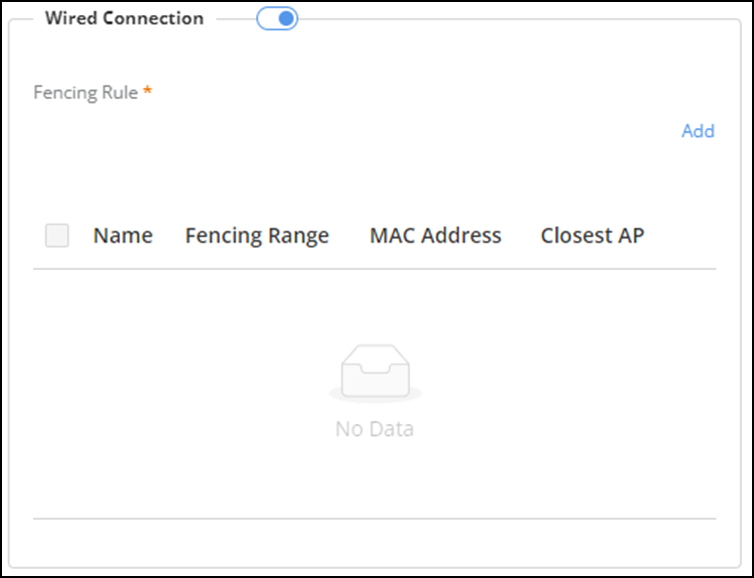
- Click Add
to add a fencing rule for wired connections.
Add Wired Connection Dialog Box 
- The Add Wired
Connection dialog box is displayed; complete the
following fields:
- Rule Name: Enter a rule name.
- Fencing
Range: Select one of the following
options.
- Same AP
- 1-hop AP neighbors
- MAC
Address: Complete the following steps to add
a MAC address:Note: You can add up to four MAC addresses.
- Click Add.
- The
Add MAC Address dialog box is
displayed.
Add MAC Address 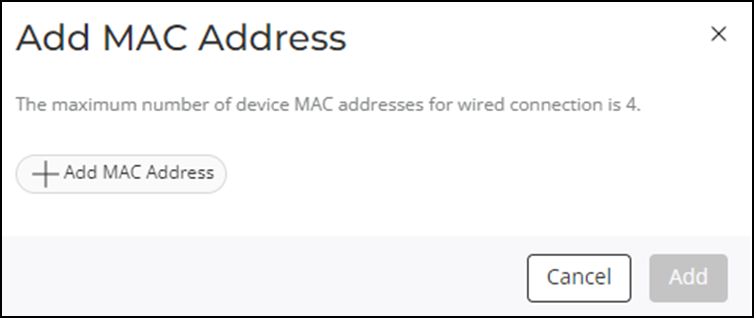
- Click +Add MAC Address and enter the MAC address.
- Click Add. The added MAC address is displayed in the MAC Address table.
- Closest
AP: Select an AP from the drop-down list.Note: You can choose only APs that are already connected to the RUCKUS One.
- Click Add.
- Custom
Mapping: Toggle the button to enable custom mapping;
by default, Custom Mapping is disabled.
Select a profile from the table or add a custom mapping.Note: You can add up to three Custom String Lists.
Custom Mapping 
- Click
Add to add a custom string.
Add Custom String 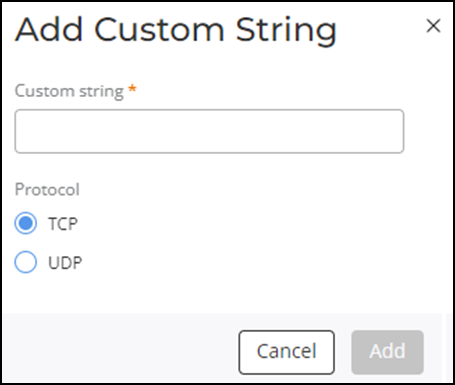
- The
Add Custom String dialog box is
displayed, complete the following fields:
- Custom String: Enter a custom string name.
- Protocol: Select one of the following
options.
- TCP
- UDP
- Click Add.
- Click
Add to add a custom string.
Configuring an SNMP Agent Profile
- Toggle the Use AP SNMP switch to enable AP SNMP. By default, Use AP SNMP is disabled.
- Select an SNMP Agent profile from the drop-down list or click Add to add an SNMP Agent profile. Refer to Creating an SNMP Agent Profile to create an SNMP profile.
Configuring an IoT Controller
This task allows you to associate an IoT controller with the venue.
-
In the IoT
Controller section, click Associate IoT
Controller.
Associating an IoT Controller  A sidebar appears, displaying a list of available IoT Controllers.
 -
Select an IoT Controller
from the Associate IoT Controller list. You can also
click the Add IoT
Controller option at the top-right corner to add a new IoT
Controller if it is not listed. Refer to Adding a RUCKUS IoT Controller for
more details.Click Apply. Click Save to apply
and save the association.
A message appears at the bottom right of the screen to indicate whether the IoT Controller was successfully associated with the venue or not.
Associating a New IoT Controller 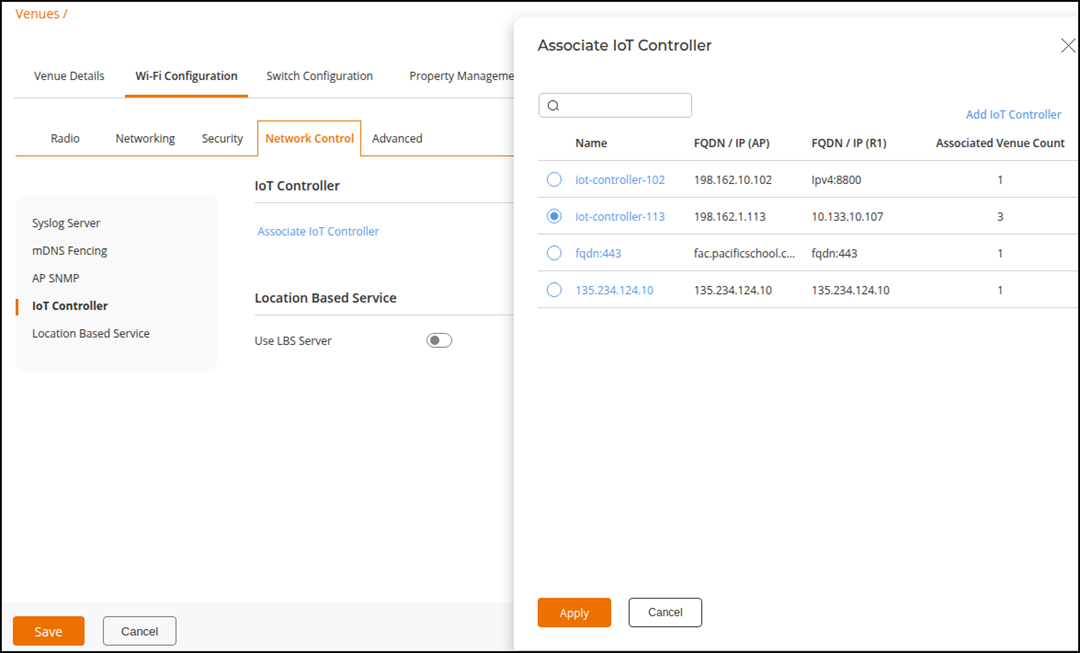 The selected IoT Controller is now associated and displayed under the IoT Controller section.
Changing or Removing the IoT Controller 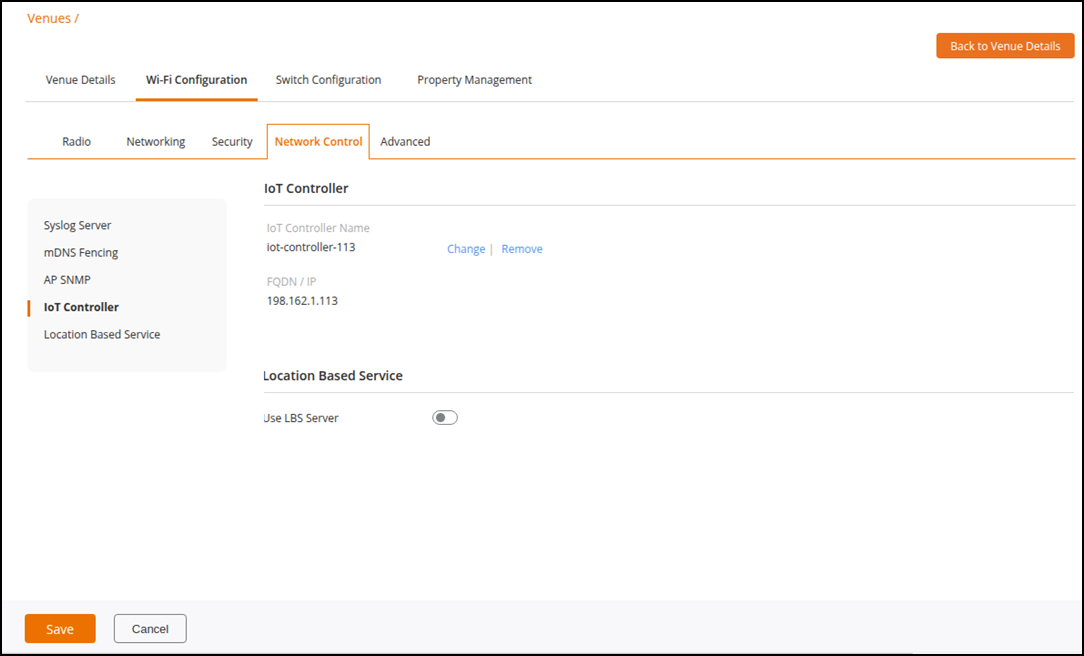
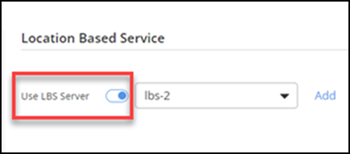
Configuring Location Based Service
-
In the Location Based
Service section, toggle the Use LBS
Server switch to enable the service. By default, Use LBS
Server is disabled.
Enabling Location Based Service