Adding and Managing a Custom Role
You can create custom roles to control administrator access at a granular level using role-based access control (RBAC). Custom roles allow you to define precise permissions and scopes, such as Read Only (default), Create, Edit, or Delete, across technology categories. This helps organizations enforce least-privilege access and delegate responsibilities effectively. By default, system-defined roles are also available to be assigned to administrators.
Create a custom role as follows:
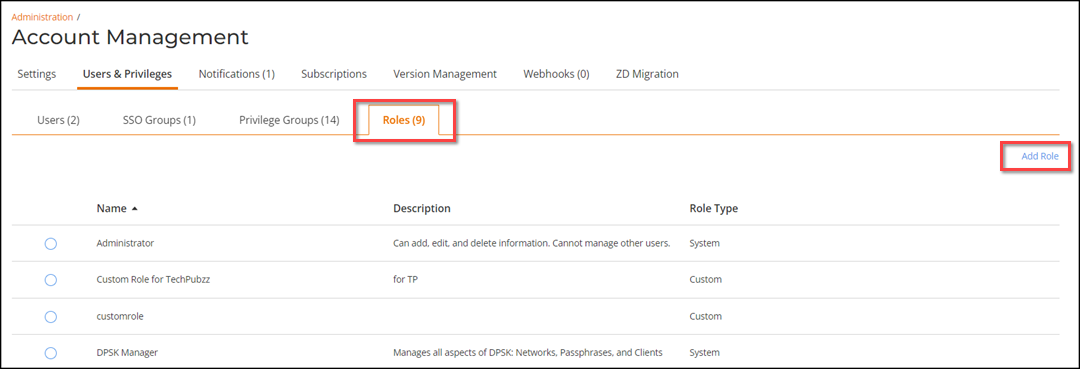
- On the RUCKUS One web interface, navigate to Administration > Account Management > Users & Privileges.
-
Click the Roles
sub-tab.
The following information is displayed:
- Name: Displays the name of the role.
- Description: Displays a description of the role.
- Role Type: Displays whether the role is system-defined or custom. System-defined roles are pre-configured and cannot be modified. Custom roles are user-defined and editable (depending on assigned privileges).
Creating a Custom Role 
-
Click Add Role.
The Add Admin Role page is displayed.
-
In the General section, type the role name and a short description for
the role.
Note: You cannot create a custom role with the same name as a system-defined role.
-
Click Next.
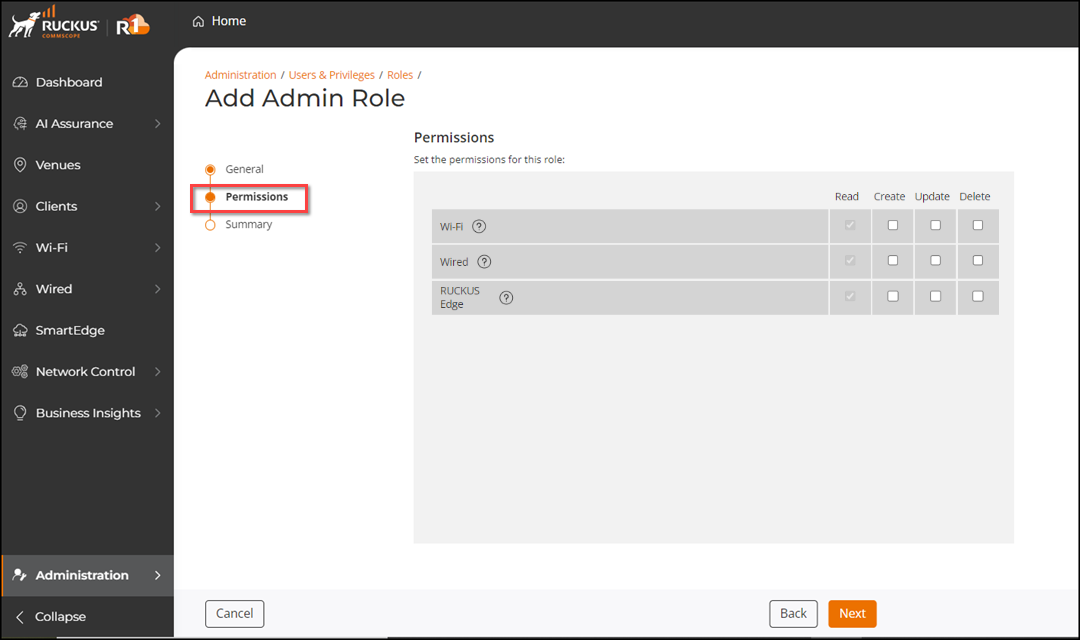
The Permissions page is displayed with two types of permissions.
- Global Permissions applies broadly across the system.
- Advanced Permissions provides more granular, scope-based controls.
The permission categories in each tab mirror the sections of the main navigation menu on the left side of the RUCKUS One web interface, helping administrators align access control with functional areas of the application.
-
(Optional) In the
Global Permissions tab, assign permissions for the
following high-level categories:
- Wi-Fi
- Wired
- Gateways
- AI
- Admin
- MSP
Note: The MSP functionality is visible only to MSP admins, allowing them to configure granular access control for MSP-EC tenants.For each category, you can apply the following permissions:
- Read Only (set by default): Allows the user to only view items.
- Create: Allows the user to create a new item.
- Edit: Allows the user to configure an existing item.
- Delete: Allows the user to delete an item.
Custom Role: Global Permissions for Device Management 
-
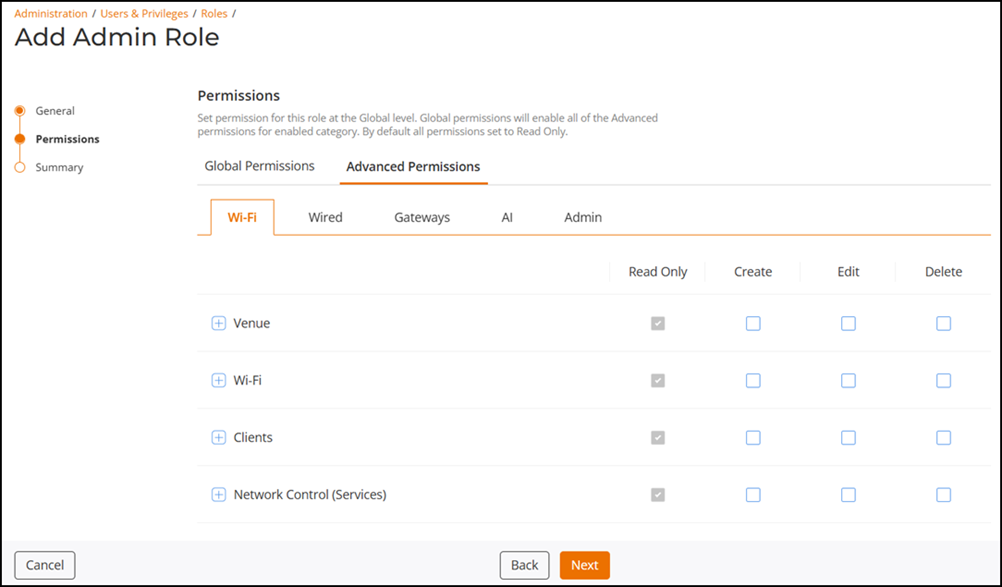
(Optional) Select the
Advanced Permissions tab to manage role permissions for
specific features and functionalities within each category. By default, the
Wi-Fi sub-tab is displayed. To configure granular
access controls, complete the following steps:
- Click on a category sub-tab (for example, Wi-Fi) to access specific functionalities.
-
Click the
 icon to view and configure individual
features within a functional area (for example,
Venue).
Custom Role: Advanced Permissions for Device Management  Note: Default selections in the Advanced Permissions tab depend on the choices made in the Global Permissions tab, but can be changed. Permissions set in the Advanced Permissions tab override those set at the global level.Note: If you see a hyphen (
 ) instead of a checkmark (
 ) for a specific category action (Create,
Edit, or Delete), then
that means the permission for that action is not granted uniformly at the
advanced level for that category. You may click on the hyphen to grant
global permission, but this may still result in partial inheritance of
permissions at the Advanced Permissions level. RUCKUS recommends checking
the advanced permissions for the category and modifying as necessary.
) for a specific category action (Create,
Edit, or Delete), then
that means the permission for that action is not granted uniformly at the
advanced level for that category. You may click on the hyphen to grant
global permission, but this may still result in partial inheritance of
permissions at the Advanced Permissions level. RUCKUS recommends checking
the advanced permissions for the category and modifying as necessary.Refer to Management Scope for Permissions for details on supported and unsupported functionality scopes.
By default, Read Only access is assigned to each functionality if no permissions are set at the global or advanced level.
-
Click Next.
The Summary page is displayed, providing details about the administrator role and permissions. Verify this information.
-
Click Add.
The newly created custom role is added to the list of roles in the Roles sub-tab. A notification is displayed on the Activities page accessible from the
 icon at the top right corner of the RUCKUS One web interface.
You can edit and delete custom roles by selecting the role and clicking Edit or Delete, respectively. You cannot edit or delete system-defined roles. A notification appears on the Activities page whenever a role is edited or deleted.