Creating an SNMP Agent Profile
RUCKUS One provides support for Simple Network Management Protocol (SNMPv2 and SNMPv3), which allows you to query information (such as system status, AP list) and to configure system settings using a Network Management System (NMS) or an SNMP MIB browser. You can also enable SNMP traps to receive immediate notifications for possible AP and system issues. SNMPv3 provides enhanced security features, including authentication and encryption, ensuring that the data being transmitted is secure and only accessible to authorized users.
Complete the following steps to create an SNMP Agent profile:
-
Find the SNMP
Agent tile and click Add.
The Add SNMP Agent page is displayed.
Add SNMP Agent Page 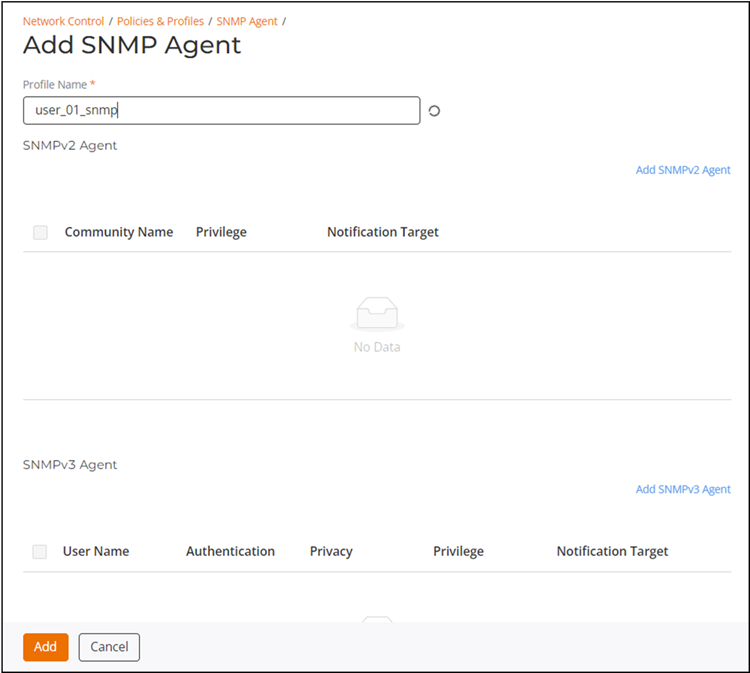
-
In the SNMPv2 Agent section, click Add SNMPv2
Agent if your network uses SNMPv2 and configure the following
settings:
The Add SNMPv2 Agent sidebar is displayed.
Add SNMPv2 Agent Sidebar 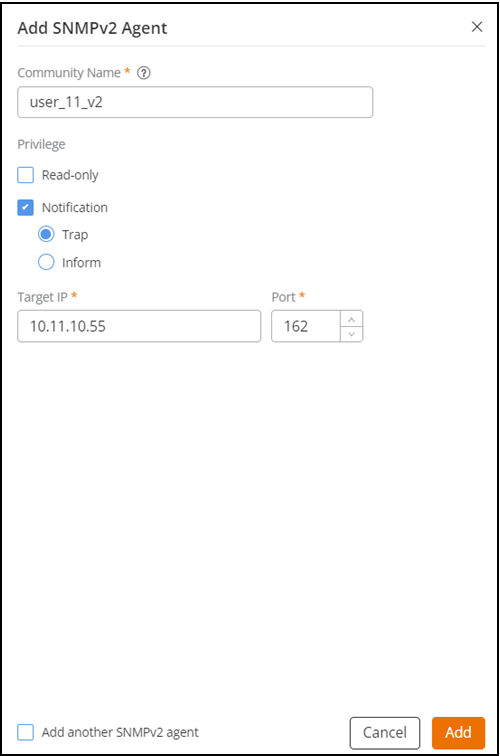
Note: If you want to add more than one SNMPv2 Agent, click the Add another SNMPv2 agent check box. Selecting this option keeps the Add SNMPv2 Agent sidebar open.The new SNMPv2 Agent profile is added to the SNMPv2 Agent table. -
In the SNMPv3 Agent section, click Add SNMPv3
Agent if your network uses SNMPv3 and configure the following
settings:
The Add SNMPv3 Agent sidebar is displayed.Note: If you want to add more than one SNMPv3 Agent, click the Add another SNMPv3 agent checkbox. Selecting this option keeps the Add SNMPv3 Agentsidebar open.
Add SNMPv3 Agent Sidebar 
-
Authentication
Password: Enter an authentication password that fulfills
the following criteria:
- Blank Spaces: The password must not contain any blank spaces.
- Character
Complexity: The password must include the following
characters: uppercase (A to Z), lowercase (a to z), digits (0 to
9), special characters, and adhere to the following rules:
- The password must be at least 8 characters in length (maximum is 32 characters)
- Must include at least one lowercase letter and one uppercase letter
- Must include at least one number
- Must include at least one special character
- Weak password: A password that does not fulfil the Character Complexity rules is considered a weak password. A weak password is not allowed.
- Usage of
Special Characters:
- The password can include the following special characters from (!) (char 33) to (~) (char 126): ~!@#$%^&*()-=_+[]{}|;':",./<>?
- The password must not begin with the special character “~” (tilde)
- The password cannot include the special characters "`" (grave accent) and "\" (backslash)
- The password cannot include the special characters "$(" consecutively, but a "$" (dollar sign) and "(" (opening parenthesis) can be used separately in the password
The password complexity indicator visually displays the complexity of the password, categorizing it as Insecure, Very Weak, Weak, Poor, or Strong, each shown in different colors. Additionally, the
 icon will
display a green checkmark for each fulfilled password criterion.
icon will
display a green checkmark for each fulfilled password criterion.
-
Authentication
Password: Enter an authentication password that fulfills
the following criteria: