Upgrading Switch Firmware at the Venue Level
The RUCKUS One web interface supports RUCKUS ICX switch firmware updates at the venue level.
Successful upgrading of switch firmware, whether scheduled or through Update Now, requires the RUCKUS ICX switch to be onboarded to RUCKUS One, associated with a venue, in the Operational state, and running a different firmware version than the selected firmware version. At the venue level, the user cannot select the current firmware version; therefore, if a switch is running the selected version, then when the upgrade starts, RUCKUS One will skip it automatically.
-
To manually initiate a firmware
update:
-
Select the checkbox for
each venue, click Next,
select the desired firmware version, then click Run
Update.
Note:
In the Switch Firmware tab, an information icon
 is displayed if switches in a venue
run an older firmware version. RUCKUS
recommends that you update the venue to the recommended firmware
version.
is displayed if switches in a venue
run an older firmware version. RUCKUS
recommends that you update the venue to the recommended firmware
version.Update Now - Select Switch(es) 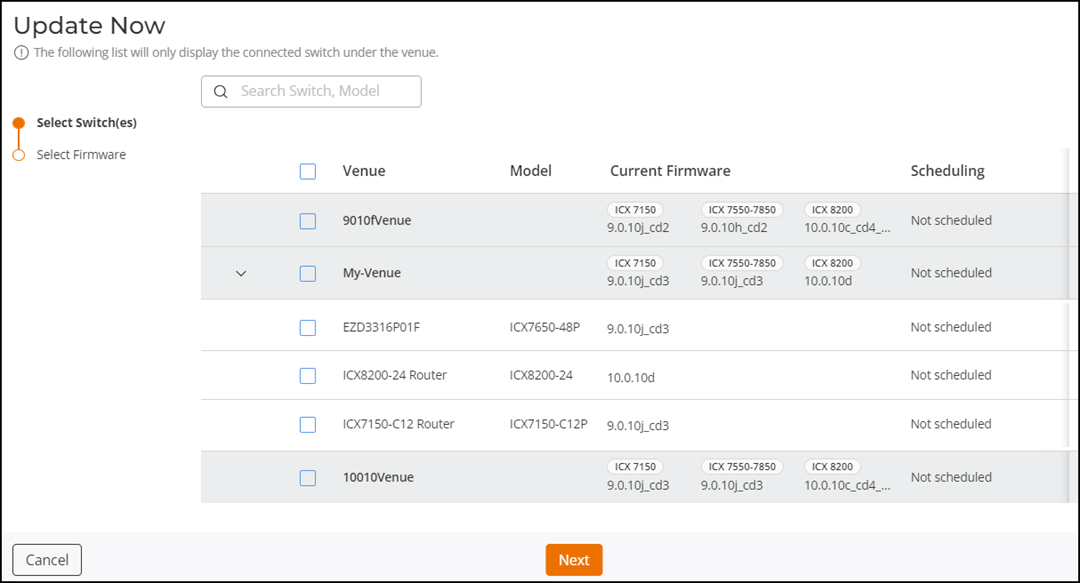
Update Now - Select Firmware 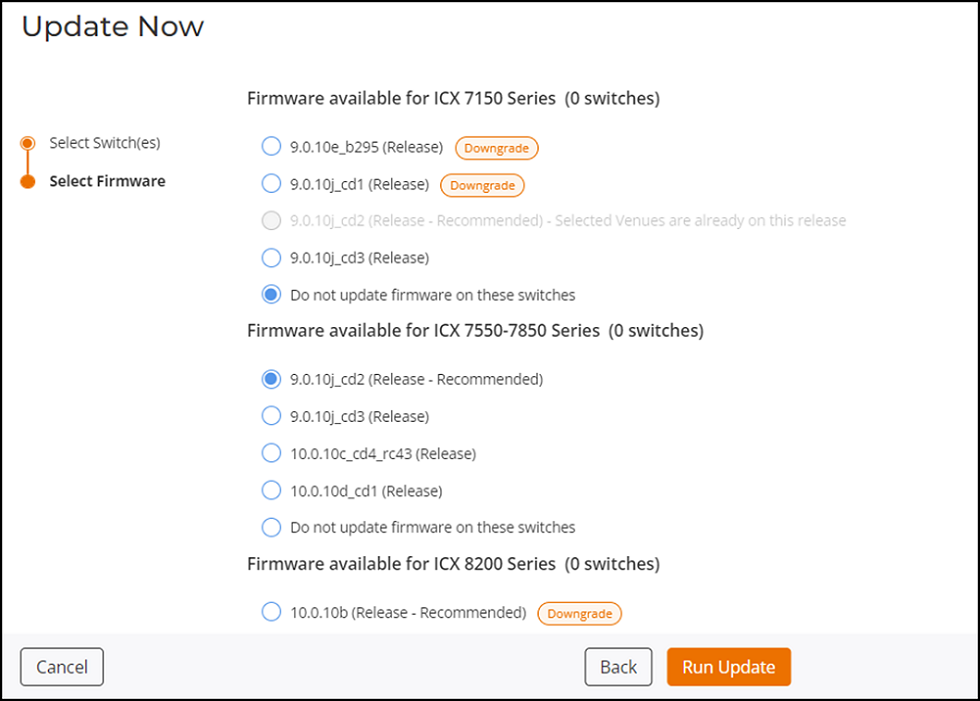
Note: RUCKUS ICX 8200-24PV and ICX 8200-C08PFV AV switches are supported in FastIron release 10.0.10 (versions 10.0.10f and later), release 10.0.20 (versions 10.0.20b and later), and future FastIron releases. These AV switches cannot be downgraded to earlier releases (such as 08.0.95x, 09.0.10x, or 10.0.00x) or earlier versions (such as 10.0.10, 10.0.10a, 10.0.10b, 10.0.10c, 10.0.10d, 10.0.10e, 10.0.20, or 10.0.20a).Note: RUCKUS ICX 7550-24XZP switch is supported in FastIron release 10.0.20b-cd1 or later versions; it is not supported in FastIron 09.0.10 and 10.0.10 releases.Note: RUCKUS ICX 8100 10G switches are supported in FastIron firmware versions 10.0.10g-cd1 and 10.0.20c and later. Supported models include ICX 8100-24-X, ICX 8100-24P-X, ICX 8100-48-X, ICX 8100-48P-X, and ICX 8100-C08PF-X. They are not supported in FastIron release 09.0.10 or earlier versions of 10.0.10 release (such as 10.0.10, 10.0.10a, 10.0.10b, 10.0.10c, 10.0.10d, 10.0.10e, 10.0.10f, 10.0.20, 10.0.20a, or 10.0.20b).Note: Support has been added for ICX 8100 and ICX 8100-X switch models. You can view available firmware versions and perform or schedule updates for these switches directly.- ICX 8100 models: 10.0.10f_cd2 and later / 10.0.20b_cd1 and later.
- ICX 8100-48PF, ICX 8100-C16P, ICX 8100-48PF-X and ICX 8100-C16P-X: 10.0.10h and later.
- ICX 8100-X models: 10.0.10g_cd1 and later / 10.0.20c and later.
Note: When selecting the firmware version, you are given options for the recommended release as well as other available versions (including earlier versions for downgrade). Remember that the recommended release may not be the latest available release.After clicking Run Update, a confirmation message appears, and the Status column of the Venues table reflects the update status.
-
Select the checkbox for
each venue, click Next,
select the desired firmware version, then click Run
Update.
-
To change the scheduling of
automatic firmware updates:
-
Select the checkbox for
each venue, click Next,
select the desired firmware version, select the desired date and time,
optionally toggle on the Pre-download the
firmware option, then click Save.
Note: The update time selections are displayed after the date is selected, and are available in two-hour intervals, starting from midnight.Note: Enabling the Pre-download the firmware option allows the firmware image file to be downloaded (in the background) to the selected switches six hours prior to the scheduled update time, thereby shortening the time required to complete the firmware update once the scheduled update process begins.
Selecting Firmware Version to Update Schedule 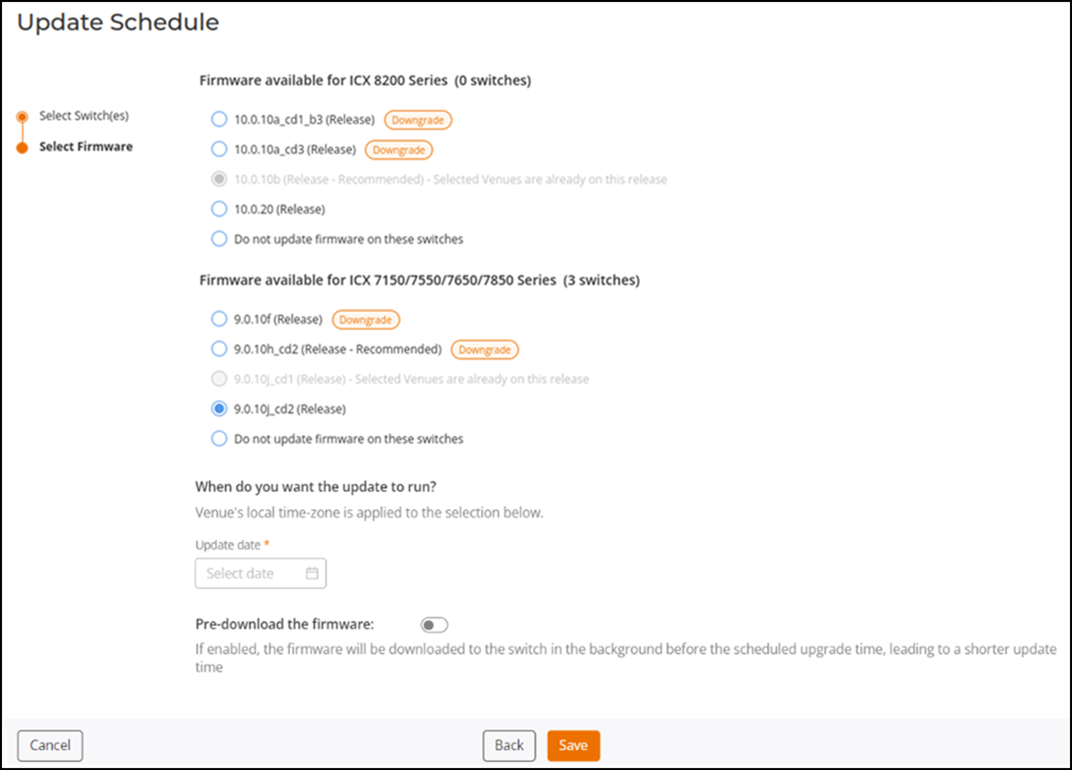
After clicking Save, a pop-up success messages, and the Scheduling column of the Venues table reflects the new schedule.
-
Select the checkbox for
each venue, click Next,
select the desired firmware version, select the desired date and time,
optionally toggle on the Pre-download the
firmware option, then click Save.
-
To skip a scheduled
update:
-
Select the checkbox for
each venue, click Skip,
then click Skip in the Skip This Update?
confirmation box.
Active Skip Update Option 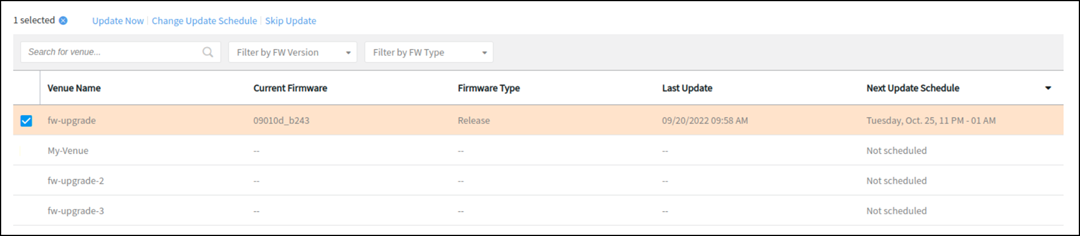
Skip Update Confirmation 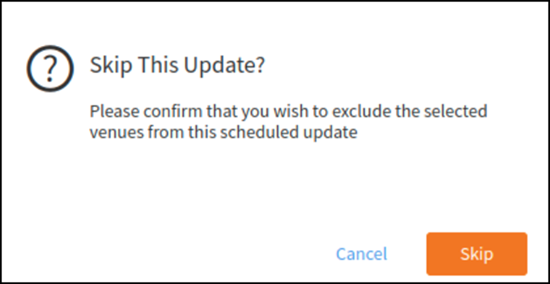
After confirming the Skip, you should see pop-up success messages, and the Scheduling column of the Venues table reflects the new schedule.
-
Select the checkbox for
each venue, click Skip,
then click Skip in the Skip This Update?
confirmation box.
To receive email or SMS notifications regarding initial scheduling of a firmware update, modifications to the firmware update schedule, reminders of upcoming firmware updates, and skipped (canceled) updates, you must ensure that you have your name and contact information provisioned in . Refer to Adding a Recipient for System Notifications for provisioning instructions.
To view Activity log entries related
to all switch firmware update operations, click the  icon
in the upper-right corner of the UI header, then click the related switch upgrade
activity to view the Activity Details. Alternatively, from the navigation bar, click , select Switch in the
Product filter drop-down menu, and view all
switch-related activities.
icon
in the upper-right corner of the UI header, then click the related switch upgrade
activity to view the Activity Details. Alternatively, from the navigation bar, click , select Switch in the
Product filter drop-down menu, and view all
switch-related activities.