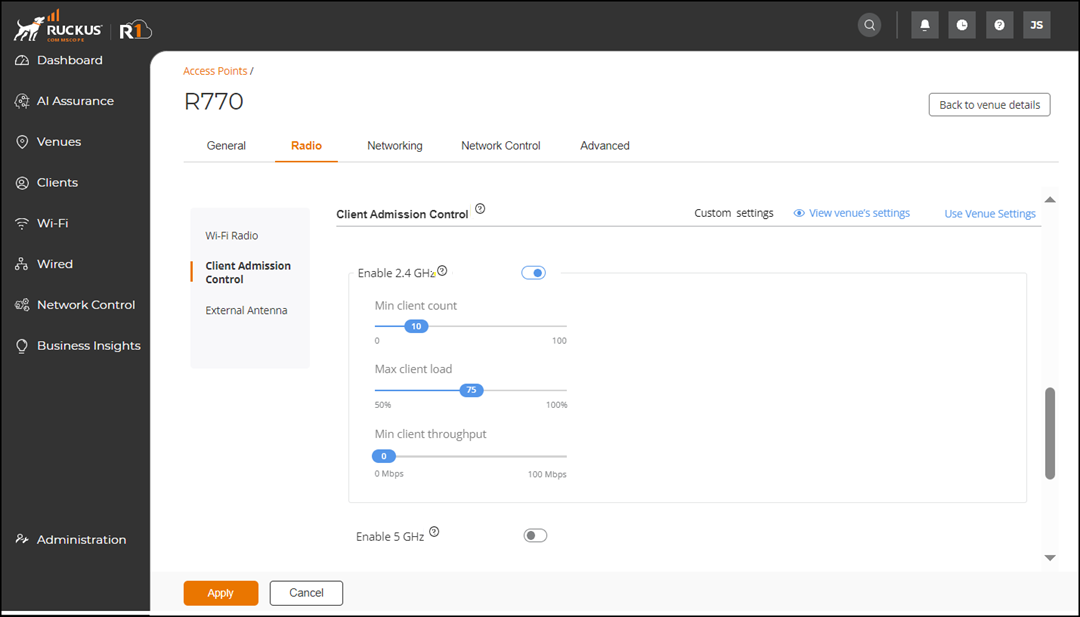
You can configure the custom settings for
client admission control or use the venue settings.
Complete the following steps to configure
custom client admission control settings of an AP. -
On the navigation bar, click .
The Wi-Fi
page is displayed.
-
Click the name of the AP.
-
On the upper-right corner, click
Configure.
The AP configuration page is displayed.
-
Click the Radio tab.
-
From the left mini navigation bar, click Client Admission
Control. The Client Admission Control
configuration page is displayed.
Configuring Client
Admission Client

-
Toggle the Enable 2.4 GHz
and Enable 5 GHz buttons and configure the following
settings.
- Min client
count: Select a value ranging from 0 through 100.
- Max radio
load (%): Select a value ranging from 50 through
100.
- Min client
throughout (Mbps): Select a value ranging from 0 through
100.
Note: Enabling Client Admission Control will disable Band Balancing and Load
Balancing on the AP.
-
Click Apply.