You can configure custom IoT
Controller settings for an individual access point or inherit the AP Group-level or
venue-level settings.
Complete the following steps to
configure the custom IoT Controller settings for an AP.
On the navigation bar, click
Wi-Fi > Access
Points > AP
List.
The Access
Points page is displayed.
Click the name of the AP for
which you want to customize the IoT settings, then on the
Overview page, click Configure.
Alternatively, click the check box for the specific AP name, then click
Edit.
The AP configuration page
is displayed, defaulting to the General tab
view.
Select the Network Control
tab.
From the left mini navigation bar, click the IoT Controller
sub-tab.
In the IoT Controller
settings the GUI indicates whether the AP is using the venue settings or custom
settings
Note: By default, the venue-level
settings are applied.
Click Customize
settings to override the settings.
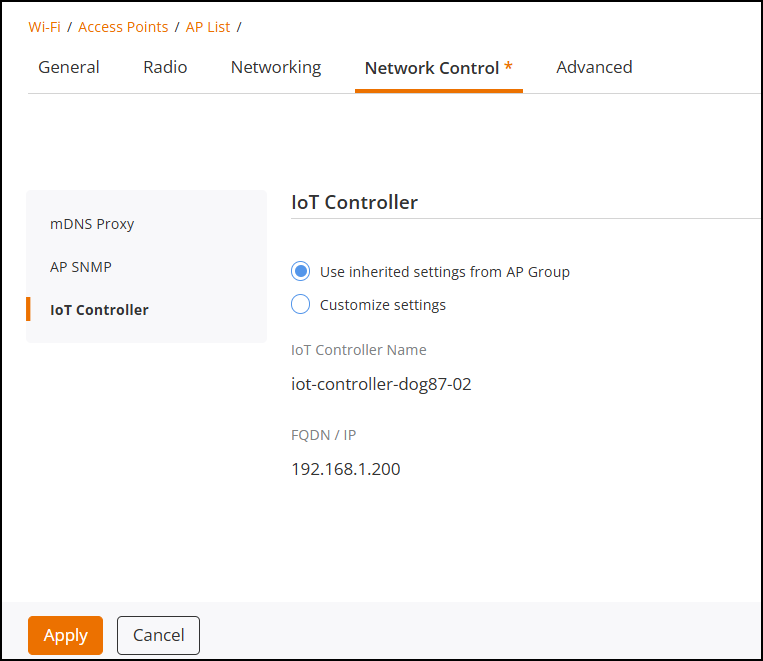
In the IoT Controller
settings section of the AP configuration, you see two radio-button
options:
Use inherited
settings from AP Group: Select this option if you want
the AP to use the IoT controller configuration defined at the AP group
level. If the AP is not tied to any AP group you will get an option
Use
inherited settings from Venue that allows you to use the
IoT controller configuration defined at the venue level.
Customize
settings: Select this option if you want the AP to use
the IoT controller configuration defined at the AP group level.
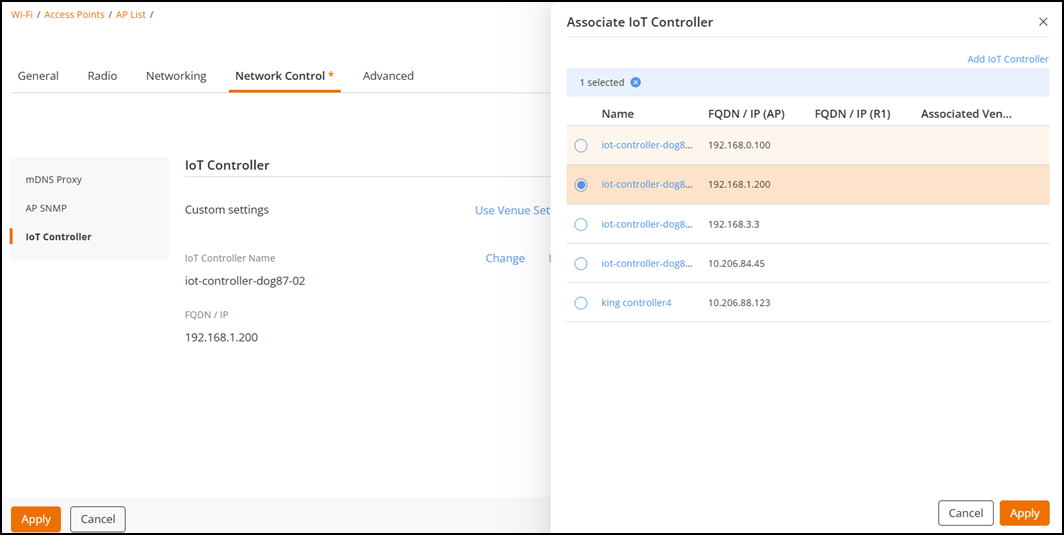
Click Associate IoT
Controller.
The Associate IoT
Controller sidebar appears, displaying a list of available IoT
Controllers.
Select an IoT Controller from
the Associate IoT Controller list. You can also click the
Add IoT
Controller option at the top-right corner to add a new IoT
Controller if it is not listed. Refer to Adding a RUCKUS IoT Controller for more details. Click
Apply.
Click Apply to apply the IoT Controller custom setting.
A message appears at the
bottom right of the screen to indicate whether the IoT Controller was
successfully associated or not.
Associating a New IoT
Controller
(Optional) Click Change to select
a different IoT Controller from the list of available controllers. Repeat Step
(7) to apply new selection.
Note: The newly associated IoT
Controller will automatically replace the existing one.
(Optional) Click Remove to
disassociate the currently linked controller from the AP. Click Apply.
A message appears at the
bottom right of the screen to indicate whether the IoT Controller was
successfully disassociated or not.
Note: For more details, go to
Administration > Activities.