Customizing the Radio Settings of an AP
From the RUCKUS One web interface, you can customize the radio settings of an AP.
Note:
- While there are similarities in settings across the radio bands, each radio band must be configured separately.
- On tri-band APs, you can configure both 5 GHz and 6 GHz bands.
-
Select the Radio tab.
Radio Tab - Wi-Fi Radio 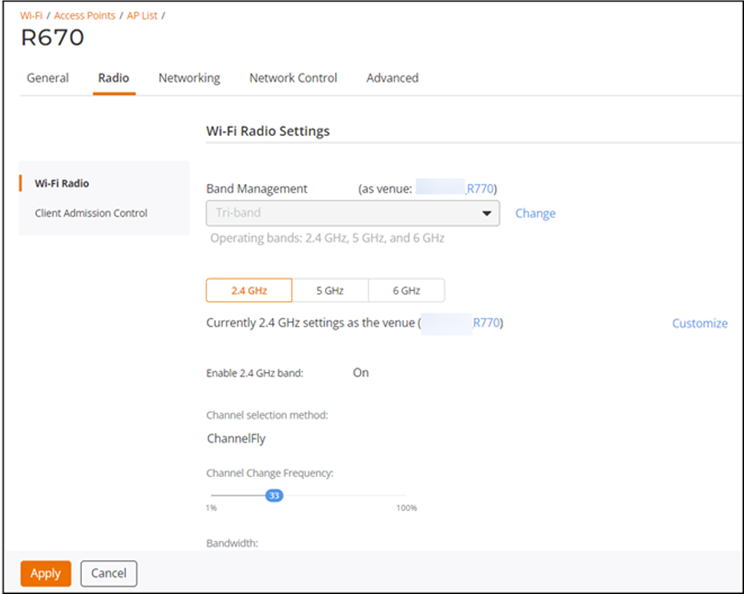
-
Complete the following fields to configure
the 6 GHz band.
-
Select the 6
GHz tab and click Custom 6 GHz
settings.
Customizing 6 GHz Radio Settings 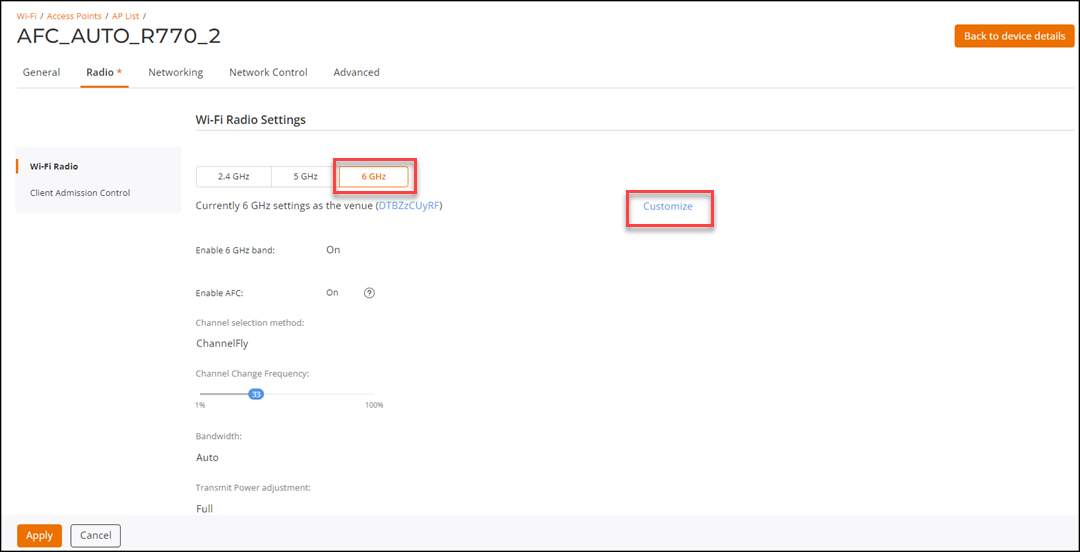
- Enable 6 GHz band: When you click Customize 6 GHz settings, the Enable 6 GHz switch is turned on by default. You can disable or re-enable the band at any time by toggling the switch.
- Enable
AFC: Toggle the Enable
AFC switch on or off to enable or disable the
feature for any indoor APs. In the case of outdoor APs, the
Enable AFC switch does not appear. For more
information on how to configure the AFC feature, refer to Radio SettingsNote: Before enabling the AFC feature, ensure that you have configured the venue height in the Venue settings page. Any attempt to enable the AFC feature without configuring the venue height results in failure.
- Channel selection method: Select the channel selection method. The options are ChannelFly (default), and Manual Channel Selection.
- Channel Change Frequency: This option is displayed only if you select Channel Fly as Channel selection method. Adjust the frequency between 1 and 100. By default, 33 is selected.
- Bandwidth: Select Auto, 20 MHz, 40 MHz, 80 MHz, 160 MHz, or 320 MHz.
- Transmit Power Adjustment: Select the transmit power adjustments from the drop-down list. The default setting is Full or you can choose Auto, Min, or Fixed (-1 dB to -10 dB).
- BSS Min Rate: Sets the lowest allowed client data rate. Select HE MCS 0, HE MCS 1, HE MCS 2, or HE MCS 3 from the drop-down list.
- Mgmt Tx Rate: Sets the transmit rate for management frames. Select 6 Mbps, 9 Mbps, 12 Mbps, 18 Mbps, or 24 Mbps from the drop-down list.
- Multicast Rate Limiting: Toggle the switch
on to enable the feature, which controls the maximum upload and
download speeds for multicast traffic on the network. When
enabled, you can configure separate bandwidth limits for
multicast upload and download using the sliders.
- Upload Limit: Select this option to apply a limit on multicast upload traffic. Use the slider to set the maximum upload rate (for example, 20 Mbps). The value can be configured between 1 Mbps and 100 Mbps.
- Download Limit: Select this option to apply a limit on multicast download traffic. Use the slider to set the maximum download rate (for example, 3 Mbps). The value can be configured between 1 Mbps and 3 Mbps.
- Channel Selection: A blue icon above the channel number indicates that the channel is enabled for the radio. If there are channels that you do not want the radio to use, disable them by clicking their respective icons. When a channel is disabled, its blue icon changes to gray.
-
Select the 6
GHz tab and click Custom 6 GHz
settings.