Adding an SD-LAN Service
You can add an SD-LAN service to manage how end-user traffic is tunneled in a Wi-Fi network that includes RUCKUS Edge devices.
Before beginning this procedure, a Tunnel Profile meeting
the requirements of your AP-to-Cluster tunnel must already be configured. The Tunnel
Profile must also have the Enable NAT-T Support option enabled. Refer to Creating a Tunnel Profile for creating a new
tunnel profile.
-
In the Add SD-LAN
Service page, configure the following:
-
General:
In this section, enter the following details:
- Service Name: Enter a meaningful name for the SD-LAN service.
- Tunnel
Profile (AP to Cluster): Select the tunnel profile from
the drop-down list that is to be used between the AP and the
Data Center RUCKUS Edge.
Adding an SD-LAN Service 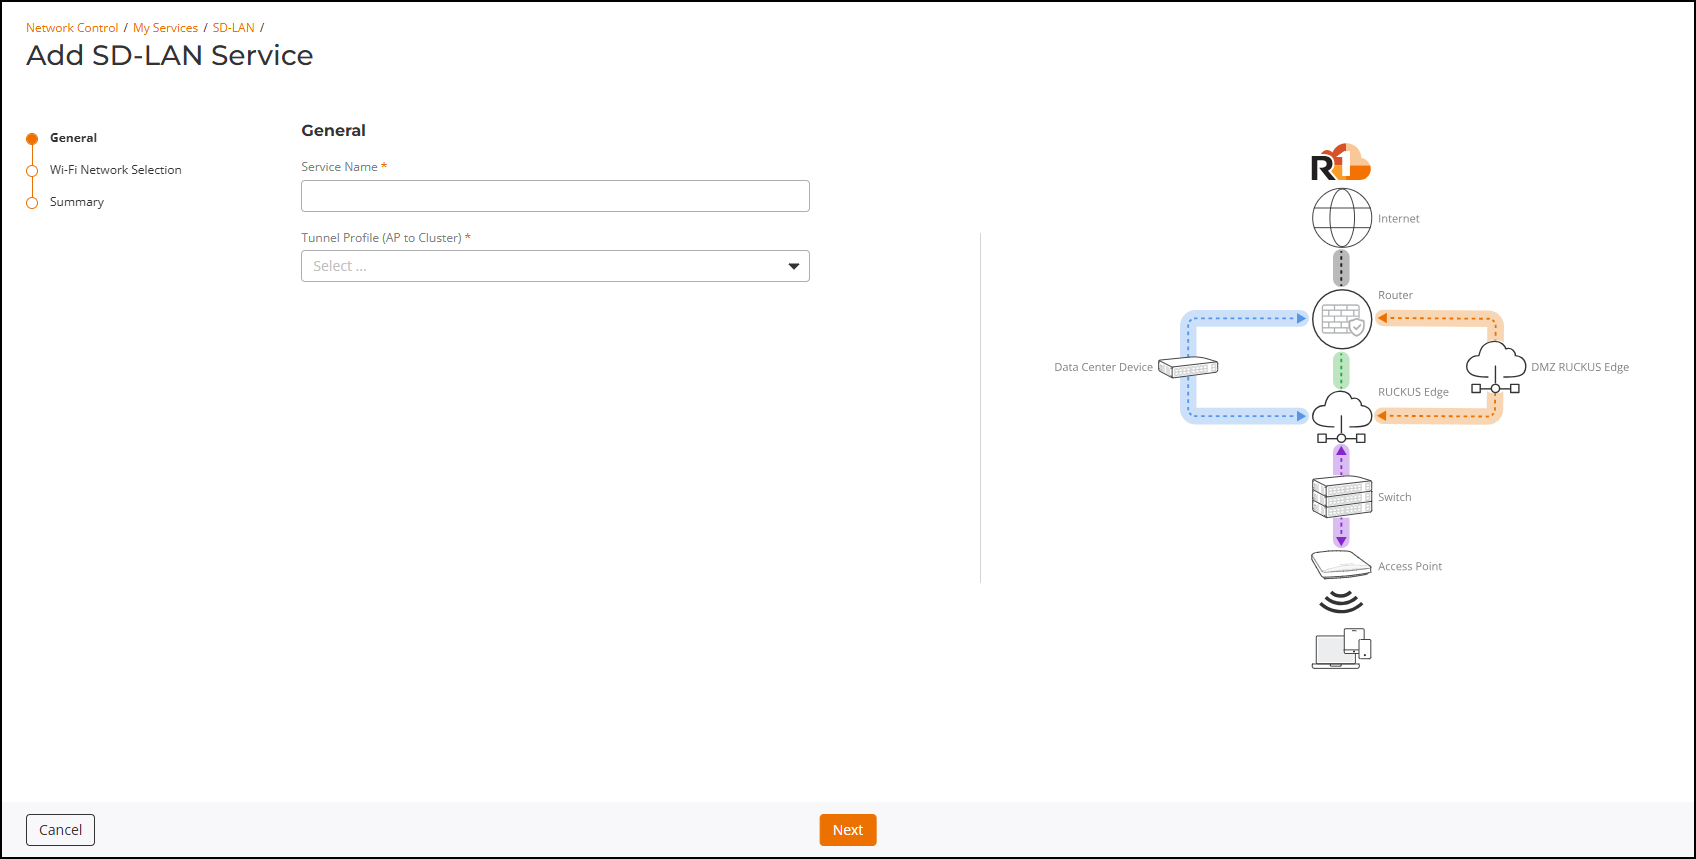
-
Click Next.
The Wi-Fi Network Selection page is displayed.
Selecting a Wi-Fi Network for the Venue 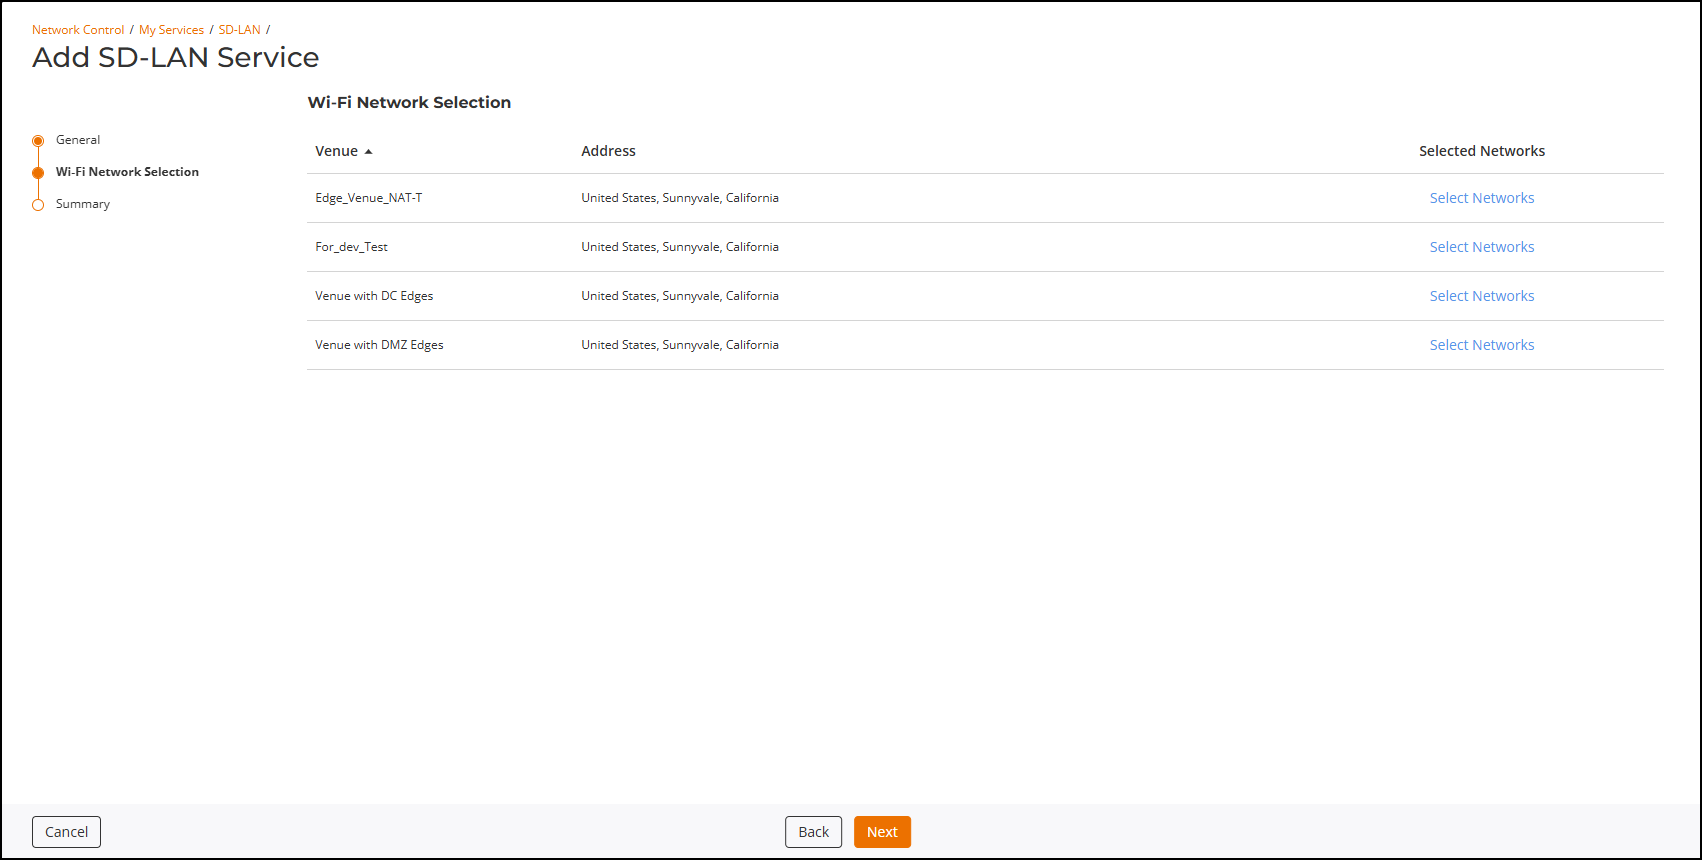
-
Click Select
Networks for the respective venue.
The venue-specific Select Networks sidebar is displayed.
Select Networks Sidebar 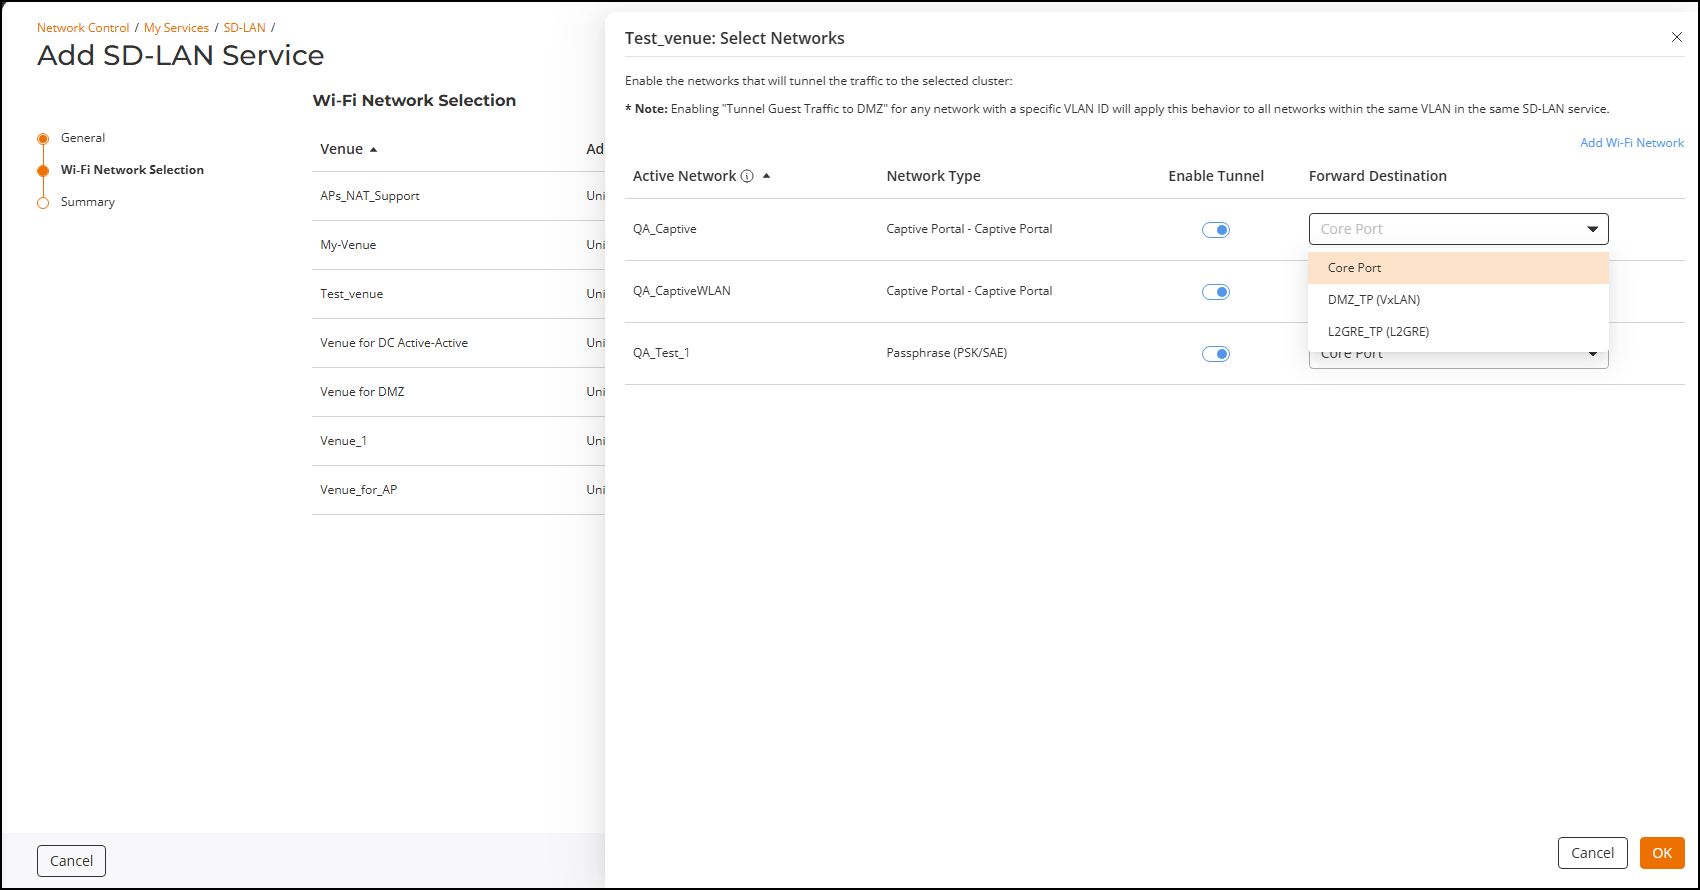
-
General:
In this section, enter the following details: