You can use User Roles to give different
levels of access to different wireless clients (end users) on the same network utilizing an
external RADIUS Server for authentication. For example, teachers, students, and
administrators can all connect to the same network but receive different access permissions
based on their role.
Complete the following steps to
create a User Role:
Add the User Roles service to
your tenant account. From the navigation bar, select Network
Control > Service
Catalog. Alternatively, you can select Network
Control > My
Services, then click Add
Service.
Find the User Roles tile and click Add.
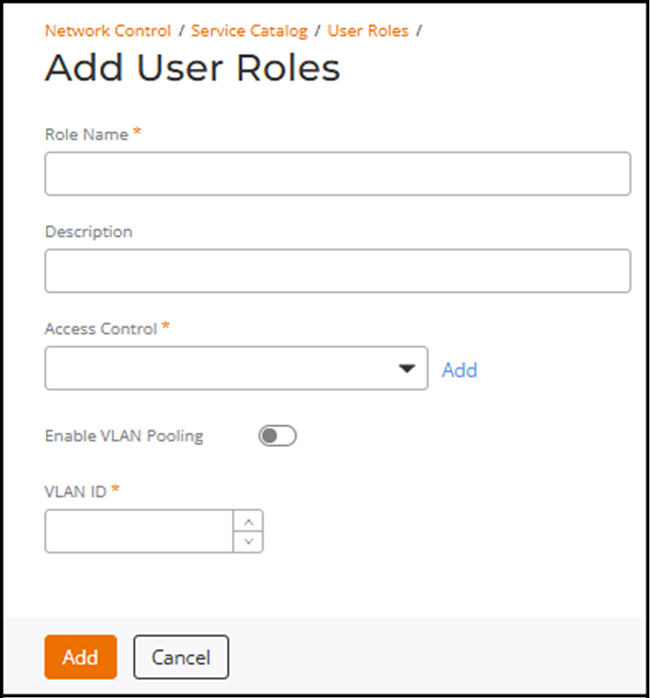
The Add User Roles page is
displayed.Add User Roles
Enter a Role Name.
(Optional) Enter a
Description.
Select an Access Control
policy from the drop-down list. This defines what the user is allowed to access
on the network.
If an access control policy is
not yet defined, you can create a new one; click Add, complete
the fields in the Add Access Control Policy dialog box,
and click Add. You can then select the newly created access control
policy from the Access Control drop-down. Refer to Creating an Access Control Policy for information on
how to create a new access control policy.
(Optional) Toggle the Enable VLAN
Pooling switch on to enable this feature. When the toggle is off
(default), the user is assigned to a single VLAN, and when the toggle is on, the
user is assigned from a VLAN pool.
Select a VLAN
ID.
Note: This field appears when Enable VLAN
Pooling is disabled.
Select the VLAN pooling
profile from the drop-down.
Note: This field appears when Enable VLAN
Pooling is enabled.
If a VLAN pooling profile
is not yet defined, you can create a new one; click Add,
complete the fields in the Create VLAN Pooling
Profile sidebar, and click Add. You
can then select the newly created VLAN pooling profile from the
VLAN
pooling drop-down. Refer to Creating a VLAN Pool for information
on how to create a VLAN pooling profile.
Click Add.
The new user role is
created and displayed in the User Roles page.