Creating an Access Control Policy
You can use the Access Control policy to create multiple wireless networks with different access control components.
Complete the following steps to create an Access Control policy:
-
Click Next.
The Add Access Control Policy page is displayed.
Add Access Control Policy 
-
Configure the Access Control Components.
Note: By default, access control component profiles are disabled.
Access Control Components 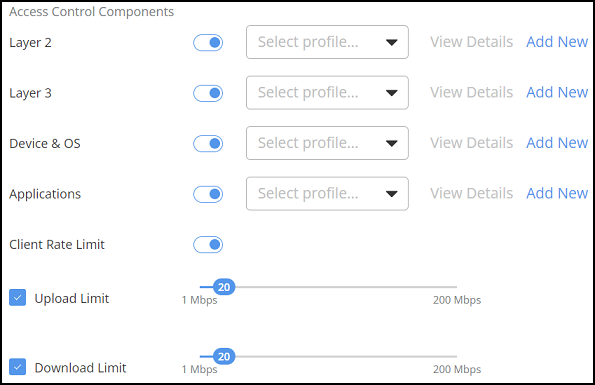
-
Toggle the Layer 2 switch on and select a profile from
the drop-down list.
If the Layer 2 Settings are not available, click Add New.The Layer 2 Settings sidebar is displayed.
Layer 2 Settings Page 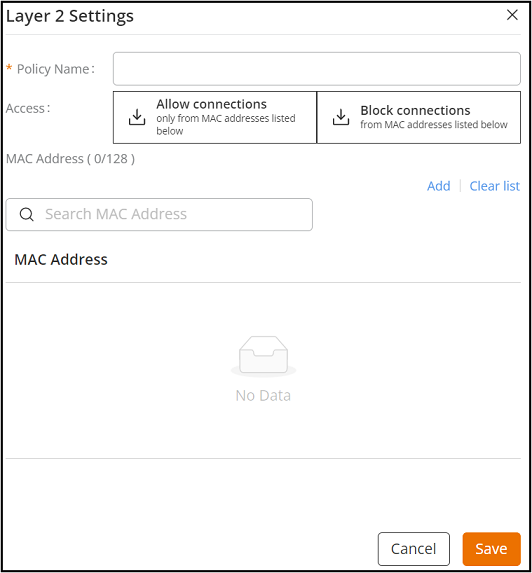
Complete the following to create a new Layer 2 setting:
-
Toggle the Layer 3 switch on and select profile from the
drop-down list.
If the Layer 3 Settings are not available, click Add New.
The Layer 3 Settings sidebar is displayed.
Layer 3 Settings Page 
Complete the following to create a Layer 3 Settings
-
Toggle the Device & OS switch on and select profile
from the drop-down list.
If the Device & OS are not available, click Add New.
The Device & OS Access Settings sidebar is displayed.
Device & OS Access Settings Page 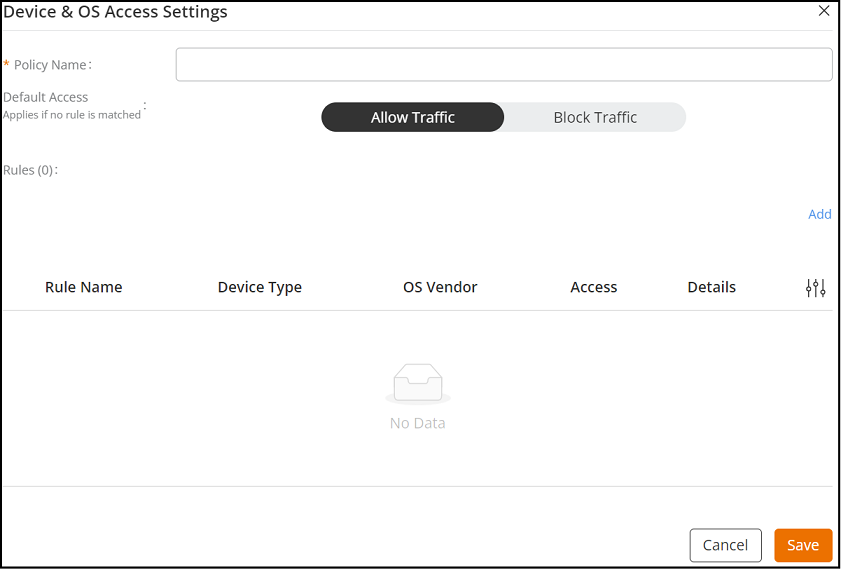
Complete the following to create a new device and OS access setting:
-
Select a rule from the Rules list by clicking
the radio button.
If the rule you need is not listed, click Add.
The Add Rule sidebar is displayed.Add Rule - Device & OS Access Settings 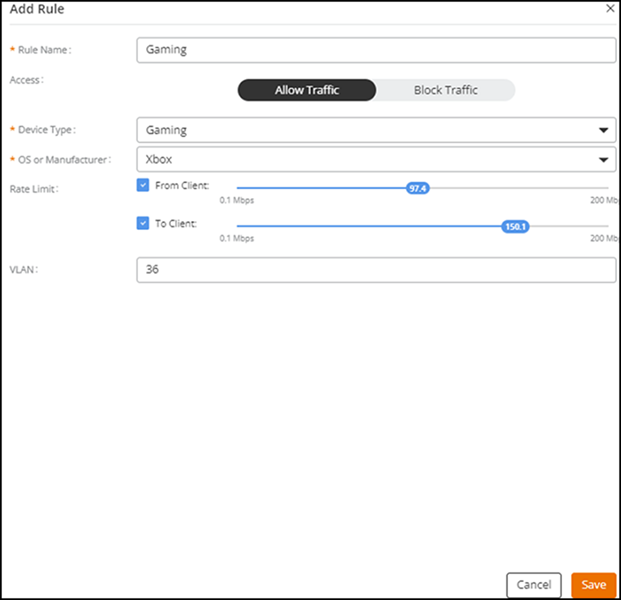 Complete the following to create a new rule.
- Rule Name: Enter the name of the rule.
- Access: Select one of the following
options:
- Allow Traffic: This allows traffic from the devices.
- Block Traffic: This denies traffic from the devices.
- Device Type: Select a device type from the list of devices from the drop-down. Currently, the supported devices are Laptop, Smartphone, Tablet, VoIP, Gaming, Printer, and IoT device.
- OS or Manufacturer: Select the OS vendor
for the device from the drop-down.Note: The OS type field is populated based on the type of device. For example, if the device type is selected as Gaming, the OS or Manufacturer drop-down displays the following options: All, GameCube, Wii, PlayStation, Xbox, and Nintendo.
- Rate Limit: Configure the From
client and To client rate
limit using the sliders.Note: Maximum rate limit ranges from 0.1 Mbps to 200 Mbps.
- VLAN: Enter the VLAN ID.
- Click Save.
-
Select a rule from the Rules list by clicking
the radio button.
-
Toggle the Applications switch on and select profile
from the drop-down list.
If the Application Access Settings is not available, click Add New.
The Application Access Settings sidebar is displayed.
Complete the following to create a new device and OS access setting:
-
Select a rule from the Rules list by clicking
the radio button.
If the rule you need is not listed, click Add.
The Add Rule sidebar is displayed. Complete the following to create a new rule.- Rule Name: Enter the name of the rule.
- Rule
Type: Select one of the following options:
- System Defined: Complete the following
fields.
- Application Category: Select the category of application from the list.
- Application Name: Enter the name of the application.
- User
Defined: Complete the following
fields.
- Application Name: Enter the name of the application.
- Destination Ip: Enter the destination IP address.
- Netmask: Enter the subnet mask value.
- Destination Port: Enter the port number.
- Protocol: Select TCP or UDP.
- Port Mapping Only: Selecting this option disables the Destination Ip and Netmask fields.
- System Defined: Complete the following
fields.
- Access
Control: Select one of the following options:
- Block Application: This blocks the user added application.
- Rate
Limit: Configure the Max
uplink rate and Max downlink
rate limits using the sliders.Note: Maximum rate limit ranges from 0.25 Mbps to 20 Mbps.
- QoS:
Complete the following fields.
- Uplink Marking: Select from
802.1p, DSCP, or Both, and select from Best effort, Video, Voice, or Background. By default, the
802.1p and Background are selected.
QoS: Uplink Marking 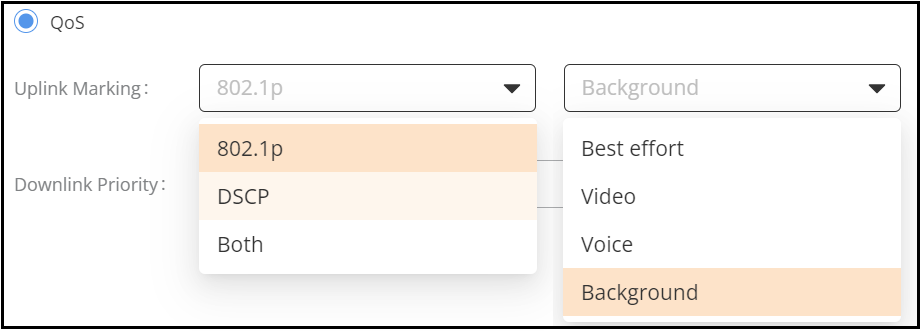
- Downlink Priority: Select from Best effort, Video, Voice, or Background. By default, Voice is selected.
- Click Save.
- Uplink Marking: Select from
802.1p, DSCP, or Both, and select from Best effort, Video, Voice, or Background. By default, the
802.1p and Background are selected.
-
Select a rule from the Rules list by clicking
the radio button.