Creating a VLAN Pool

You can add a VLAN Pool profile at multiple venues.

To use the VLAN Pooling feature, you must create a VLAN Pooling profile and assign the profile to a specific WLAN.

Complete the following steps to create a VLAN Pool policy:
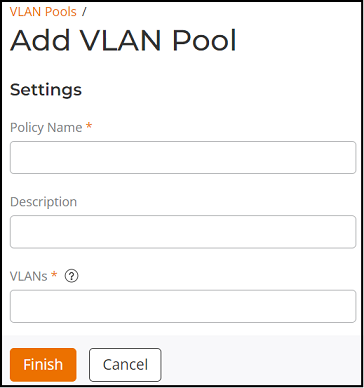
  1. From the navigation bar, select Network Control > Service Catalog. Alternatively, You can click on Network Control > My Services > Add Service.
    The Service Catalog page is displayed.
    Note: The My Services page displays tiles only for those services that already have at least one instance added to the account. The Service Catalog page always displays the complete list of services available in RUCKUS One.
  2. Select VLAN Pools, and click Add.
    The Add VLAN Pool page is displayed.
    Add VLAN Pool Settings Page
  3. Complete the following fields:
    • Policy Name: Enter a unique name for the VLAN Pool policy.
    • Description: Enter a description for the VLAN Pool policy.
    • VLANs: Enter the VLANs to be added to the VLAN Pool.

      You can enter one or multiple VLANs. The valid range is from 2 through 4096. You can add up to 64 VLAN members to a VLAN Pool.

  4. Click Finish.
    A VLAN Pool policy is created and is displayed in the VLAN Pools page.