Adding and Managing a Directory Server Profile
You can add a Directory Server profile to provide a user authentication mechanism that can be associated with one or more captive portal networks that utilize an Active Directory or Lightweight Directory Access Protocol (LDAP) Server.
-
Find the Directory Server
tile and click Add.
The Add Directory Server page is displayed.
Adding a Directory Server 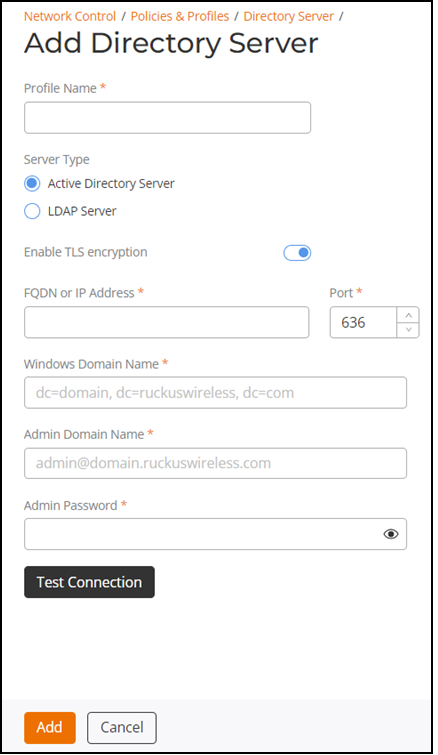
-
(Optional) Click Add
custom field, select an Attribute Type from
the drop-down list and enter a Claim Name. If you want to
enter another attribute name and claim name, click Add custom
field again.
The Directory Server profile is added to the Directory Server page. A notification is displayed on the Activities page, which is accessible by clicking the
 icon at the upper-right corner of the RUCKUS One web interface.
 You can click a specific Directory Server profile to view configuration details, identity attribute mappings, as well as a list of associated Instances displaying the network name and type.
-
Click Add.
The newly added service is displayed on the Directory Server page.
Directory Server 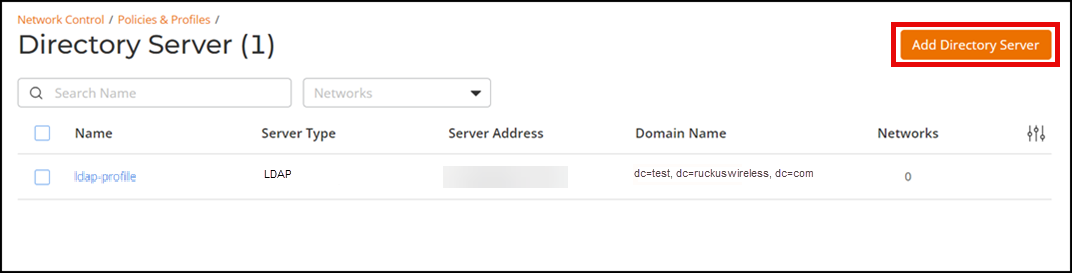
The Directory Server page displays all directory server profiles defined in the RUCKUS One account:
- Name: Displays the name of the Directory Server profile.
- Server Type: Displays the server type (Active Directory or LDAP).
- Server Address: Displays the FQDN or IP address along with the port.
- Domain Name: Displays the configured domain name in the format dc=domain, dc=ruckuswireless, dc=com.
- Networks: Displays the number of networks currently associated with the Directory Server profile.
You can use the Search option to display only the table entries matching the specified Name; enter a minimum of two characters. Additionally, you can filter the list of Directory Server profiles by selecting an option from the drop-down list in the Networks field.
You can customize which fields appear in the Directory Server table by clicking the
 icon and selecting or deselecting the desired
column names. Optionally, you can click Reset to
default to have the default subset of columns appear in the
Directory Server table. Click Clear
Filters to reset the filters. You can sort the list of
Directory Server profiles by clicking the associated column
header.
icon and selecting or deselecting the desired
column names. Optionally, you can click Reset to
default to have the default subset of columns appear in the
Directory Server table. Click Clear
Filters to reset the filters. You can sort the list of
Directory Server profiles by clicking the associated column
header.
You can edit or delete a profile from the Directory Server page by selecting the profile and clicking Edit or Delete, or by opening the profile and clicking Configure.