Configuring a VLAN at the Switch Level

You can configure VLAN settings on a per-ICX switch basis from the RUCKUS One web interface.

Complete the following steps to configure VLAN settings at the switch level.
  1. From the navigation bar, select Wired > Switches > Switch List.
  2. In the Switch List page, click the name of a specific ICX switch or switch stack.

    The Overview page is displayed.

    Switches Overview Page: VLANs Tab
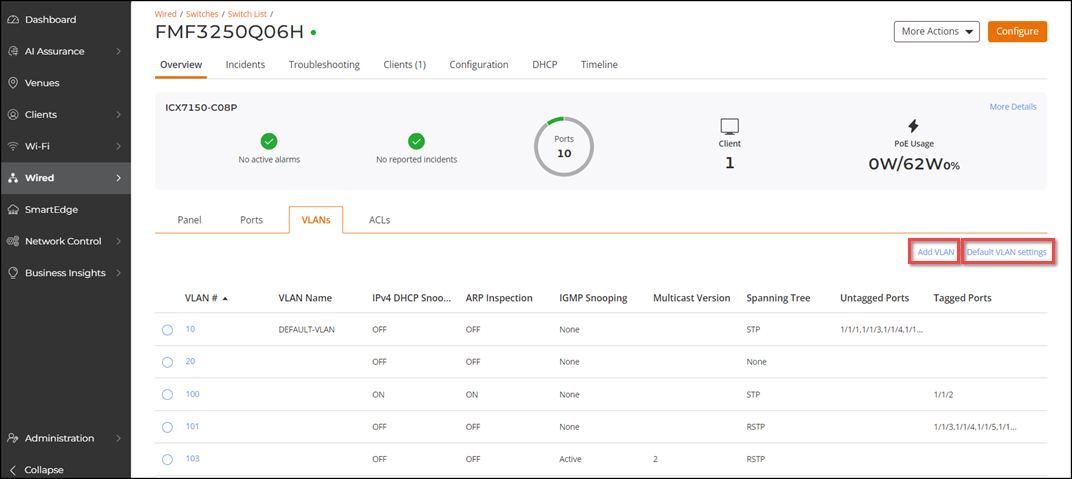

  3. Select the VLANs sub-tab and click Add VLAN.
    The Add VLAN sidebar is displayed.
    Adding a VLAN for a Switch


  4. Enter the VLAN ID and optionally enter the VLAN name.

    The VLAN ID value ranges from 1 through 4095, except 4087, and 4090 through 4094. The default VLAN ID is 1.

  5. Configure these optional settings in the Add VLAN sidebar:
    1. Toggle ON the IPv4 DHCP Snooping and ARP Inspection options to enhance network security.
    2. IGMP Snooping is disabled by default (drop-down option is set to NONE). You can use the drop-down list to select Active or Passive. If Active or Passive is selected, then the Multicast Version option becomes active.
    3. Select Multicast Version from the list (Version 2 or Version 3) depending on which version is supported by your network and the network devices it is compatible with. The default value is Version 2.
    4. Select Spanning tree protocol from the list (RSTP, STP, and NONE).
    5. Click Add Ports to select the untagged and tagged ports from the switch panel in the pop-up Add Ports window. Click Add to close the window.
  6. Click Add on the sidebar to add the switch-level VLAN.

    You can see the VLAN ID configured on a per-ICX switch basis by viewing the VLANs sub-tab.

  7. (Optional) From the VLANs tab, click Default VLAN Settings to edit the default VLAN settings, such as VLAN ID and Spanning tree protocol.
    Note: It is recommended not to change the default VLAN ID unless the VLAN ID already exists on the switch(es).
  8. (Optional) To edit a VLAN setting, click a specific VLAN ID checkbox, click Edit, and in the Edit VLAN sidebar, update the desired fields and click Save.
  9. (Optional) To delete a VLAN, click a specific VLAN ID checkbox, click Delete. In the Delete confirmation message that appears, click Delete. A message confirming successful deletion is displayed.

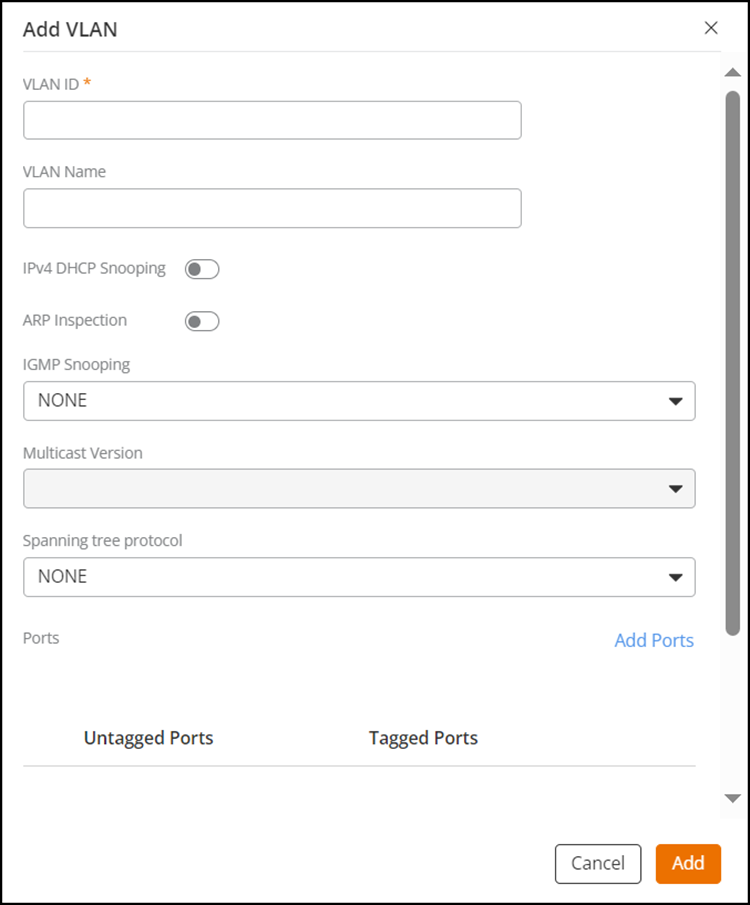
You can also add a VLAN using the following methods:

  • From the Ports page for a specific switch: From the Overview page of a specific switch, select the Ports sub-tab. Click a specific Port Number checkbox and click Edit. In the Edit Port sidebar, for Port VLANs, click Edit. In the Select Port VLANs dialog box, click Add VLAN.
  • From the Port List page for a switch device in a venue: From the navigation bar, click Venues. From the Venues page, click a specific Venue name, select the Devices > Switch sub-tab, and click the icon. Click a specific Port Number checkbox and click Edit. In the Edit Port sidebar, for Port VLANs, click Edit. In the Select Port VLANs dialog box, click Add VLAN.
    Adding a VLAN from Switch Port and Venue Port Settings
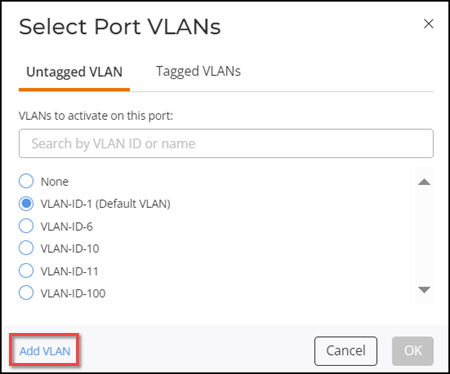
You may navigate to Administration > Timeline > Activities to view the entry for this action, such as the date and time of the action, and whether it was a success or failure.