MSP administrators can create a new role,
an Integrator or Installer, and assign them the task of managing MSP end
customers.
Complete the following steps to add an Integrator or
Installer account.
On the navigation bar, click
Tech Partners.
The Tech Partners page is displayed.
Click Add Tech Partner.
The Add Tech Partner page is
displayed.
In the Account
Name field, enter the account name. The account name must be
unique.
For
Address, enter the physical address.
For MSP
Delegations, click Manage to access
the Manage MSP Delegations sidebar. In the
Users sub-tab, the administrators are assigned the
system roles while the Privilege Groups sub-tab contains
custom roles. Complete the following steps:
In the
Users sub-tab, select the checkbox of one or
more MSP administrators in the Name column and
select Prime Admin from the Role
drop-down list. Note that a Tech Partner can be created only with the
Prime Admin role. Use the search option to find an MSP administrator
name by entering the partial (at least two characters) or full email
address of the MSP administrator; all matching entries are
displayed.
In the
Privilege Groups sub-tab, select the checkbox
of one or more MSP Privilege Groups. Use the search option to find a
privilege group by entering the partial (at least two characters) or
full name of the Privilege Group; all matching entries are
displayed.
Note: The Privilege Group
with the scope set to All MSP
Customers from the
Administration menu (Administration > Account Management > Users
& Privileges > Privilege Groups > Add
Privilege Group) is selected by default and is non-configurable. For
the Privilege Groups with the scope set to Specific
Customer(s), you can modify the scope by selecting
or unselecting the checkbox.
Click Save.
For Account
Administrator, in the Email field, enter the
email address of the administrator.
Note: You can use a single email
address with multiple tenants associated with different brands or MSPs,
enabling an MSP Admin to manage them all.
In the First Name
and Last Name fields, enter the first name and
last name of the administrator.
The Privilege
Group field is greyed out and disabled. Only Prime Admins have
the privilege to modify the role.
Click Next to go to the Customers
page.
In the
Customers page, under Access
Period, select either Not Limited, or
Limited to and set the number of days.
Note: If set to Limited
to, an Installer account is created, and if set to
Not Limited, an Integrator account is
created.
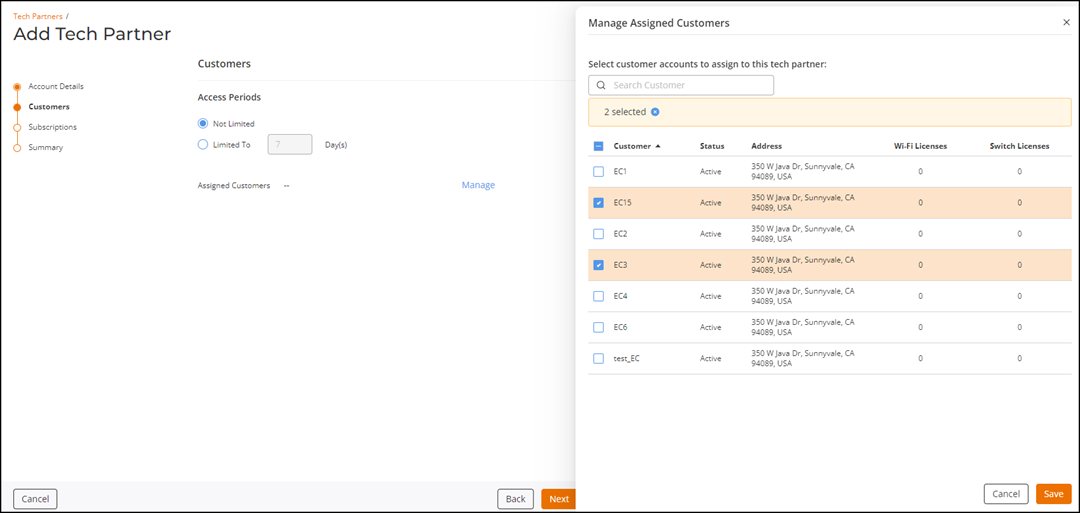
Click Manage
corresponding to Assigned Customers to display the
Manage Assigned Customers page. You can view all MSP
end customers including the ones that are already assigned to other Integrators
or Installers.
Select customers that you want to assign to the current Tech Partner and click
Save.
Manage Assigned Customers
Click Next to go to the
Subscriptions page.
In the
Subscriptions page, enter the number of devices.
Click Next to go to the Privacy
page.
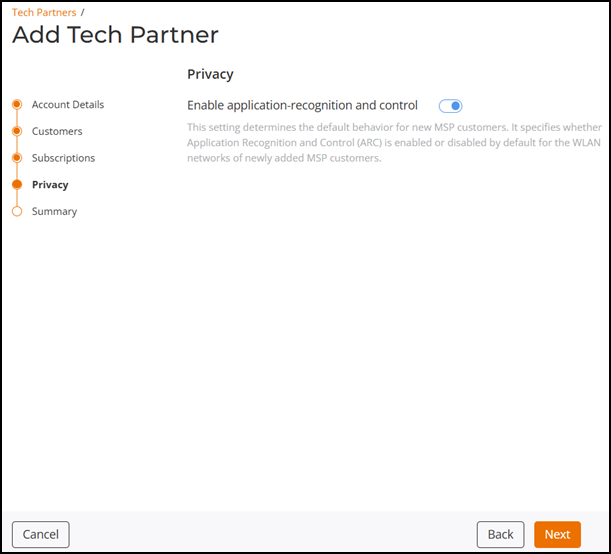
In the
Privacy page, the Application Recognition and Control
(ARC) setting follows the configuration set at the MSP administration level.
Only Prime Admins and Administrators can override this setting.
Privacy
Setting
For Service Expiration Date, set a custom date.
Click Next
to go to the Summary page.
Review the information in the Summary page and click
Add Tech Partner.
You can see the newly added integrator or installer in the
Tech Partners page.