Creating an Authentication Profile
An Authentication Profile is used to define the authentication service that validates the login credentials of users and administrators accessing network resources.
-
From the navigation bar, select
Network
Control > Service
Catalog. Alternatively, You can click on Network
Control > My
Services > Add
Service.
The Service Catalog page is displayed.
-
Select Port
Authentication tile and click Add.
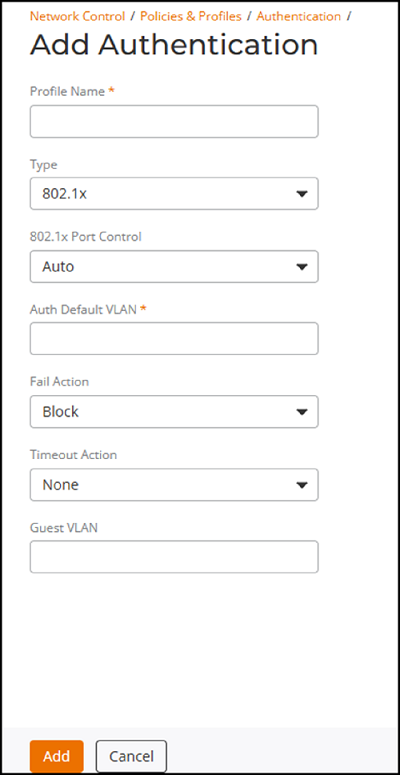
The Add Port Authentication page is displayed.
Add Port Authentication Page  Configure the following:
- Profile Name: Enter a name to identify the profile.
- Type: Select
the authentication type from the drop-down menu. Options include 802.1x, MAC-AUTH, and
802.1x and
MAC-AUTH.
IEEE 802.1X is a standard for port-based network access control. It provides an authentication mechanism for devices attempting to connect to a LAN or WLAN.
MAC Authentication (MAC-AUTH) is a method used to authenticate devices based on their Media Access Control (MAC) addresses.
- Change Authentication Order: The default order is Type 802.1x followed by Type MAC-AUTH. Enabling this option will change the order. This option is displayed only when 802.1x and MAC-AUTH is selected as the authentication Type.
-
802.1x Port Control: This
option is active only when 802.1x is selected as the authentication Type. Select one of the
options from the drop-down menu. Options include Auto, Force Authorize, and Force Unauthorized.
Auto: This setting enables 802.1X Port Control is a setting that enables 802.1X authentication on a port and initially places the port in an unauthorized state.
Force Authorize: This setting disables 802.1X authentication on a port and immediately transitions the port to an authorized state without requiring any authentication exchange. This means the port can transmit and receive normal traffic without performing 802.1X-based authentication of the client.
Force Unauthorized: This setting keeps a port in an unauthorized state, regardless of any authentication attempts by the client. This means the port will not allow any network access, effectively blocking all traffic except for 802.1x protocol messages.
- Auth Default VLAN: Enter a VLAN value from 1 through 4095.
-
Fail Action: This option
determines what happens when a device fails authentication. Select one of the
options from the drop-down menu - Block or Restricted VLAN.
Block: This option keeps the port in an unauthorized state, blocking all network access except for IEEE 802.1V protocol messages. Essentially, the device cannot communicate on the network until it successfully authenticates.
Restricted VLAN: This option places the device into a designated VLAN that provides limited network access. This VLAN might allow access to certain resources, such as a remediation server or a guest network, but restricts access to the main network security.
- Restricted VLAN: This field is displayed if Restricted VLAN is selected as a Fail Action. Enter the VLAN ID.
- Timeout Action: This option determines what happens when a session times out. Select one of the options from the drop-down menu - None, Failure, Success, or Critical VLAN.
- Critical VLAN: This field is displayed if Critical VLAN is selected as a Timeout Action. Enter the VLAN ID.
- Guest VLAN: Enter the VLAN ID.
- Click Add. The authentication profile is created and appears in the Authentication page.