RUCKUS One allows you to add a reusable
certificate template to simplify certificate management, standardizing the certificate
issuance process and ensuring consistent security practices.
Complete the following steps to add
certificate template:
From the navigation bar, select Network Control > Service Catalog.
The Service Catalog page is displayed.
Note: The My
Services page displays tiles only for those services that
already have at least one instance added to the account. The
Service Catalog page always displays the complete
list of services available in RUCKUS One.
Select Device Certificate from the Template
Instance Type and Template from the
Device Certificate Type.
The Add
Certificate Template page is displayed.Adding a Certificate
Template
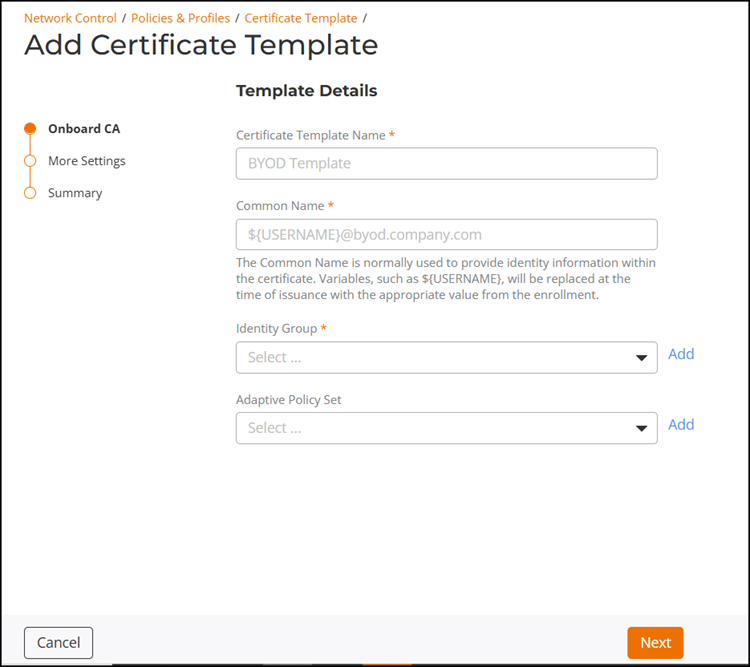
Complete the following settings
in the Onboard CA page.
Certificate
Template Name: Enter a name (up to 32 characters) that
you want assign to the certificate template.
Common
Name: Enter a common name. The common name is typically
used to convey identity information within the certificate. Variables
such as ${USERNAME} will be dynamically replaced with the corresponding
value from the enrollment during issuance.
Identity
Group: Select an identity group from the drop-down.
Alternatively, click Add to access the
Create Identity Group sidebar and add an
identity group.
Adaptive Policy
Set: Select an Adaptive Policy Set from the drop-down.
Alternatively, click Add to access the
Add Adaptive Policy Set page and add an
Adaptive Policy Set.
Click Next.
The More Settings page is displayed.Configuring More Settings
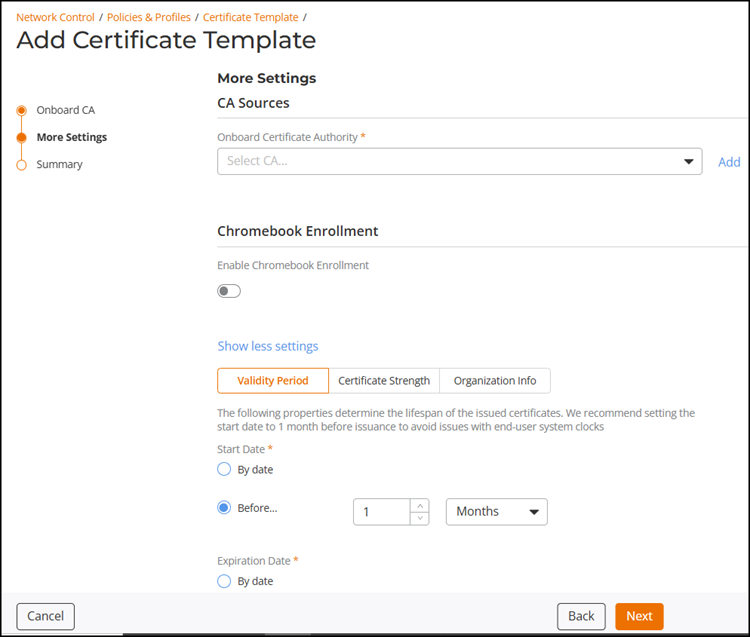
Complete the following in the in the More Settings
page.
CA
Sources: Select a Certificate Authority from the
drop-down. Alternatively, click Add to access the Add Certificate
Authority sidebar and add a CA.
Enable
Chromebook Enrollment: (Optional) Toggle the switch to
On. By default, the Chromebook
Enrollment option is disabled.
Complete the
following to configure Chromebook
Enrollment:
Enrollment Type: Select
Device or User
from the drop-down.
Existing Certificates: For the
existing certificates, select an action from the
drop-down.
Google API Key: Enter the Google
API key. The Google API key is configured and obtained from
here: console.developers.google.com
Service Account JSON Private Key:
Click Browse to upload a file from your local
drive or drag and drop a file.
Click Show more
settings to expand the Add Certificate Template
page and complete the following:
Validity
Period
Note: The following
properties determine the lifespan of the issued certificates. We
recommend setting the start date to 1 month before issuance to avoid
issues with end-user system clocks.
Start
Date: Select the By
Date and pick a date from the calendar or select
Before to specify the time and select
Hours, Days,
Weeks, Months or
Years from the drop-down.
Expiration Date: Select the By
Date and pick a date from the calendar or select
Before to specify the time and select
Hours, Days,
Weeks, Months or
Years from the drop-down.
Certificate
Strength
Keylength: Configure the key length by
dragging the slider. The valid values are: 2048, 3072, or 4096.
Note that the key length does not apply to certificates
generated by Chromebook Enrollment or from
Certificate Signing Requests (CSRs), which are manually
added.
Algorithm: Select an algorithm from
the drop-down: SHA-256,
SHA-384, or
SHA-512.
Organization
Info
Organization Pattern: Enter the name
of the organization.
Organization Unit Pattern: Enter the
name of the unit or department.
Locality Pattern: Enter the name of
the locality.
State
Pattern: Enter the name of the state.
Country
Pattern: Enter the name of the country.
Click Next.
The Summary
page is displayed.
Review the Summary page and click
Add to add the certificate template.
The certificate template
is successfully added and available in the Certificate Template
page.
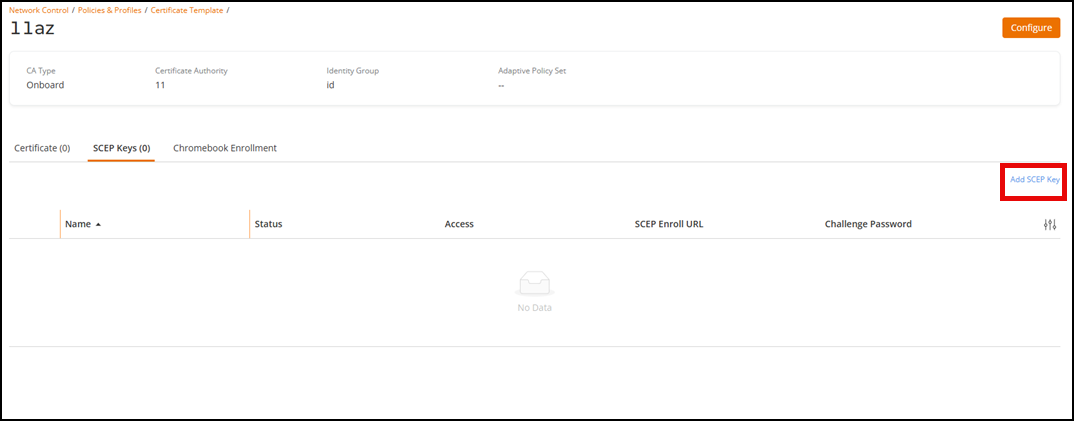
In the Certificate
Template page, click the newly created certificate template,
select the SCEP Key sub-tab, and click Add SCEP
Key.
Adding an SCEP
Key
The Add SCEP
Key sidebar is displayed.
In the Add SCEP
Key sidebar, complete the following:
Adding an SCEP Key
Name: Enter a name
Challenge
Password Type: Select one of the following:
None: Default; no challenge password
is configured.
Static: In the Challenge
Password field, enter a password.
Microsoft Intune: For
Microsoft Intune Tenant ID, enter the
Microsoft Intune tenant ID, for Azure Application
ID, enter the application ID, for Azure
Application Key, enter the application key.
Validity
Information:
Expiration Date: Pick a date from the
calendar.
Allowed
subnets: Specify the allowed subnets.
Blocked
subnets: Specify the blocked subnets.
Note: Access to the
SCEP server and its associated key should be restricted to
authorized personnel and disabled when not actively in
use.
Configuration
Information
Days of
Access: Configure the access period. The valid
range is from 0 through 365. By default, 10 days access is
granted.
Common
Name #1 Mapping: Select a common name from the
drop-down or select Ignore.
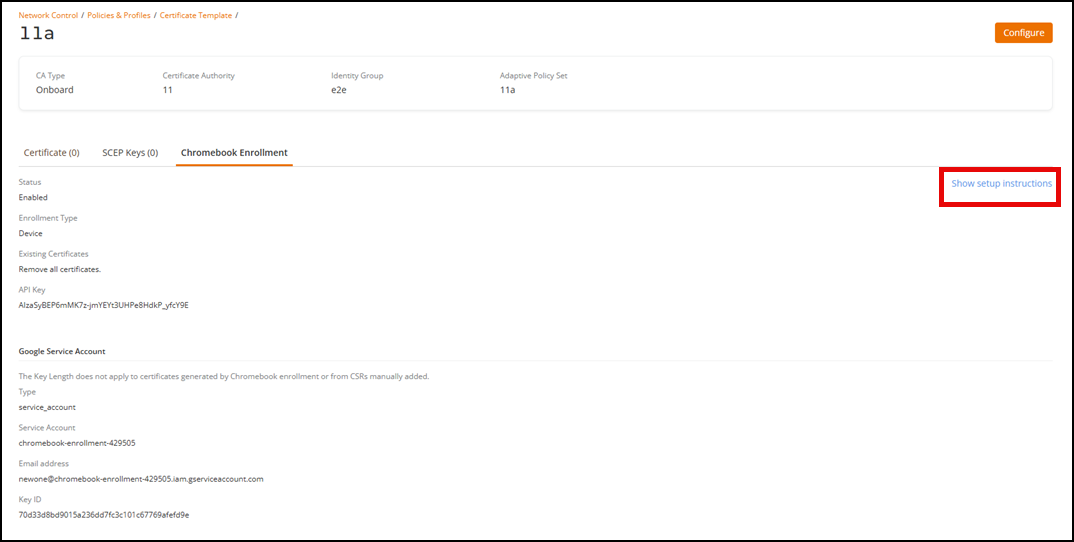
In the Certificate
Template page, click the newly created certificate template,
select the Chromebook Enrollment sub-tab, and click
Show setup
instructions.
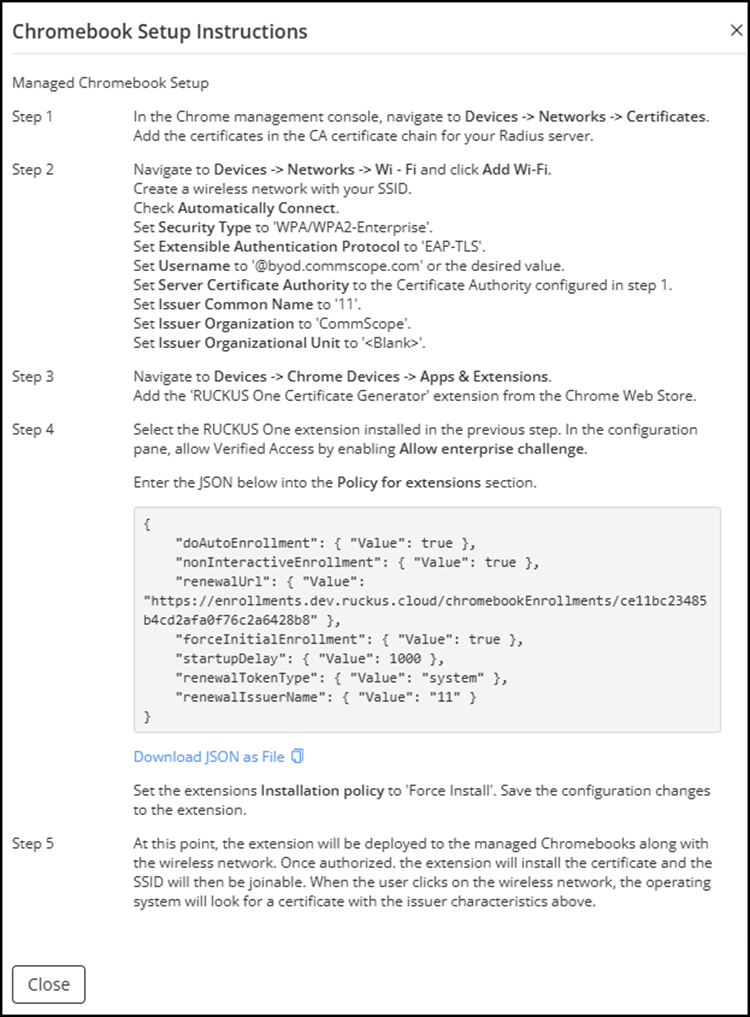
Configuring Chromebook
Enrollment The Chromebook Setup Instructions sidebar is
displayed.Viewing Chromebook
Setup Instructions
You can view the certificates by clicking on the Certificate
Management in the My Services page.
The Certificate
Management page is displayed. By default, the
Certificates sub-tab is displayed on the
Device Certificates tab.
Select the
Templates sub-tab.
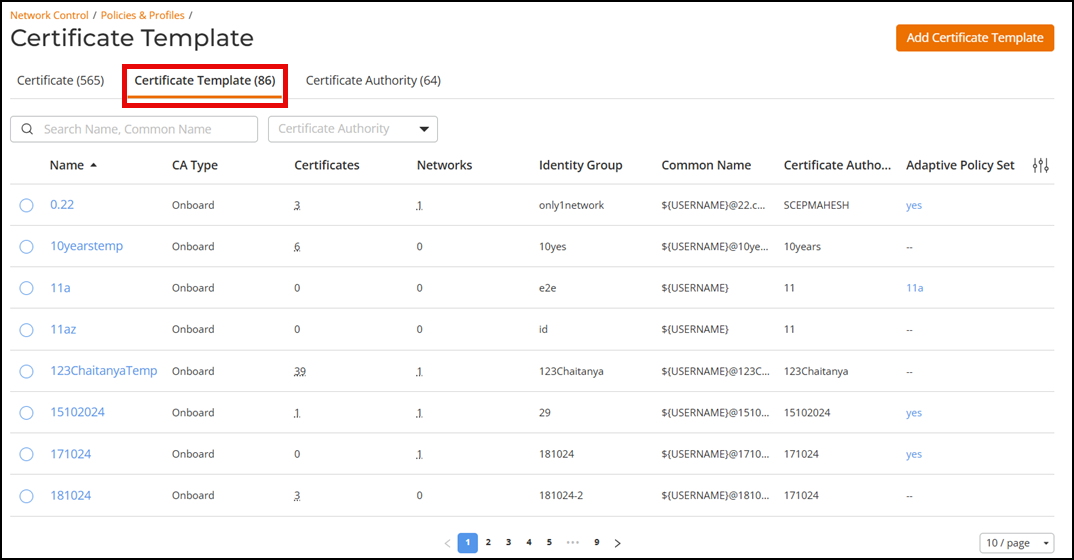
The
Templates page is displayed. Viewing Certificate
Templates
The
Templates page displays the following
information:
Name: Displays the name of the certificate
template.
CA
Type: Displays the type of certificate
authority.
Certificates: Displays the number of
certificates using the template.
Networks: Displays the number of networks
using the template.
Identity
Group: Displays the identity group.
Common
Name: Displays the username and domain.
Certificate
Authority: Displays the name of the associated
certificate authority.
Adaptive
Policy Set: Displays the adaptive policy set.
You can delete
one or more certificates associated with a template by clicking the template
name link; the template details page is displayed. The
Certificates tab displayed by default. Select the
checkbox next to one or more certificate names, and then click Delete.
 The Add SCEP Key sidebar is displayed.
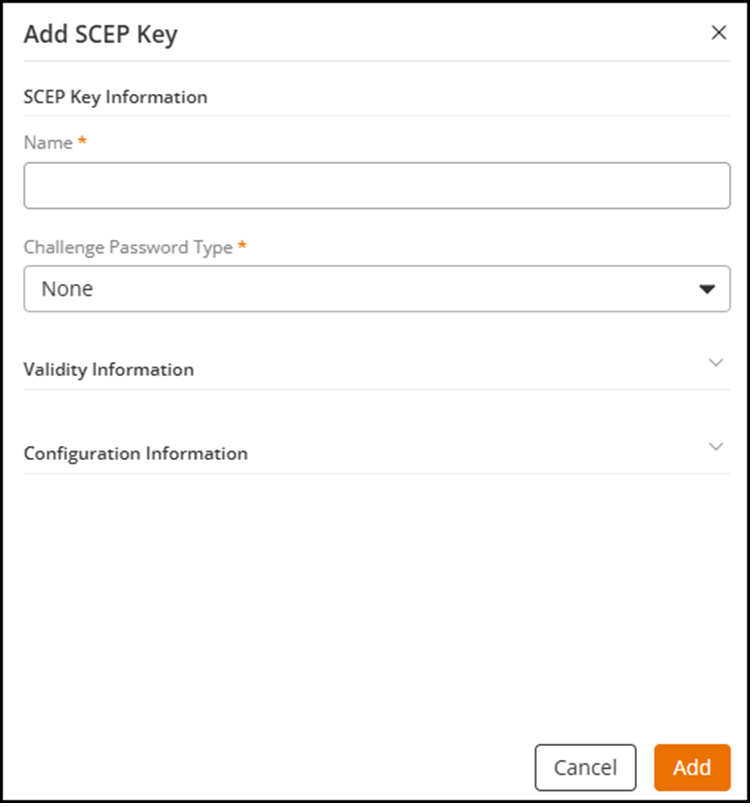
 The Templates page displays the following information: