You can create certificates to establish
secure communication and verify the identity of entities in your network.
A Certificate Template must already exist prior to starting
this procedure. Refer to Adding a Certificate Template for instructions.
Complete the following steps to generate a
certificate:
From the navigation bar, select Network Control > Service Catalog.
The Service Catalog page is displayed.
Note: The My
Services page displays tiles only for those services that
already have at least one instance added to the account. The
Service Catalog page always displays the complete
list of services available in RUCKUS One.
Select Device Certificate from the Template
Instance Type and Certificate from the
Device Certificate Type.
The Generate
Certificate page is displayed.Generating
Certificate
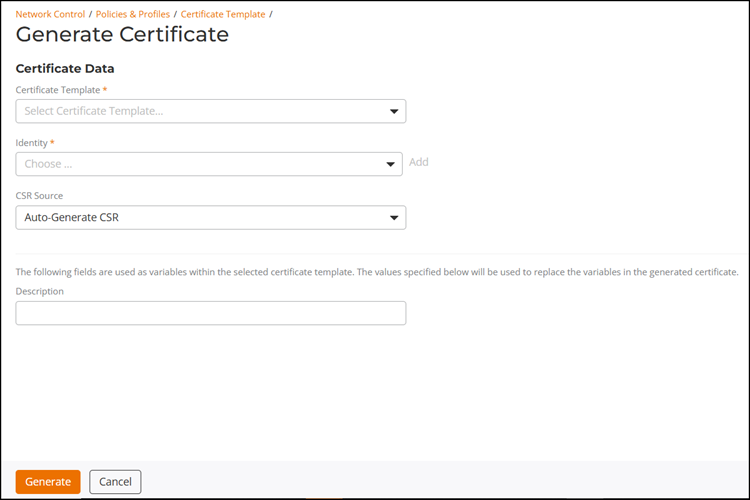
In the Generate Certificate page, complete the
following:
Certificate Template: Select a certificate template
from the drop-down.
Identity: Select an identity from the
drop-down. Alternatively, click Add to
access the Create Identity sidebar and create an
identity. For more information on creating an identity, refer to:
CSR
Source: Select one of the following from the
drop-down:
Auto-generate CSR
Copy
& Paste CSR
USERNAME: Enter a username.
Description: Enter a description.
Click Generate.
The certificate is generated.
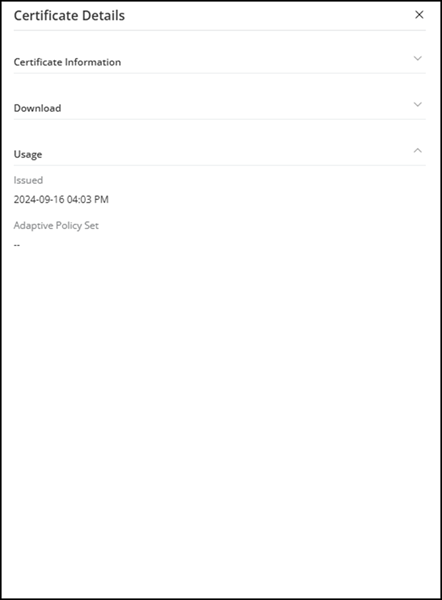
(Optional) In the Certificate page, click a name.
The Certificate Details sidebar is displayed.Viewing Certificate DetailsThe Certificate Details sidebar displays the
following options:
While connecting the clients,
configure the domain suffix setting as shown in the following table.
Setting Name
Value (Fixed
Descriptions
Domain Suffix Match
ruckus.cloud
This
setting validates the certificate of the EAP Server by
its DNS name. The value you enter must match a
dNSName element of the
certificate’s subjectAltName
extension. Values are compared one domain part at a
time, starting from the top-level domain. You can enter
multiple values separated by semicolons. The certificate
is valid if at least one value matches. You cannot use
wildcards. For example: example.com matches
server.example.com but not server-example.com.
This
Domain Suffix Match setting is only
available for EAP connections.
The domain name is
used to validate the server certificate, which is the certificate from
FreeRADIUS. Therefore, it is not used for the certificate template or the
client certificate.
You can view the certificates by
clicking on the Certificate Management in the My
Services page.
The Certificate
Management page is displayed. By default, the Device
Certificates tab is displayed. Viewing Certificate
Templates
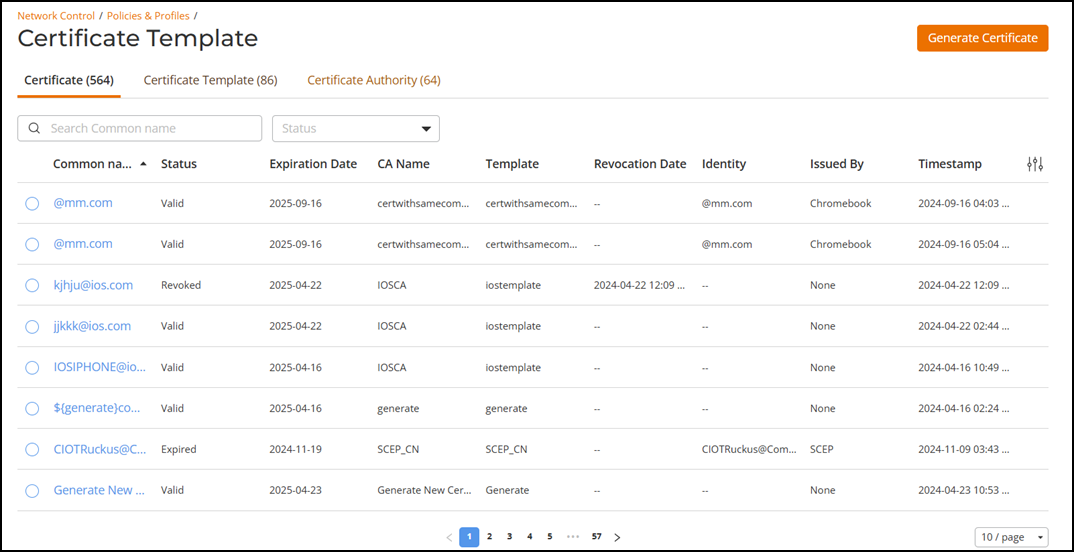
The
Certificates page displays the following
information:
Common
name: Displays common name of the certificate
holder.
Status: Displays the status of the
certificate: Valid,
Revoked, or
Expired.
Expiration
Date: Displays the expiration date.
CA
Name: Displays the name of the certification
authority.
Template: Displays the name of the
certificate template.
Revocation
Date: Displays the revocation date.
Identity: Displays the Display Name
of the identity.
Issued
by: Displays information on the Issuer.
Timestamp: Displays the time stamp.
Serial
Number: Displays the serial number.
Thumbprint: Displays the thumb print.
Email: Displays the email address of the
organization.
You can actively
manage the certificate lifecycle by deleting one or multiple device
certificates in a single operation. This capability lets you remove expired,
revoked, or unused certificates, keep certificate inventories clean, and
improve efficiency when managing large numbers of certificates. Select the
checkbox next to one or more certificate names, and click Delete.
 The Certificates page displays the following information: