You can view details of the APs and AP
groups that are associated with a specific venue.
Complete the following steps to view details
about APs and AP groups.
On the navigation bar, click
Venues.
The Venues page is displayed.
Click a specific Venue name, then
click the Devices tab. Alternatively, in the table row for
the specific venue name, click the number displayed in the
Wi-Fi column.
By default, the Wi-Fi page is
displayed. The Wi-Fi tab has three sub-tabs depicted with
icons: Device List, Mesh List,
Report View, and AP Group List. By
default, the Device List sub-tab is displayed.Devices: Wi-FiRegardless of the sub-tab being viewed, the Wi-Fi tab
displays a warning banner if there are any AP and Wi-Fi feature
incompatibilities in this network.
If a compatibility warning
banner appears, click See details for more information.
The Incompatibility
Details sidebar displays information such as the name of the
feature (or features) for which incompatibility exists between the AP and
the venue configuration, the number of incompatible APs, and the minimum
required AP firmware version for the listed feature.
In the Incompatible
APs column, pause the pointer on the AP count number to view
the list of individual incompatible APs. In the Min. Required
Versions column, pause the pointer on the firmware version
to view the AP model families (denoted by their applicable IEEE 802.11
standard) that support the specific Wi-Fi feature. Select the check box of a
specific feature, the Update Version
Now and Schedule version
update options appear only if there is a new AP firmware
available for the AP model supporting the selected feature. You can update
the AP firmware version by choosing the Update Version
Now option or schedule a firmware update at a later time by
choosing the Schedule version update option.
Incompatibility Details Sidebar
Note: If you disable or enable one of the
features that depends on AP compatibility, then RUCKUS One
automatically checks AP compatibility as part of the venue or network
configuration update. Click the icon in the upper-right corner of the UI header, then click the related
network or venue settings activity to view the Activity
Details. Here you can do the following:
View the status of
the resulting AP compatibility check.
Click See incompatible
report to view a list of the incompatible APs.
To view the incompatible report,
from the right upper corner of the dashboard, click Activities. From
the activities list, click on events related to network activities. Click
See incompatible
report to view the incompatible APs.
You can view each AP that is assigned to the venue using one of the following
methods:
From the Devices
List sub-tab.
By default, the
Device List page is displayed. The Device List sub-tab displays the following
information about each AP that is assigned to the venue:
AP Name: Displays the name of the AP. To
view more information about the AP, click the AP name.
Status: Displays the status of the AP.
For example, if the AP is powered on and is providing wireless
service to clients, a green check mark appears next to the word
Operational.
Model: Displays the model number of the
AP
IP
Address: Displays the IP address of the AP
MAC Address: Displays the MAC address of
the AP
Venue: Displays the name of the
venue
Switch: Displays the name of the switch
Mesh Role: Displays the role of the AP within the
Mesh network
Clients: Displays the number of clients
currently associated with the AP. To view more information about the
associated clients, click the client count number.
AP
Group: Displays the name of the AP Group
RF
Channel: Displays the RF 2.4 GHz channel, 5 GHz
channel, and 6 GHz channel.
TX Power: Displays the transmitter’s peak or
average power output, measured over a defined time interval. This
value indicates the strength of the transmitted signal.
Note: TX
Power is available only on access points running firmware
version 7.1.1 or later.
Up Time: Displays
Tags: Displays the tags associated with the
AP
Serial Number: Displays the AP serial number
Version: Displays the AP version number
PoE Port: Displays the Port speed
Secure
Boot: Displays whether the AP is secure boot enabled
or disabled. If enabled, a check mark is displayed, else appears
blank.
Management
VLAN: Displays the AP management VLAN ID
AFC
Status: Displays the AFC status (Passed or
failed).
AFC Power
State: Displays the AFC power state (Standard or
Low).
Feature Compatibility: Displays
the AP compatibility with Wi-Fi features in this venue (Partially
incompatible, Fully compatible, or Unknown). You can click
Partially incompatible to view the incompatibility
details such as the AP model, the current AP firmware version, the
name of the features for which incompatibility exists between the AP
and the venue configuration, and the minimum required AP firmware
version for the listed features.
You can search the
results using the Search field. Enter
the partial or complete MAC Address, IP Address, Serial Number, Model,
Tags, or AP name in the Search field. Any
matching APs are displayed. You can also add Tags
to the AP that can be used in global search.
You can filter the
results using the Status, AP
Group, Feature Compatibility, or
Group By field as follows:
Status: You can filter the result with Required
Attention, Transient Issue, In Setup Phase, Offline, or
Operational.
AP
Group: You can filter the result with AP
groups.
Feature
Compatibility: You can filter the results by
selecting a feature name.
Group
By: You can filter the result with Status,
Model, or AP Group.
From the Report
View sub-tab.
The Report View sub-tab displays the following information
about each AP that is assigned to the venue:
Total
APs: Displays the total AP count in the venue.
APs
Online: Displays the total online AP count in the
venue.
APs
Offline: Displays the total offline AP count in the
venue.
Top APs by Offline
Duration: Displays the graph of top offline APs by
offline duration in the venue.
APs by Offline
Duration: Displays the graph of offline APs by
offline duration in the venue.
AP Count Trend:
Displays the number of APs deployed over time.
AP
Status: Displays the status of the AP.
AP Status
Trend: Displays the status trend of the AP.
Top AP
Models: Displays the graph of top AP models.
Top AP Models Over
Time: Displays the graph of top AP models over
time.
Top AP Software
Versions: Displays the graph of top AP software
versions.
Top AP Software
Versions Over Time: Displays the graph of top AP
software versions over time.
Top AP Reboot
Reasons: Displays the list of top AP reboot reasons.
Top AP Reboot Reasons Over
Time: Displays the list of top AP reboot reasons
overtime.
Top APs by Reboot
Count: Displays the number of top individual APs in a
network have been rebooted.
Top APs by Reboot Count Over
Time: Displays the number of top individual APs in a
network have been rebooted over time.
AP Details for
Online/Offline Status: Displays the APs details in
the venue in a table format such as AP Name, AP MAC Address, AP
Internal IP Address, AP Location, AP Model, and AP Connection Status
(online or offline).
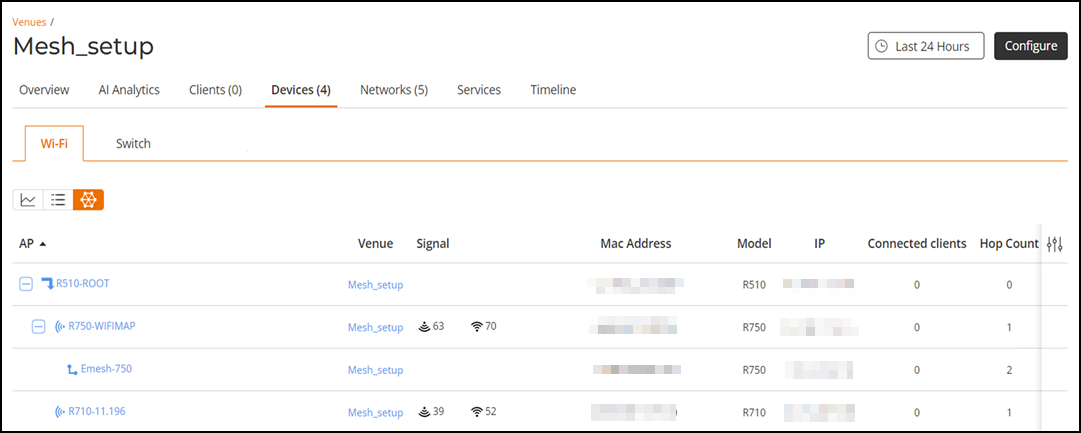
From the Mesh
sub-tab.
Click the
Mesh icon. The Mesh topology table displays all the APs
that are part of a Mesh topology. APs that are in venues that are not
set to support Mesh are not listed. There is an expand button next to
the names of the root APs.
Mesh
Topology
Click the expand
button to list the Mesh APs that are connected to the root AP. Click the
expand button for each Mesh AP to view the properties of the AP.
Note: If a venue is
not set to support Mesh, the Wi-Fi details page
that is displayed when you click the Devices tab
will not show the Mesh option. If you have defined
the venue as Mesh but have not added any APs, you will still find the
Mesh option. However, when you click, you are
prompted with the message that no Mesh APs are added.
In the
Wi-Fi sub-tab, you can view information about each AP
group that is assigned to the venue by clicking the AP Group
List sub-tab.
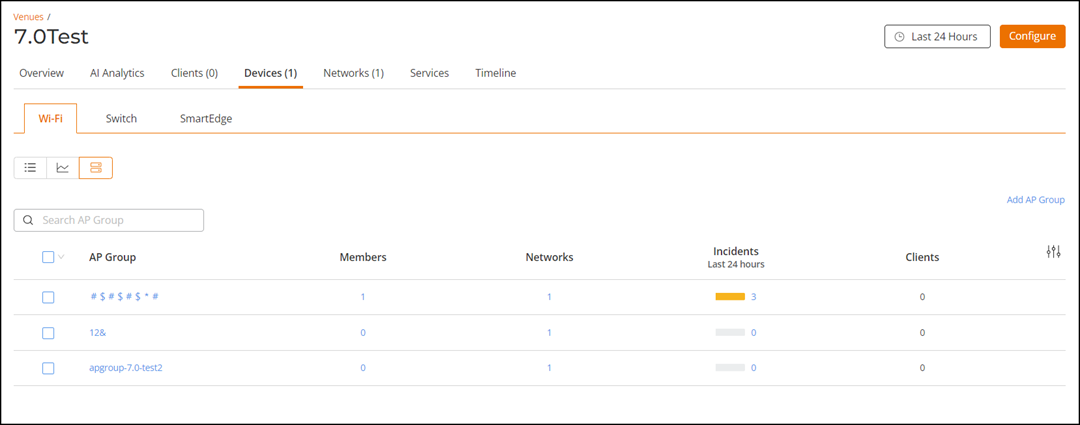
Viewing the AP Group
List The AP Group List page displays the following
information:
AP Group:
Displays the name of the AP group. To view more information about the AP
group, click the AP group name.
Members:
Indicates the number of members in the AP group. Hover your cursor over
the number to display a list of the member AP names. Click on the number
to access details on the APs page for the specified
AP Group.
Networks:
Indicates the number of networks with which the AP group is associated.
Hover your cursor over the number to display a list of the network
names. Click on the number to access details on the
Networks page for the specified AP Group.
Incidents: Indicates the number of incidents that have
occurred in the AP group during the specified time period. Click on the
number to access details on the Incidents page for
the specified AP Group.
Clients:
Displays the number of clients currently associated with the AP
group.
You can search the
results using the Search field. Enter the partial or full AP group name in
the Search field. Any matching AP groups are
displayed.
(Optional) Click Add AP to add an AP to the venue. For
more information on adding an AP, refer to Adding an AP.
(Optional) Click Add AP Group to add an AP group. For
more information on adding a group, Adding an AP Group.
(Optional) Click Import APs to import APs. For more
information on adding APs in bulk, refer to Adding APs in Bulk.
(Optional) Select an AP group and click Edit to edit the
AP group.
(Optional) Select an AP group and click Delete to delete
the AP group.

 icon serves as a
warning, indicating that the AP is not running on maximum power and some AP
capabilities may be impacted. For more information, refer to the AP
datasheets at https://www.ruckusnetworks.com/products/wireless-access-points/.
icon serves as a
warning, indicating that the AP is not running on maximum power and some AP
capabilities may be impacted. For more information, refer to the AP
datasheets at https://www.ruckusnetworks.com/products/wireless-access-points/.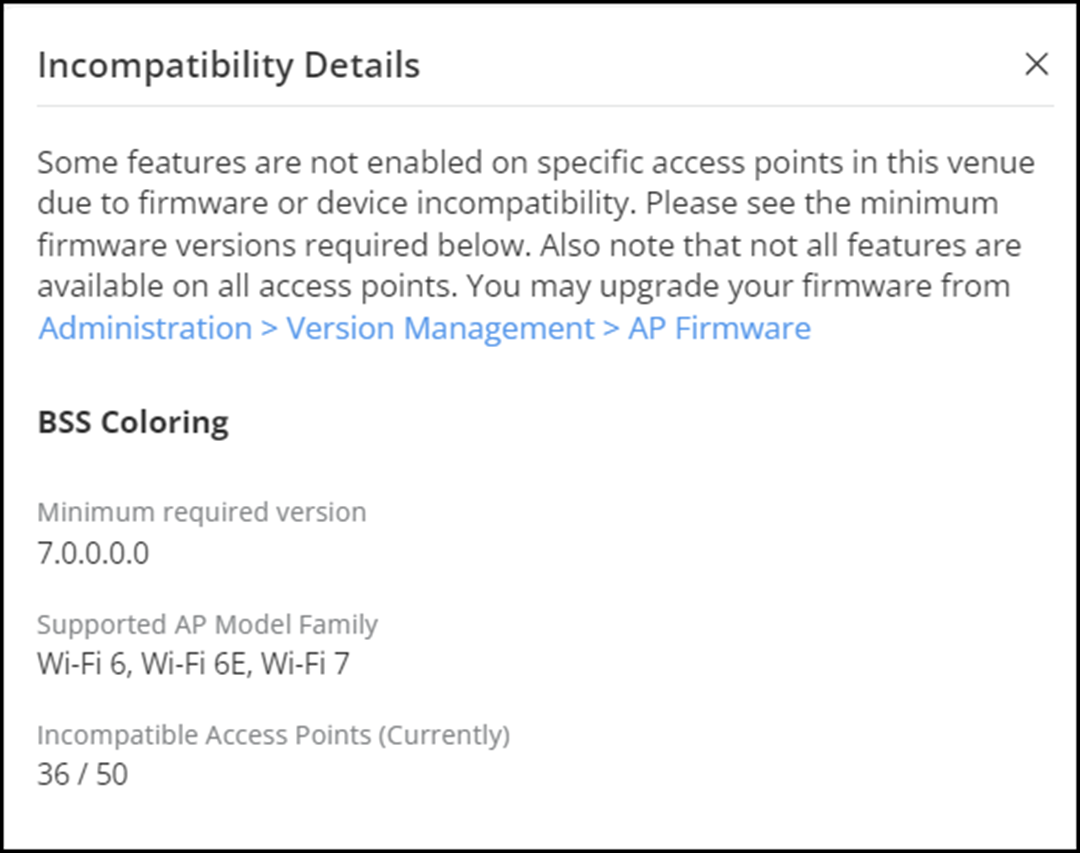 Note: If you disable or enable one of the features that depends on AP compatibility, then RUCKUS One automatically checks AP compatibility as part of the venue or network configuration update. Click the
 icon in the upper-right corner of the UI header, then click the related
network or venue settings activity to view the Activity
Details. Here you can do the following:
icon in the upper-right corner of the UI header, then click the related
network or venue settings activity to view the Activity
Details. Here you can do the following: